This morning a snuck upstairs to have another skirmish game. This morning I had Brits and Germans in Normandy again, with a meeting engagement between two patrols, both sent to scout out a ford suitable for vehicles to cross a stream. On the Brit side I had a section sub-divided into a Bren Group (NCO, Bren, A-gunner, and two rifles) and a Rifle Group (NCO, Sten, and three rifles). The Germans had an Assault Group (NCO, MP-40, and three rifles) and a Fire Group (NCO, MG-42, and A-gunner). Both sides were in file following a trail on their respective sides of the stream. The action picks up when the two sides initially spot each other, with all forces starting deployed on the table and all cards in the deck (Brit 9, Germ 7, as both sides have an LMG of two men acting on one card). I used the same rules as last night, unmodified.


Turn 1: The Brits are up first, with lead Brit rifle handling the situation like a champ. He darts to his left into the treeline and looses a shot at his pointman counterpart, pinning him. The Bren team is right behind them, quickly getting the gun into action, killing the German pointman and the AG NCO! Little did I know this would be the Brits' high water mark...
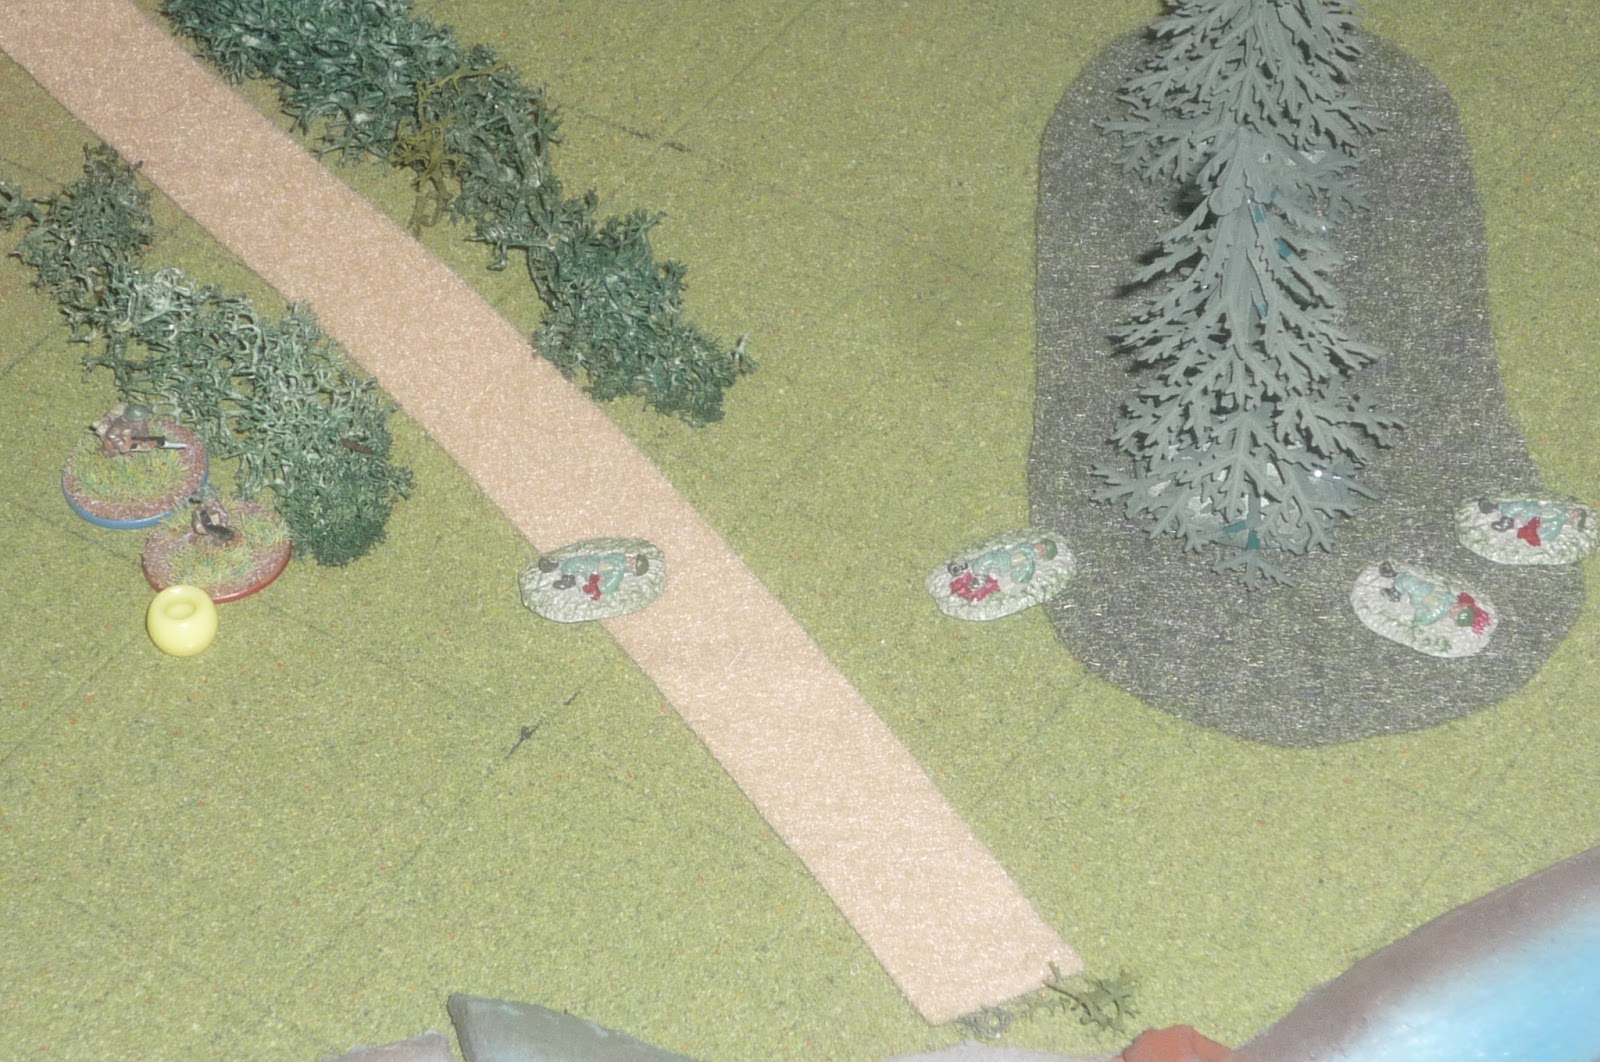
The German MG-42 goes prone right there in the middle of the trail and cuts loose on the three Brits in the treeline, totally missing the rifleman and Bren gunner (4 1's and 2's), but killing the A-gunner. The AG MP-40 sprints forward and hurls a grenade at the treeline, which promptly lands in the middle of the stream, perfectly harmless. The other AG rifleman darts into the trees on his left and fires at the BG NCO, not pinning him, but causing him and the rifle right behind him to flingh (they failed their command rolls). The last AG rifle decides to fall back into the trees next to the FG and takes a shot at the BG NCO, who's hanging out in the middle of the trail, but misses. The FG NCO empties an MP-40 mag at long range at the Bren, missing. The whole RG, minus one knucklehead that couldn't pass his command roll even with the RG NCO right next to him, takes off at a sprint to the left on a flanking maneuver (which I thought was brilliant and going to put this fight in the bag).


Turn 2: The Germans are up first; knowing the Brits would like to reinforce the center treeline, particularly getting the NCO over there, the MG-42 goes on overwatch, which ended up being very clever (there is a chance of them not doing anything if 1) the Brits don't try to move into his field of fire, or 2) the Brits do try but fail their command rolls and can't). The Germans are up again, and the MP-40 sprays the treeline (hitting nothing) and sprints into the woods to his right, attempting to cut off the Brit RG hauling butt to that flank. The BG rifle in the treeline next to the Bren slides over to become the A-gunner, and the gunner decides to go after the LMG. Apparently he didn't relish the idea of a duel with the MG-42, and so he rolled over onto his back and lit a cigarette (another failed roll; see, you need to get that NCO over there!). The Brits were up again, and now the decision was to send the BG rifle to the treeline or the BG NCO first. I decided to send the rifleman, and, using my trusty Course of Action Decision Maker Thingy/Matrix, the MG-42 decided to use its Overwatch status to blast the treeline. So now in the treeline I had a rifle, the Bren gunner, and the A-gunner, and the MG-42 pinned all three. I was feeling kind fortunate when the next card was Brit, and now I was going to safely move the BG NCO up to the treeline to get that gun back into action, but his shoe was untied and he simply couldn't bring himself to move up without first taking care of that bit of business (so the Overwatch worked out perfectly for the Germans, because if they'd waited for the NCO they wouldn't have gotten to fire. As it was, they pinned all three guys in the treeline and the NCO was still standing in the middle of the trail). A couple AG rifleman took potshots at the dumb-a$$ BG NCO in the middle of the trail, but missed! Then the German NCO, firing his SMG at very long range, managed to pin the BG NCO. Perfect... On the good news front, the Rifle Group managed to cover a ton of ground as a group, crossing the river and getting everyone into or near the wood housing the German MP-40, setting up a showdown in the woods next turn. Lastly, the remaining RG rifle, finding himself all alone way back on the trail, decides the easiest thing to do would be to move up in support of the BG.

**On a side note, I removed all the black beads before taking these pictures (black shows the man has activated). On the one hand, I think the beads are ugly and make the pictures ugly; on the other hand, I think they help to show where the guys are out (please keep in mind this is all 10mm). If anyone is out there, I'd love to hear if you think the black beads are a good or bad idea (the yellow beads are staying because those are 'pins.').**


Turn 3, The End is Nigh: Alright, here we go, the turn I'm going to use some classic fire and maneuver to pin the German MG-42 with my BG and the RG is going to break through on its left hook to envelop the German MG.
It starts well, with the Brits getting first go. I decided to go with the RG, and I keep wondering if I should have instead gone with unpinning the BG NCO and moving him up to get the Bren going. But I went with the RG and, as the German MP-40 in the wood was not pinned, I didn't want to just charge him, I wanted to put some fire on him first. I chose the Sten gunner who, with 3 dice at close range, stood a good chance at killing him. Didn't kill him, but the Sten pinned the MP-40, who was now ripe for a movement into close combat to eliminate him. The RG NCO looked to his left, "Smithers, go get him." "Uhhhhh, no thanks Sarge" (FAIL). No problem, another Brit card; the RG NCO looks to his right, "Chauncey, go get him." "Uhhh, I think I'll pass too, Sarge." "You've got to be bloody @#$%-ing me!!! No worries, I'll go get him myself." Oh wait, German card comes out. The MP-40 unpins himself (very impressive, I can't get the BG NCO to do that), sprays a long burst of 9mm parabellum rounds in the general direction of the Brit RG, and hauls butt out of the treeline and back across the road, essentially consolidating the German line from the other AG rifle on the his left to the FG on his right. Then the other RG rifleman and finally, predictably, the RG NCO fail their rolls. That's right, the damned MP-40 got away and the whole RG is spent, zero accomplished (talk about friction; they should have been able to whack the MP-40 and move up as a group to put pressure on the German MG-42).
Then the MG-42 opens up, killing the BG rifleman and the A-gunner in the center woods. The Bren gunner sprays fire at the MG-42 (3 dice, rolling a 1, a 2, and a 3), then falls back to the BG NCO, who is then promptly shot by the German FG NCO.
Again, these rules have no overall 'force morale' or 'breaking point,' but I declared the Germans had carried the day as the only reasonable thing for the Brits to do was fall back and live to fight another day.


Okay, so I'm 0 for 2, so what? Both fights have been a lot of fun, this one even more so as I'm much more familiar/comfortable with the rules. I got to use a grenade, simples. I tried to use close combat, but my lads weren't quite up to the task. Still no guns, mortars, or vehicles, but I'll get to that. I may be able to get another game or two in today (the wifey is taking the kids to a birthday party), we'll see. I played this out in about 45 minutes, with taking notes and pictures, so not bad.
I'll probably play another small scale game like this because I need to figure out close combat. What is troubling me is that the rules, as I have them, activate guys individually. This is working out great, except, what about close combat? What I mean is, in the wood I had an NCO and two rifles that could have closed into close combat (if they passed they're command rolls, and I'm not counting the Sten gunner because he had already activated, pinning the MP-40). So, I have a three to one advantage, but how do I model that? Activating individually I could have charged one man after the other into the German, with him defeating each one individually. That certainly doesn't seem right. I don't really want to do a 'group order' mechanic, I want to stick with the system. I've thought about making the single (in this case the German) a -1 or -2 to each additional close combat in the turn, so that the rules stay consistent with individual activations. So he might defeat the first guy, but fighting the second guy he'll be at a -1 or -2 disadvantage. The only problem I see with this is, because of the individual card activation, he might get away. I mean, in real life let's say all three Brits charge in; the Kraut kills one, but the other two Brits kill the German. With individual activation, a single Brit charges in, get killed. Now the German is -2 for the next close combat; not much of an incentive to stick around. So, the next card is German as opposed to British, and the German decides to spray fire and run away (which is exactly what happened in this game). Maybe something along the lines of, if engaged in close combat that turn you are occupied and thus cannot shoot or move? If you've been successfully charged, you can't do anything else that turn, and are -2 to subsequent close combats. Hmmm... I think I like that. Any thoughts?
Well, I'll see where the day takes me.
V/R,
Jack


No comments:
Post a Comment