Sunday, August 25, 2013

First Go at Operation Jupiter

All,
    I had time for another game today, and I'd bought Britton Publishers' "Operation Jupiter" scenario book, which is right up my alley, and I highly recommend.  So, this Batrep might look like my other ones, but it's straight out of the book and I used element-based activation (as opposed to individual activation), using Angel Barracks' "KR-16" rules (slightly modified).  Here's the setup from the book:

I. 130 Brigade Attacks
10 July 1944: On the extreme left of the tight Odon Bridgehead, 5/Dorsets shook out into their assault formations. Their FUP (forming up point) was in the valley, out of sight of the enemy, just to the south of the village of Fontaine Etoupefour. Here Nebelwerfers engaged all likely British positions in the valley below, inflicting the Dorset's first casualties of the day.

1. les Duanes Farm Complex
5/Dorsets are the leading troops of 130 Brigade's attack into the depths of the German defenses on the low ground to the east of Hill 112. Their first objective is a German salient centered on the les Duanes farm complex.
Setting
7 Company, 2/22 SS-Panzer Grenadier Regiment holds the stoutly built stone farm-buildings, which they have developed into the central feature of a forward strong point.
British Forces
• 1x 4-man Platoon HQ of regular to veteran troop quality
• 3x 10-man Rifle Section of green to veteran troop quality
• 4x Churchill VII with 5-man crew of regular to professional troop quality
• 2x Fire Mission: 2-gun battery (25-pounder) with 85% availability

--I gave the Brits a Lt, Plt Sgt, rifle, and 2" mortar as the 4-man HQ group.  The rifle sections were each split into a 5-man Bren Group and a 5-man Rifle Group.  Instead of Churchills I used M-4 Shermans (I don't have any Churchills).  Instead of the 25-pounder battery, I gave the Brits two fire missions from 2 3" mortars.

German Forces
• 1x 6-man Platoon HQ of professional to veteran troop quality
• 1x 10-man Rifle Squad of regular to veteran troop quality (d4 panzerfaust 60)
• 2x Pak 40 ATG with 5-man crew of regular & professional troop quality
• 1x Tripod Mounted MG42 with 4-man crew of veteran troop quality
• 1x Fire Mission: 6-tube battery (Nebelwerfer-41) with 95% availability

--I gave the Germans a Lt, a Plt Sgt, a PzSchreck team, and two rifleman for the 6-man HQ, which essentially became the Lt and a five-man PzSchreck team headed by the Plt Sgt.  The 10-man rifle squad was broken into two five-man sections, each with NCO, LMG team, one PzFst, and one rifleman.  The tripod MG-42 had a two-man crew, an NCO, and a rifleman.  Both Pak-40 ATGs have four crew and one NCO.  I replaced the Nebelwerfer with one fire mission from two 80mm tubes.

Victory Conditions
The British have eight turns to capture the objective building of les Duanes Farm Complex. The Germans must prevent this.
 Here's the board: 3' x 3', with Brits on left and Germans on right, mostly in the houses.
 The German forces, as outlined above.
 The Brit forces, also outlined above.
 Brit left: 1st Squad Rifle Group (left) and Bren Group (right).  Will be referred to as 1BR and 1BG.
 The Brit center: at rear we have three Shermans (T1, T2, and T3), in fron we have 2RG and 2BG, with the Plt Sgt in the very center.
 The Brit right: we have T4, with the 2"mortar and two 3" mortars to its right (the 2 3" mortars get two fire missions then leave).  In front we have 3RG and 3BG, with Platoon Commander (Lt) and his batman in the center.
 German left: We have 2nd Squad at top left, a Pak-40 at top right (2ATG), and the two 80mm mortars at bottom left (they get one fire mission then leave).
 The German center: upstairs is the HMG team, downstairs is another Pak-40 (left, 1ATG) and the Plt Commander (Lt), and outside to right is the PanzerSchreck team led by the Plt Sgt.
 German right: 1st squad.

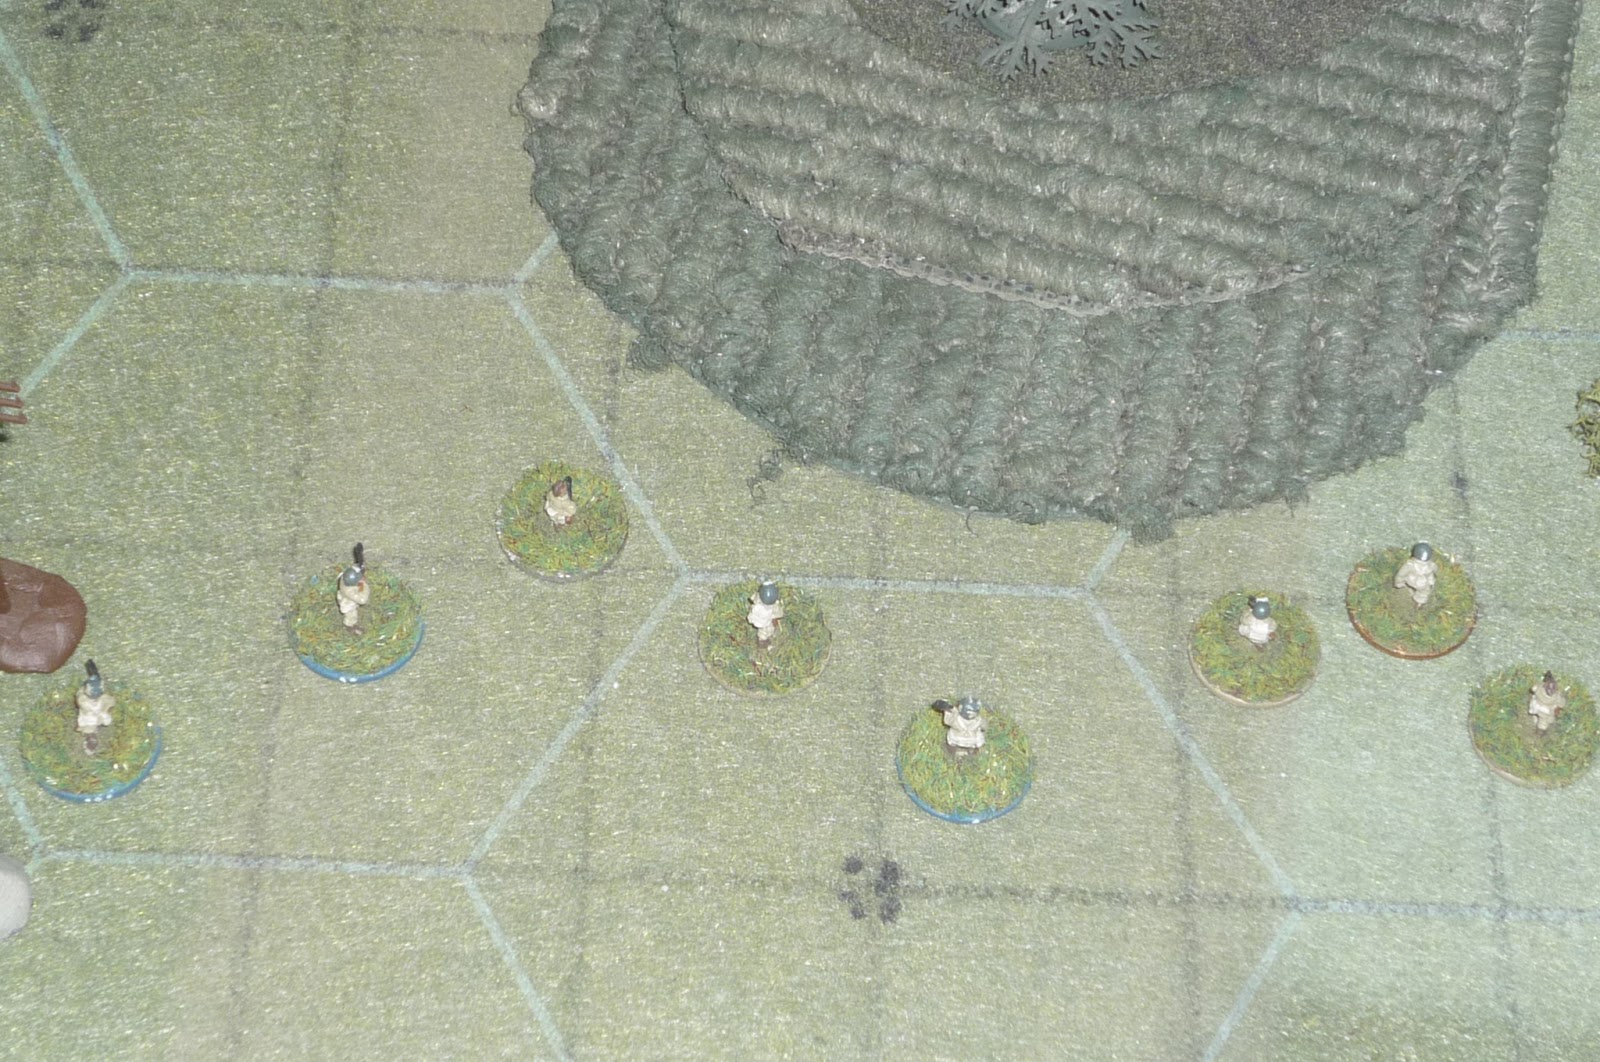
Turn 1: 3RG (on far right) moves up at a rapid clip, as does 2RG, while German 2ATG goes on Overwatch.  The Brit Lt moves up on right, and 1RG moves up on left, taking cover in the treeline.  The Brit Plt Sgt moves up in the center, and T4 comes lumbering out, triggering 2ATG on Overwatch; it knocked out T4's main gun.  T3 then pulled up and put a pin on 2ATG, before 1ATG fired and put 3 pins on T3.  Then the German HMG opened up on 2RG, killing three and placing a pin.  T2 moved up and busted 1ATG, killing its NCO (though this wasn't really a factor as the German Lt was right there).  German 2nd Squad lit into 3RG on Brit far right, killing its NCO, with 3BG then cutting loose on 2Sq, killing their NCO and placing a pin (the Germans were to have some pretty spectacular command rolls, despite the pins and losing NCOs).  2BG cut loose on the German HMG upstairs, killing one and placing three pins, while the PzSchreck team knocked out T2.  1BG tried to return the favor, but failed to score a single hit on the PzSchr team (on 8 dice).
    The Germans decided there was no time like the present to use their mortar barrage, splitting fire between 3BG and 2BG, getting one kill and one pin on the former, and one kill and three pins on the latter.  T1 then moved up and hit 1ATG, getting one pin, while the German Lt tried to rally the German HMG team and failed.  The Brit 3" mortars then went after the PzSch team (3 kills and 1 pin), and so the 2" decided to throw in some HE there as well, to no effect.  Then the German 1st Squad, on the Brit far left, decided to move up and fire on 1RG, to no effect.
 Overview: All Brit tanks are out in the open, with one KO and one damaged, while the Brits have two RGs in the open before the German positions.  At the very top we have 1RG and 1Sq facing off in the treeline, while the German HMG and 1ATG, in the large house, and the PzSchr team have racked up a lot of casualties/pins.
 Brit left, with 1RG and 1BG, as well as surviving T1 and KOed T2.
 Brit center: Both BGs in treeline got stung a bit, while the RGs were roughly treated.  T3, on left, took some pins, and T4, on right, got its gun knocked out.
 German left, with some pins on 2ATG (right).
 The German house, with HMG upstairs, 1 ATG downstarirs, and the PzSchr team outside, all pretty beat up.
 1RG and 1Sq facing off on the far left, with a few pins on 1Sq already.

Turn 2: The Germans are up first, and 1ATG fires up T1, but fails to penetrate, placing a couple pins.  The Brit Plt Sgt runs back to support T1, who then manages to activate, putting two more pins on 1ATG.  Out comes another card, which is used to activate the two 3" mortars, which hits 2ATG (1 kill, their NCO), and the PzSchr team (1 kill, no one left but the Plt Sgt).  Meanwhile, the Brit Lt falls back to support T3 and T4.  T3 activated and put a 75mm round into 2ATGs house, putting two more pins, though somehow 2ATG managed to activate (needing a 6!), and knocked out T3.
    Then 3BG fails its command roll and 2BG puts two kills and two pins on the German HMG team.  1BG helps out 1RG in the treeline but shooting up 1st Squad, getting two more pins, though 1RG fails its command roll!  But then so does 1st Squad, so no harm no foul...
    The 2" goes after the German Plt Sgt (sole survivor of the PzSchr team), no hits (I wanted to get him before he could move left and help all the German units over there with their 'pin' problems).  3RG, despite having lost its NCO, is still in relatively good shape, and so it moves forward against 2nd Squad on the Brit far right, but its fire scores 0 hits.  2nd Squad loads a fresh belt and mows down three of 3RG, and the remaining rifleman goes running back towards the Brit Lt.  T4 activates, and uses its MG against 2ATG, killing one, while 2RG goes prone and puts a pin on the German Plt Sgt.
     Things are looking up when the German HMG in the house fails its command roll, but then, miraculously, the German Lt is able to rally off their seven pins (needing to roll a 6, that's what he did).
 Overview: Now we've got two Brit tanks (T2 and T3) burning, with T1 having a few pins but otherwise okay, and T4 missing its main gun.  The Brit RGs in the field are beat to crap, and their supporting BGs are sporting quite a few pins.  Both 1RG and 1BG are looking pretty good though.  The German PzSchr team is gone, and both ATGs are suffering a lot of pins, but the German Lt performed a miracle on the HMG team, rallying off their pins.
 Brit center: Both BGs in the treeline are a bit beat up, while 2RG has hit the dirt (green bead).  The Plt Sgt is choking on the smoke behind the KOed T2.
 Brit right: Remaining rifleman of 3RG is at far right, running to meet up with the Lt, behind T4.
 The German house: Plt Sgt at far right amongst the bodies of the PzSchr team, the HMG upstairs sporting three dead man (but no pins!), and 1ATG with two dead men (and plenty of pins, not pictured because they're in front of the bldg).
 German left: 2nd Squad, at far left, having suffered some casualties but also having just seen off 3RG, and 2ATG on right, sporting a couple dead men and a boatload of pins (wouldn't take much more to get them to run).

Turn 3: T1 activates (with the help of the Lt), and lights up 1ATG, killing two (they have one gunner left) and putting another two pins on them, and the German Lt fails at unpinning them.  T4 goes after 2ATG with its MG, but hits nothing, and the German Plt Sgt sprints left to help 2ATG out, allowing them to activate (incredible!), getting a couple more pins on T4.
    The HMG in the house tears into 1RGs flank, killing one and placing one pin, while 1BG goes after 1Sq, getting a kill and a pin, and the 2" adds another pin (why won't they run?!).  Somehow 2Sq, on Brit far right, manages to activate and go after 3BG, getting another pin on them.
    The surviving 3RG rifle joins the Brit Lt, who rallies T1 while the Plt Sgt rallies T4, and the German 1ATG fails its command roll.  3BG failed its roll, and 2BG went after 2ATG, getting another pin (they're not running because the German Plt Sgt is there).
    In the top treeline, 1RG passes and fires up 1Sq, getting a kill, and helping 1Sq fail its roll.  Lastly, 2RG passed and fired at the HMG, but hit nothing...
 Overview: Still two tanks in operation, though only my top RG is really still fit for fighting, and my bottom two BGs are racking up enough pins that I'm starting to worry they may be out of the fight soon, though the Germans have racked up a lot of pins on both squads and both ATGs.
 Brit left: RG1 still facing off against 1Sq, with help from 1BG at left (T1 has been focusing all its attention on the German ATGs).
 Brit center.  Real happy about the Plt Sgt and Lt rallying the pins off the tanks, now they need to go do that for 2BG and 3BG.
 Another shot of Brit center.
 German center: 1ATG only has one guy left, and the HMG only has two.  The Plt Sgt is at bottom left, running over to help 2ATG.
 German left: Still three guys left at 2ATG (on right), but they've got five pins.  Only two guys left in 2nd Squad, on left, and they've got a few pins of their own.

Turn 4: T1 moves up and fires at the HMG in the house, to no effect.  The German Lt, needing a 6, rallies 1ATG, which is almost impossible and really bad news, because the next thing I know T1 is up in flames.  That wasn't fair...
    T4 charges forward and shoots up 2nd Squad, getting a kill and two pins, while the Lt moves over to 3BG, who passes (despite a whole bunch of pins) and kills two and gets another pin on 2ATG (one gunner left), though the arrival of the German Plt Sgt keeps the remaining crewman from running.  The Brit Plt Sgt moves to 2BG, but they fail their roll anyway...
    1BG and the 2" fire on the German 1st Squad, killing one and getting another pin, though both 1RG and 1st Squad failed their rolls.  Somehow 2ATG passes their roll, but T4 is too far left, and with only one crewman left, he can't get the gun turned.  So he fires an HE round at 3BG, putting two more pins on them.  The last couple guys from 2RG crawled forward toward the German house, hoping to get close enough to eventually lob some grenades in.
 Brit left: despite only a couple pins, I can't get 1RG to activate and finish off 1st Squad, who's barely hanging on.
 German right: the German house; a whole lot of cadavers, and you can just see the green 'prone' bead for 2RG, who's slowly inching their way towards the bldg.
 German left: you can see T4, which just machine-gunned 2nd squad, which is down to one man, and at bottom right you can see 2ATG, which has one man and the German Plt Sgt (and a whole lotta pins).
 Brit right: 3BG with 6 pins, with the platoon commander sitting next to them and the 2" behind them.
 Brit center: 2BG with 4 pins and the Platoon Sergeant.

Turn 5: T4 activates first, pumping machine gun rounds into 2nd Squad's position, getting enough pins to force the machine gunner to abandon his gun and take to the hills.  Then 1RG finally activates and lets 1st Squad have it, causing them to run for the hills too.
    1BG went after the HMG, getting a kill (one man left), while the Plt Sgt rallied 2BG, who fired up 2ATG, causing him to depart the area.
    The German Platoon Sergeant then ran to the house and found the Lieutenant.  "Sir, there's a machine gun upstairs with one man, an ATG in the next room, also with one man, and then there's you and me.  I think it's time to go, Boss."
All that remained of the German force.  I tallied up the casualties:
Brits                                                                               Germans
3 KO tanks                                                                    2 abandoned Pak-40 ATGs
1 damaged tank                                                              N/A
10 WIA/KIA (not including tank crews)                          22 WIA/KIA

It was a hell of a fight, and I'm kinda surprised I carried the day; it certainly looked dark for awhile.  I continue to not be able to handle armor very effectively...  I had a good time, and I've already been eyeing the next scenario in the book.  We'll see what (when?) happens.

V/R,
Jack

A Small, Sharp Firefight (US AB vs. Germans, Normandy '44)

All,
    After my last fight, I was jonesing for one of my traditional, 'all the cards in the deck' furious shootouts.  So I quickly lined up a small force of US paras and German infantry, and got it on.
    The premise was an Airborne squad was on patrol in Normandy, when shots rang out.  They quickly moved to establish a base of fire and 'right hook.'
 The German forces, behind a wall.  An NCO and an MP-40 flanked by two rifleman.
 The Airborne squad, with an NCO, an SMG, and three rifles on the left and a Lt and two SMG's on the right (I know a Lt shouldn't be leading a squad, but what the heck?).
 Overview of start positions, with US on left and Germans on right.
 Turn 1: The base of fire moved up, suffering a couple pins from the Germans, while the flanking team moved right behind cover of the hill/treeline.
 Turn 2: The base of fire opens up, getting a couple pins, though its SMG decides to dart left to the bushes on that side, where he finds out bushes aren't very good cover, and gets whacked.  The right hook moves up to the treeline to its front, where the opposing German rifleman is apparently a dead-eye, and he knocks down the Lt.
 Turn 3: The base of fire team again opens up a hot fire, actually killing the German NCO and MP-40, and pinning the rifleman on the left side, while on the right the same German 'dead-eye' rifleman gets another kill, popping one of the US SMG gunners.  The remaining SMG gunner on the right puts a few pins on the German marksman.  With the amount of pins on the two remaining Germans and the fact their NCO is kaput, the rest should be easy.  Should...
 Turn 4: The German rifle on the left is too pinned and can't activate, though the base of fire element has acquired some pins and is having troubles of its own.  The SMG on the right hook puts a couple more pins on the German marksman, 5 total, meaning he has to roll a 6 to activate.  Which he promptly rolls, activates, and shoots the remaining right-hook member right between the eyes!  Unbelievable...
 Turn 5: One of the base of fire rifles opens up, putting enough pins on the German left-hand rifle to break him and drive him off, covering the SMG and other rifle move left behind the bushes where their comrade is lying there bleeding out.  That leaves only the 'marksman' for the Germans, who again rolls a 6 to activate, this time rallying off all the pins.
Turn 6: But it's all for naught as the US cards come out first, and the SMG and rifleman finally put him out of his misery.

It was quick and fun, taking maybe 15 minutes.  I was aggravated that the Germans were able to cause so many casualties, but, ces la guerre.

V/R,
Jack

US Airborne vs Germans, Normandy '44

All,
    So I got in a decent sized game of US paras taking it to the Germans in Normandy, circa June 1944.  An understrength Airborne Platoon, minus many of it original members but having picked up 'cats and dogs' from various other units, was moving on its way to its assembly area when enemy activity is detected.  The Lieutenant quickly forms the ad-hoc platoon into a base of fire element and two maneuver elements.

 Far left, clockwise: Plt Sgt, 60mm mortar team, bazooka, Lieutenant, .30 cal. MG team.
 4 rifles and two SMGs.
 Three rifles and three SMGs.
 German HMG team.
 German understrength rifle squad.
 Another German squad.
 Initial US deployement.  Bottom left is 60mm mortar, top left is Lt with Bazooka, SMG, and 3 rifles.  Center is MG team with NCO and rifle, and right is Plt Sgt, 2 SMGs, and 4 rifles.
 The whole board, with US forces in bottom left and the white poker chips representing German blinds.  There are four dummies and three 'real.'  I'm not sure if you can tell, but I went with a bigger board this time, going 3' x 3' instead of my usual 2' x 3'.
 Overview after Turn 1: The Lt took his group up the left side, uncovering a dummy blind, while the MG team moved up into the treeline atop the hill in the center.  All the action was on the right, where the Plt Sgt's team spotted the German HMG team.  The Krauts opened up, and with some really atrocious die-rolling, only managed a couple pins, while the 60mm mortar dropped an HE round, but it landed right.
 The Plt Sgt's team (left) facing off against the tripod-mounted MG-42.
 Overview after Turn 2: The mortar dumped one right on top of the MG-42, killing its NCO and rifleman, and pinning the gunner and A-gunner.  The team splits, with a few Joes staying in the treeline to lay down fire and a few running left to the wall, which spots another dummy blind.  The MG-42 lays into the guys in the treeline, killing the NCO and a rifleman.
    The Lt's team continued moving up.  (The photo is not oriented as normal; at top is the German MG-42, with Plt Sgt and a couple guys behind the wall and dead guys in the treeline just below it, MG team at center, and Lt's team on far bottom left).
 The situation on the right, where the German MG has lost two men but just taken down two men.
 Turn 3: The German MG-42 is able to activate first, and gets a couple pins on the Plt Sgt's group, though this hardly slows them down.  The Plt Sgt and another Tommy-gunner move up and eliminate the MG-42 crew, while two others move left to begin scouting for the Germans.
 On the far left, the Lt's team has gone as far as they can go without breaking cover, and a German blind is looming in that house to its front, with another to the top right (off camera).
 Turn 4: Well, time to get too it, so the Lt sends a scout forward, causing the blind to flip, revealing a German squad, which absolutely lays into the GIs, killing the scout, the Lt, and the SMG, and putting pins on the bazooka and another rifle, but the heady paras are quick to respond.
    The mortar responds, killing the A-gunner (a rifleman took over his duties), then the MG team opens up, getting a few pins but no kills.  The bazooka man manages to activate, and pops a rocket into the side of the building, killing three, and the two rifles finished off the German machine gunner, leaving only an MP-40 in the house.
 On the right, the Plt Sgt's boys take an operational pause to rally off pins and get reformed.
 Turn 5: On the left, the remains of the Lt's team shoot it out with the German MP-40 to no effect, though they force him into LOS of the MG, which guns him down.
 The Plt Sgt's boys move up on the last German blind.
Turn 6: Plt Sgt and a rifle move right, into a treeline, spotting the last German squad, which promptly kills the Plt Sgt and rifleman.  As per usual, the 60mm mortar is quick into action (and very accurate today) and kills the LMG team, followed by the .30 cal. MG gunning down the German NCO.  This is enough for the last two German rifleman to decide they've had enough...

The game was... okay.  I decided to go with all German forces on blinds and went with a bigger board, so what this meant was that the Germans operated in a very uncoordinated fashion, with the three German units essentially going down in three separate, unrelated fights.  In particular, this allowed the US forces to engage their supporting fires on each and every German team, i.e., there was never a 'do I use the mortar over here or over there?' moment, as the German teams popped up one at a time, allowing me to focus the full firepower on each.  Not a bad time, just the situation was never really in doubt, despite some pretty bad rifleman casualties.

V/R,
Jack

Hell on Wheels, 'Blade Force' Fight #10

All, 1030 Local Time 26 November 1942 Near Chouigoui, French Tunisia At dawn the tanks of 10th Panzer Division crashed into Blade Force'...