All,
Let the rules tinkering begin! I changed the activations to activating between 2 and 5 troops, depending on the die roll (as opposed to the 'straight' activate 2 men on a 2-5 die roll), and I changed the morale system. Normally, on a '1' the soldier is pinned (can't move but can shoot), and on a '6' he flees 12", and then 'hunkers' (no move or shoot). The problem (for me) is, this keeps carrying troops off the field of battle, straightaway. That is, there's no build-up to him running away, it could literally be the first time he was fired at, and 'poof,' he's gone. I'm not saying this never happened in real life, and I've already stated part of the problem is with me playing on a board only 24 inches by 24 inches (he's fleeing half my table), but I'm not satisfied with how this is going. So the way I'm playing it is, the first '1' is a 'hit the deck,' the 2nd a 'pin,' the third (or a '6') is a suppression, and subsequent 1's and 6's move the guy up the chain to suppression, or move him back out of LOS to the enemy, or, if that's not possible, he runs away.
I can tell you the former made the game much quicker (about 20 minutes, which is right up my alley), and the morale seemed a bit better, but the problem with the former mechanic change is that it's much easier for troops to shake off knock-downs and morale issues.
So, the regiment is on its way to Arnone, and has been in heavy fighting, though so far 1st Battalion has been in reserve. The regiment has broken through the roadblock and now 1st Battalion has assumed the point, with 1st Platoon leading the way up the road, when contact is made with an enemy patrol sort of loitering about the area. The Plt Sgt, SSgt Ford, is with Sgt Glenn's 3rd Squad at the head of the column, and surges into action.
The table, 2' x 2' in 10mm (Pendraken) once again. The Germans will be at the top, the US in column on the road, coming on from the bottom (South).
The US forces, from right to left: SSgt Ford, Sgt Glenn, Cpl Timmons (w/BAR), then riflemen Pvt Johnson, PFC Leshore, and Pvt Anders. The German (once again somehow) have a Lt, a SMG gunner, and two riflemen.
Initial dispositions. The Germans are all North of the East-West road, with three East and one West of the North-South road. The US troops are moving up the North-South road...
In the following order: Johnson, SSgt Ford, Cpl Timmons, Anders, Sgt Glenn, and Leshore.
A German rifleman at far left, with their Lt in the middle and the SMG behind the building.
The last rifleman at far right, with SMG visible at left behind building.
I let the Germans go first this time, and they promptly roll a '1' (scurry). This pic is looking West to East, where the far left German rifleman (bottom right) sprinted across the road to flank the US troops on the North-South road. The German officer also moved up (far left) to peer around the building.
This pic looks East to West, where the far right German rifleman moved across the road and the SMG gunner crossed the North-South road and took up position behind the wall at far right.
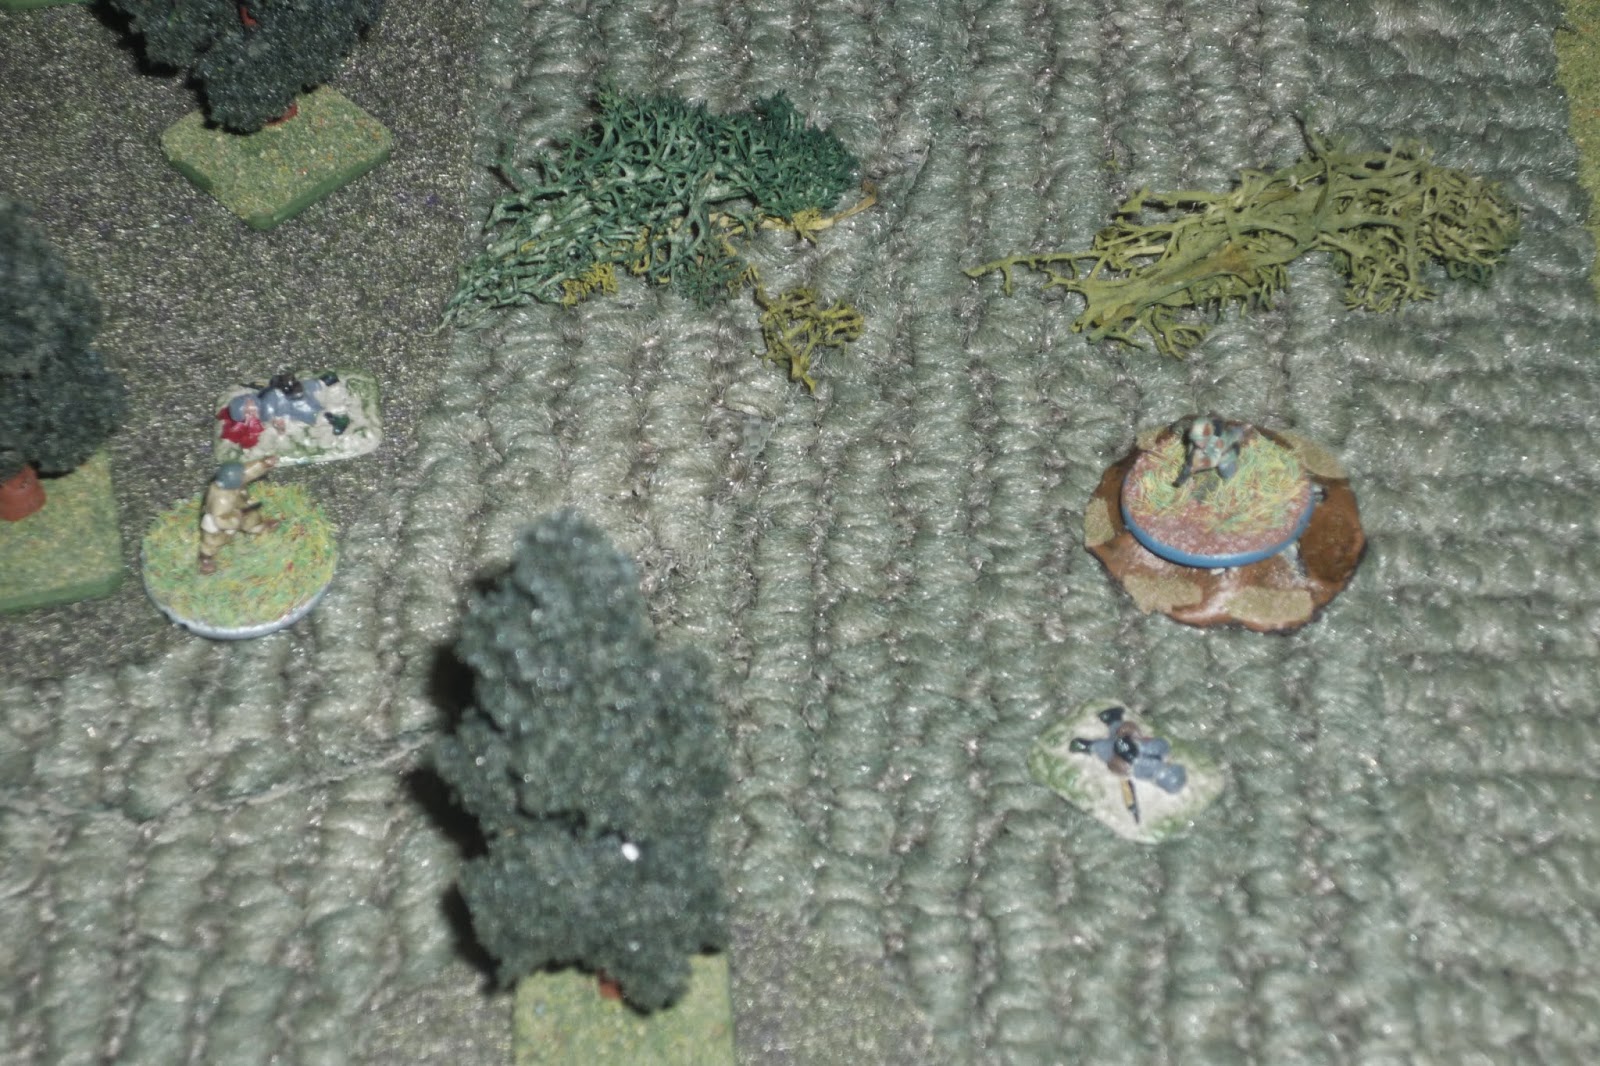
This pic is looking East to West; Johnson moved left off the road to engage the flanking German rifleman, firing and causing the German to hit the deck (green bead).
SSgt Ford dashed ahead, jumped in a crater, and fired at the SMG gunner behind the wall, suppressing him (red bead), while Cpl Timmons joined him, firing at the German rifleman at far right, to no effect.
This pic is looking North to South, with the far left German rifleman at left center and Johnson at top right. Sgt Glenn (bottom left) sprinted left and opened up with his Tommy Gun, suppressing the German rifleman. Then the Germans rolled another scurry. They won't be able to fire, but they're two men that are suppressed will be able to attempt to rally.
The German rifleman on the far right moved back to the suppressed SMG gunner at the wall and helped him unpin. The SMG gunner can't act this turn, but he'll be able to perform reactive fire during the US turn. That's SSgt Ford at bottom center.
On the left, the German Lt sprinted to the suppressed rifleman and helped him rally. Again, he can't act, but he'll be able to perform reactive fire. That's Sgt Glenn at bottom center.
Johnson sat tight and fired at the German Lt and rifleman at far left, missing, while Leshore (bottom right) moved over and fired, also missing. Sgt Glenn cut loose a torrent of SMG fire, suppressing both Germans. This should have been a decisive advantage, but because I changed the activation system both Germans would be able to rally rather easily. Maybe I need to change how easy it is to rally? But then I mess with the rules' patented '1 and 6' system (things are 'normal' on a 2-5, with 'different' stuff happening on 1 and 6).
The BAR moved up to take cover next to SSgt Ford and clear his lane of fire, intending on lighting up the SMG. But the German SMG had not acted last turn, so was able to perform reactive fire, which suppressed the BAR gunner. SSgt Ford fired, to no effect...
On the left (not pictured), the German Lt and rifleman both shook off their suppressions, while on the right, the SMG gunner fired at SSgt Ford, causing him to hit the ground, so the German rifleman hopped the wall and moved up (top center, behind bushes).
On the left, Sgt Glenn fires, forcing the German rifleman to hit the deck, while Johnson (top right) fired and hit nothing, followed by Leshore rushing up (center), firing, and also hitting nothing...
Meanwhile, SSgt Ford (center, in crater) pops up and fires at the German rifleman (top right) missing, while Anders (bottom left) moved up and fired at the German SMG (top left), missing. The BAR gunner (far right, with red bead) remains suppressed (not because of a bad roll, but because I chose to use the activations on other guys).
Both Germans on the left fired (at Sgt Glenn and Leshore), missing everything.
While both Germans on the right did the same...
Sgt Glenn (bottom center) sprayed again, missing again, but Leshore (center) fired and put the German rifleman down (top left), while Johnson (top right) moved up and fired, suppressing the German Lieutenant (red bead at top left).
SSgt Ford left his crater, running over to Cpl Timmons and helping him rally, then firing at the German rifleman on this side, knocking him down (black bead at top right). Then Anders (bottom left) opened up on the German SMG (behind the wall), putting him down! Things are looking up. However, the German rifleman managed to get back up, though he couldn't act (eligible for reactive fire during US turn).
But on the left the German Lt failed his rally attempt, so I played it that Sgt Glenn, Johnson, and Leshore moved in and captured his cowering ass. And just when I thought I could finish this up, the US rolled a 'scurry,' so no shooting this turn...
Leaving Leshore to guard the German Lieutenant, Sgt Glenn and Johnson (bottom left) moved east down the road towards the sole remaining German (top right), while Anders hopped the wall at bottom center, charged across the intersection, and took up station behind the wall.
And SSgt Ford and Cpl Timmons fell back to cover.
The hilarious thing is that the German then rolled a 'scurry,' so he can't shoot either. With his options severely limited, he makes a run for the border (top right), and escapes the Americans' grasp.
However, the mission is a success! The light German opposition is brushed back, with no losses of our own, and so the advance continues. The game was smooth and quick, easily the most enjoyable of the three I played today (and not just because I won!).
I think these rules will suffice to give a fun campaign, I just want to play a few more test games, adding in vehicles. Hopefully I'll get them in this coming weekend. Stay tuned, and let me know what you think of these games/rules/my campaign concept.
V/R,
Jack
This is my blog dedicated to wargaming various aspects of the Second World War in Europe, on land and in the air, in various scales.
Showing posts with label All American. Show all posts
Thursday, July 17, 2014
Tuesday, July 15, 2014
All Americans, Part 11 (Near Naples, 6 October 1943)
All,
A couple days later and it's October 6, 1943, with the regiment having just forced the Villa Literno river. On its march towards the (fictional) village of Alfredo Ravioli, the regiment once again finds itself squaring off against a dug-in German defensive line. 1st Battalion is thrown at the first of a series of hills, Hill 125. Able Company is again in the lead, following Baker Company's unsuccessful attempt at cracking the German line. More air and artillery is called up, and once again the paratroopers prepare to cross the line of departure.
Once again, heavy fire pours into the company almost from the start of its advance, and platoon movement quickly breaks down into squad rushes urged on by battle-wise officers and NCOs. As the moment for the final push arises, we find Lt Shepherd at the head of Sgt Bettis' 1st Squad.
The board, 2' x 2', German position atop Hill 125 at top center, Americans coming on the table from the bottom. North is up. Once again there are craters from arty and air strikes.
The opposing forces: US, from right to left: Lt Shepherd (with only a pistol after being chastised by his battalion commander for acting too much like a 'damned rifleman'), Sgt Bettis, Cpl Fox (with BAR), Pvt Ivers, Pvt Chisholm, Pvt Calhoun, and Pvt Swenson. Germans have a Lieutenant (I rolled up a German officer for all three games), a MMG gunner and A-gunner, and a LMG gunner and A-gunner (interesting, eh? But that's what I rolled up).
Setup. Tripod MG-42 is in dug-in position with German Lt, LMG is to the left, though it will displace once spotted. The US force is split into a base of fire element, led by Sgt Bettis on right, and a maneuver element, led by Lt Shepherd, on left.
German MG position, the objective.
Supporting LMG team, set to cover their right flank.
On the US right, Sgt Bettis, flanked by the BAR gunner, Cpl Fox, on left, and Pvt Ivers on right.
On US left, Lt Shepherd leading, followed by Calhoun, Chisholm, and Swenson.
The game starts with the BAR (off camera to right) firing on the German machine gun position, pinning the gunner (I forgot to apply extra dice to the A-gunner and Lt!), then Pvt Chisholm (bottom center) moving up and firing, causing the MG gunner to flee! I had the German A-gunner move over and handle the gun, though it would be less capable without an A-gunner (and the German Lt wasn't going to lower himself to do that).
The LMG team displaced, actually moving closer to the MG position.
The German MG pinned Cpl Fox (BAR gunner, at bottom right), while the LMG team fired at Chisholm (bottom left) and pinned him. Again, not sure what to do regarding the rules. The LMG team rolled snake-eyes (two 1's) on its shock dice, which is two pins, but the rules only discuss a pin or a hunker (which occurs on a 6), so I left him at pin.
Calhoun moved up next to Chisholm on the knoll (bottom center) and fired his M-1 Carbine at the LMG, to no effect...
While Lt Shepherd charged past the knoll, screaming like a demon and firing his .45 pistol, to no effect.
The German MG fired at Swenson and Calhoun, pinning Calhoun (Chisholm is still pinned as well).
Swenson (bottom left) rushed forward and fired, killing the LMG gunner. While the A-gunner was moving over to take over the gun, Lt Shepherd rushed forward, still blasting away with his pistol, causing the A-gunner to run!
The German MG opens up on the entire US left, pinning Swenson and causing Calhoun to run like a girl...
While the German Lieutenant moves over and fires his pistol at Lt Shepherd. A good, old-fashioned pistol duel!
Just when I think I can finish this off, the US rolls up a 'scurry,' meaning everyone can move but no one can shoot... Shepherd moves ever closer to the German MG position (the Germans can't 'Guard Fire' during scurry, but I probably should have allowed the German Lt to 'Snap Fire'). Meanwhile, Cpl Fox, Chisholm, and Swenson unpin themselves.
While Bettis and Ivers move up on the right.
Bad news, the Germans roll 'firefight,' but it's really not that bad because they only have the MG gunner and the Lt can fire anyway. But it's still bad news because the German MG cuts Sgt Bettis down, and pins Ivers.
And the German Lt fires his P-38 at Lt Shepherd missing, but Shepherd returns fire and puts a .45 ACP right between the German officer's eyes.
Return fire from Chisholm, Swenson, and Cpl Fox manage a knock down and to pin the German MG gunner. Lt Shepherd takes advantage of the German gunner's poor physical and mental shape by jumping into the MG position and finishing the last defender!
Urrah! Or 'Currahee,' or whatever paratroopers of the (made up) 499th PIR say (every Army unit says something different). The Germans suffered 3 KIA, while one ran away. The platoon suffered Sgt Bettis being wounded bad enough to miss the next 16 days of combat, while Lt Shepherd was recommended for the Bronze Star for personally leading the attack into the German MG position.
Once again, a good time, just still not all that enthralled with the morale system. Once again there were times when I got double pins and didn't know what to do, and two men (one German, one American) ran off as soon as they were fired at, which seems a bit steep a 'punishment' to me (to go from a 'good' mental state to running from the battlefield, abandoning your buddies at the drop of a hat). I'm going to change some things up next game, we'll see how it goes.
V/R,
Jack
A couple days later and it's October 6, 1943, with the regiment having just forced the Villa Literno river. On its march towards the (fictional) village of Alfredo Ravioli, the regiment once again finds itself squaring off against a dug-in German defensive line. 1st Battalion is thrown at the first of a series of hills, Hill 125. Able Company is again in the lead, following Baker Company's unsuccessful attempt at cracking the German line. More air and artillery is called up, and once again the paratroopers prepare to cross the line of departure.
Once again, heavy fire pours into the company almost from the start of its advance, and platoon movement quickly breaks down into squad rushes urged on by battle-wise officers and NCOs. As the moment for the final push arises, we find Lt Shepherd at the head of Sgt Bettis' 1st Squad.
The board, 2' x 2', German position atop Hill 125 at top center, Americans coming on the table from the bottom. North is up. Once again there are craters from arty and air strikes.
The opposing forces: US, from right to left: Lt Shepherd (with only a pistol after being chastised by his battalion commander for acting too much like a 'damned rifleman'), Sgt Bettis, Cpl Fox (with BAR), Pvt Ivers, Pvt Chisholm, Pvt Calhoun, and Pvt Swenson. Germans have a Lieutenant (I rolled up a German officer for all three games), a MMG gunner and A-gunner, and a LMG gunner and A-gunner (interesting, eh? But that's what I rolled up).
Setup. Tripod MG-42 is in dug-in position with German Lt, LMG is to the left, though it will displace once spotted. The US force is split into a base of fire element, led by Sgt Bettis on right, and a maneuver element, led by Lt Shepherd, on left.
German MG position, the objective.
Supporting LMG team, set to cover their right flank.
On the US right, Sgt Bettis, flanked by the BAR gunner, Cpl Fox, on left, and Pvt Ivers on right.
On US left, Lt Shepherd leading, followed by Calhoun, Chisholm, and Swenson.
The game starts with the BAR (off camera to right) firing on the German machine gun position, pinning the gunner (I forgot to apply extra dice to the A-gunner and Lt!), then Pvt Chisholm (bottom center) moving up and firing, causing the MG gunner to flee! I had the German A-gunner move over and handle the gun, though it would be less capable without an A-gunner (and the German Lt wasn't going to lower himself to do that).
The LMG team displaced, actually moving closer to the MG position.
The German MG pinned Cpl Fox (BAR gunner, at bottom right), while the LMG team fired at Chisholm (bottom left) and pinned him. Again, not sure what to do regarding the rules. The LMG team rolled snake-eyes (two 1's) on its shock dice, which is two pins, but the rules only discuss a pin or a hunker (which occurs on a 6), so I left him at pin.
Calhoun moved up next to Chisholm on the knoll (bottom center) and fired his M-1 Carbine at the LMG, to no effect...
While Lt Shepherd charged past the knoll, screaming like a demon and firing his .45 pistol, to no effect.
The German MG fired at Swenson and Calhoun, pinning Calhoun (Chisholm is still pinned as well).
Swenson (bottom left) rushed forward and fired, killing the LMG gunner. While the A-gunner was moving over to take over the gun, Lt Shepherd rushed forward, still blasting away with his pistol, causing the A-gunner to run!
The German MG opens up on the entire US left, pinning Swenson and causing Calhoun to run like a girl...
While the German Lieutenant moves over and fires his pistol at Lt Shepherd. A good, old-fashioned pistol duel!
Just when I think I can finish this off, the US rolls up a 'scurry,' meaning everyone can move but no one can shoot... Shepherd moves ever closer to the German MG position (the Germans can't 'Guard Fire' during scurry, but I probably should have allowed the German Lt to 'Snap Fire'). Meanwhile, Cpl Fox, Chisholm, and Swenson unpin themselves.
While Bettis and Ivers move up on the right.
Bad news, the Germans roll 'firefight,' but it's really not that bad because they only have the MG gunner and the Lt can fire anyway. But it's still bad news because the German MG cuts Sgt Bettis down, and pins Ivers.
And the German Lt fires his P-38 at Lt Shepherd missing, but Shepherd returns fire and puts a .45 ACP right between the German officer's eyes.
Return fire from Chisholm, Swenson, and Cpl Fox manage a knock down and to pin the German MG gunner. Lt Shepherd takes advantage of the German gunner's poor physical and mental shape by jumping into the MG position and finishing the last defender!
Urrah! Or 'Currahee,' or whatever paratroopers of the (made up) 499th PIR say (every Army unit says something different). The Germans suffered 3 KIA, while one ran away. The platoon suffered Sgt Bettis being wounded bad enough to miss the next 16 days of combat, while Lt Shepherd was recommended for the Bronze Star for personally leading the attack into the German MG position.
Once again, a good time, just still not all that enthralled with the morale system. Once again there were times when I got double pins and didn't know what to do, and two men (one German, one American) ran off as soon as they were fired at, which seems a bit steep a 'punishment' to me (to go from a 'good' mental state to running from the battlefield, abandoning your buddies at the drop of a hat). I'm going to change some things up next game, we'll see how it goes.
V/R,
Jack
Sunday, July 13, 2014
Operation Avalanche Platoon Roster
Sorry guys, my gaming has been seriously curtailed; not much time with the new baby on deck. But you know me, I can't go too long without sneaking off for a bit of gaming...
Following the mop up on Sicily, the regiment jumped into Italy in support of Operation Avalanche, the Landing at Salerno, 13 September 1943 to 4 January 1944. They were not involved in much fighting, then were evacuated to the UK to prep for Overlord. My goal with this is very limited: I recently purchased a set of rules called "Five Men in Normandy" and want to test them out with a few games, so I figured my 'All-Americans' platoon could serve nicely as a test bed. If this works (i.e., if I'm happy with the rules), my intent is to start a new campaign with Brits vs. Germans in Normandy.
Unit:
1st Platoon, Dog Company, 1st Battalion, 499th Parachute Infantry Regiment, 82nd Airborne Division
Operation Husky Roster
HQ Element:
Platoon Commander - 2Lt Jack Shepherd (Sicily: PH, BS w/V): Rec BS w/V (11)
Platoon Sergeant - SSgt Sawyer Ford (Sicily: SS w/V)
Radio/Telephone Operator - Sgt Gamble (Sicily)
Bazooka Gunner - Cpl Ignacio (Sicily: PH, BS w/V)
Bazooka Assistant (stand Garand) - PFC Fitzgerald (Sicily)
1st Squad, Rifle Team:
Squad Leader - Sgt Bettis (Sicily): PH (11), rtn 21 Oct
Rifleman (kneel SMG) - Cpl Lake (Sicily)
Rifleman (stand carbine) - Pvt Calhoun (Sicily: PH)
Rifleman (port Garand) - Pvt Swenson (Sicily)
Rifleman (rush Garand) - Pvt Chisholm (Sicily)
1st Squad, BAR Team:
Assistant Squad Leader - Cpl John Locke (Sicily)
Automatic Rifleman - Cpl Fox (Sicily)
Rifleman (crouch carbine) - Pvt Grant (Sicily)
Rifleman (fire Garand) - Pvt Hughes (Sicily)
Rifleman (kneel Garand) - Pvt Ivers (Sicily)
2nd Squad, Rifle Team:
Squad Leader - Cpl Keepers (Sicily): PH (10); Local Evac, rtn 12 Oct
Rifleman (kneel Mohawk) - PFC Alston (Sicily: PH, BS w/V): Rec BS w/V (1)
Automatic Rifleman - PFC India (Sicily: PH x 2)
Rifleman (crouching carbine) - Pvt Edge (Sicily: PH)
Rifleman (port Garand) - PFC Danson (Sicily)
2nd Squad, BAR Team:
Assistant Squad Leader -
Squad Machine Gun (gunner) - PFC Cahill (Sicily: PH)
Squad Machine Gun (asst gunner) - Pvt Jackson (Sicily: PH)
Rifleman (fire Garand) -
Rifleman (port Garand) - Pvt Girardo (Sicily: PH x2)
3rd Squad, Rifle Team:
Squad Leader - Sgt Glenn (Sicily: DSC, PH x 2)
Rifleman (stand Mohawk) - PFC Ertz (Sicily: PH x 2)
Rifleman (stand SMG) - Pvt Xavier (Sicily: PH)
Rifleman (stand carbine) - Pvt Anders (Sicily)
Rifleman (port Garand) - Pvt Johnson (Sicily: PH x 2)
3rd Squad, BAR Team:
Assistant Squad Leader - Cpl Charley Pace (Sicily: PH x 2)
Automatic Rifleman - Cpl Timmons (Sicily)
Rifleman (rush Garand) - PFC Leshore (Sicily)
Rifleman (crouch carbine) - Pvt O'Rourke (Sicily)
Rifleman (port Garand) - Pvt Kleen (Sicily)
Weapons Platoon Support:
Medium Machine Gun Team:
Gunner - PFC Clue (Sicily: PH x 2)
A-Gunner - Pvt Dederick (Sicily)
Ammo Carrier - Pvt House (Sicily)
Ammo Carrier - Pvt Molsby (Sicily)
60mm Mortar Team:
Gunner - Cpl Richard Alpert (Sicily)
A-Gunner - Pvt Black (Sicily)
Ammo Carrier - Pvt Delby (Sicily)
Ammo Carrier - Pvt Stadler (Sicily)
Combat Engineer NCO:
NCO - Sgt Cade Austen (Sicily)
Engineer (rush Garand) - Pvt Teague (Sicily)
Engineer (flamethrower) - Pvt Overbay (Sicily)
Engineer (bangalore) - Pvt Kuhalski (Sicily)
Engineer (pole charge) - Pvt Bliss (Sicily)
Regimental Support:
57mm Anti-Tank Gun (single, section, platoon)
NCO - Sgt "Penny" Widmore (Sicily: PH)
Gunner - Pvt Peel (Sicily)
Gunner - Pvt Pippen (Sicily: PH)
Gunner - Pvt Vinson (Sicily: PH)
Divisional Support
M4 Sherman (single, section, platoon)
Tank Commander - SSgt Leclaire Littleton (Sicily)
M3 Stuart (single, section, platoon)
Tank Commander - SSgt Sonny Moon (Sicily)
Inactive:
Cpl Everson (Sicily, Italy): PH (10), Evac US
Pvt Longwood (Sicily, Italy): PH (10), Captured
Following the mop up on Sicily, the regiment jumped into Italy in support of Operation Avalanche, the Landing at Salerno, 13 September 1943 to 4 January 1944. They were not involved in much fighting, then were evacuated to the UK to prep for Overlord. My goal with this is very limited: I recently purchased a set of rules called "Five Men in Normandy" and want to test them out with a few games, so I figured my 'All-Americans' platoon could serve nicely as a test bed. If this works (i.e., if I'm happy with the rules), my intent is to start a new campaign with Brits vs. Germans in Normandy.
Unit:
1st Platoon, Dog Company, 1st Battalion, 499th Parachute Infantry Regiment, 82nd Airborne Division
Operation Husky Roster
HQ Element:
Platoon Commander - 2Lt Jack Shepherd (Sicily: PH, BS w/V): Rec BS w/V (11)
Platoon Sergeant - SSgt Sawyer Ford (Sicily: SS w/V)
Radio/Telephone Operator - Sgt Gamble (Sicily)
Bazooka Gunner - Cpl Ignacio (Sicily: PH, BS w/V)
Bazooka Assistant (stand Garand) - PFC Fitzgerald (Sicily)
1st Squad, Rifle Team:
Squad Leader - Sgt Bettis (Sicily): PH (11), rtn 21 Oct
Rifleman (kneel SMG) - Cpl Lake (Sicily)
Rifleman (stand carbine) - Pvt Calhoun (Sicily: PH)
Rifleman (port Garand) - Pvt Swenson (Sicily)
Rifleman (rush Garand) - Pvt Chisholm (Sicily)
1st Squad, BAR Team:
Assistant Squad Leader - Cpl John Locke (Sicily)
Automatic Rifleman - Cpl Fox (Sicily)
Rifleman (crouch carbine) - Pvt Grant (Sicily)
Rifleman (fire Garand) - Pvt Hughes (Sicily)
Rifleman (kneel Garand) - Pvt Ivers (Sicily)
2nd Squad, Rifle Team:
Squad Leader - Cpl Keepers (Sicily): PH (10); Local Evac, rtn 12 Oct
Rifleman (kneel Mohawk) - PFC Alston (Sicily: PH, BS w/V): Rec BS w/V (1)
Automatic Rifleman - PFC India (Sicily: PH x 2)
Rifleman (crouching carbine) - Pvt Edge (Sicily: PH)
Rifleman (port Garand) - PFC Danson (Sicily)
2nd Squad, BAR Team:
Assistant Squad Leader -
Squad Machine Gun (gunner) - PFC Cahill (Sicily: PH)
Squad Machine Gun (asst gunner) - Pvt Jackson (Sicily: PH)
Rifleman (fire Garand) -
Rifleman (port Garand) - Pvt Girardo (Sicily: PH x2)
3rd Squad, Rifle Team:
Squad Leader - Sgt Glenn (Sicily: DSC, PH x 2)
Rifleman (stand Mohawk) - PFC Ertz (Sicily: PH x 2)
Rifleman (stand SMG) - Pvt Xavier (Sicily: PH)
Rifleman (stand carbine) - Pvt Anders (Sicily)
Rifleman (port Garand) - Pvt Johnson (Sicily: PH x 2)
3rd Squad, BAR Team:
Assistant Squad Leader - Cpl Charley Pace (Sicily: PH x 2)
Automatic Rifleman - Cpl Timmons (Sicily)
Rifleman (rush Garand) - PFC Leshore (Sicily)
Rifleman (crouch carbine) - Pvt O'Rourke (Sicily)
Rifleman (port Garand) - Pvt Kleen (Sicily)
Weapons Platoon Support:
Medium Machine Gun Team:
Gunner - PFC Clue (Sicily: PH x 2)
A-Gunner - Pvt Dederick (Sicily)
Ammo Carrier - Pvt House (Sicily)
Ammo Carrier - Pvt Molsby (Sicily)
60mm Mortar Team:
Gunner - Cpl Richard Alpert (Sicily)
A-Gunner - Pvt Black (Sicily)
Ammo Carrier - Pvt Delby (Sicily)
Ammo Carrier - Pvt Stadler (Sicily)
Combat Engineer NCO:
NCO - Sgt Cade Austen (Sicily)
Engineer (rush Garand) - Pvt Teague (Sicily)
Engineer (flamethrower) - Pvt Overbay (Sicily)
Engineer (bangalore) - Pvt Kuhalski (Sicily)
Engineer (pole charge) - Pvt Bliss (Sicily)
Regimental Support:
57mm Anti-Tank Gun (single, section, platoon)
NCO - Sgt "Penny" Widmore (Sicily: PH)
Gunner - Pvt Peel (Sicily)
Gunner - Pvt Pippen (Sicily: PH)
Gunner - Pvt Vinson (Sicily: PH)
Divisional Support
M4 Sherman (single, section, platoon)
Tank Commander - SSgt Leclaire Littleton (Sicily)
M3 Stuart (single, section, platoon)
Tank Commander - SSgt Sonny Moon (Sicily)
Inactive:
Cpl Everson (Sicily, Italy): PH (10), Evac US
Pvt Longwood (Sicily, Italy): PH (10), Captured
All Americans, Part 10 (Near Naples, 4 October 1943)
All,
I'm back, albeit in a limited capacity. Three weeks into this, wife and baby are doing well, but we're all tired and there's not much time for wargaming. Having said that, I've been on the lookout for something to do small, quick games, and I may have found an answer in the new skirmish rules "Five Men in Normandy." I've had them for a couple weeks now, and last night I resolved to wake up early (whilst the wife and three kids were hopefully still sleeping) and sneak upstairs to get in a game or three, which is exactly what I did.
I played the rules twice as written, then tweaked a couple things: one to speed the game up a bit, and another to make the morale system act a little more to my liking. The first two games were okay, and the third not only went great (a sound trouncing of the Germans!), but felt right. So, what was I doing?
I resurrected my "All Americans" campaign; not a full-blown deal, but something I already had lying around, ready to go, in order to allow me to playtest the rules. After the three playtest games today I've decided I'd like to playtest three more games. Today was nothing but pure infantry vs. infantry, and for my next three I'd like to go US armor vs. German infantry, German armor vs US infantry, and US armor vs German armor. These are skirmish rules, so I'm not looking for massive, armor slugfests, I'm just taking about one vehicle against none or one vehicle. I hope to get to that next weekend. So, let's get back to the story.
Following the fight in Sicily, the 499th PIR readied itself again for combat, and on 14 Sept 1943 it jumped near Paestum in Italy, in support of the floundering invasion beaches at Salerno. The regiment had a great drop, and was able to quickly form up and move into the line. What followed was much boredom, preparing for German counterattacks that didn't materialize. After much digging in, marching, counter-marching, and digging in again, the invasion beaches were secure enough for the 499th to begin its move on Naples. The regiment moved out on foot, encountering very limited resistance on its way to Naples, which it entered on 1 Oct 1943. Several days later the regiment began pushing further inland, which is where this batrep picks up.
It's 4 October 1943 and the regiment has been on the move for a couple days. They found themselves near the town of Villa Literno, searching for river crossing over the nearby river of the same name, when they ran into German forces in strength. German infantry and anti-tank weapons occupied nearby (fictional) Hill 113. 1st Battalion drew up plans to clear the hill, with Able and Baker companies in the assault, HQ Company (with its machine guns and mortars) in support, and Charlie Company in reserve. Able was on the right, with Baker tacking the hill head-on and Able working its right flank, where the German position was anchored on a bombed out house.
The assault kicked off with a massive artillery barrage provided by nearby British 25-pounders, and the attack kicked off with 1st Platoon in the assault, 2nd Platoon in support, and 3rd Platoon in reserve. 3rd Platoon layed about in a defile, reading letters, smoking cigarettes, and eating C-rations, while 2nd Platoon poured fire into the house from dug-in positions. 1st Platoon left its jump-off positions at 0615, right on schedule, in a platoon wedge formation, with 1st Squad on the left, 2nd Squad leading in the center, and 3rd Squad on the right. About 200 yards from the objective the platoon began receiving heavy fire from a machine gun in the enemy-held house, and everyone went to ground. Lt Shepherd, SSgt Ford, and the squad leaders immediately set about kicking the troopers' asses into getting back into the fight, and squad fire and maneuver was begun.
2nd and 3rd Squads, as well as 2nd Platoon and the company machine guns and mortars, laid down fire on the house as 1st Squad bolted forward. They hit the ground and began firing as 3rd Squad made its bound, then 2nd, as the platoon slowly worked its way forward under heavy fire. Along the way, one of the 60mm mortars scored a perfect hit, silencing the enemy machine gun, though a handful of enemy riflemen remained.
The squad rushed continued, drawing the platoon ever closer to the objective. Both enemy troops and paratroopers continued to fall as the fighting neared its climax; one more bound and the objective would be theirs! As luck would have it, 2nd Squad, led by Corporal Keepers, found itself in the final assault position, and with a bellow of "Follow me!" Keepers led several members of his squad to their feet and at the enemy position. What he didn't know was that the German platoon commander had noticed his faltering left flank and was leading a small group of men to aid their comrades in the house.
Overview of the field. As normal, I will be playing this in 10mm (all Pendraken), and the board is 2' x 2'. The objective house is at center top, surrounded by craters from the arty barrage, and 2nd Squad will be entering from the bottom baseline.
The opposing forces: top, from right to left, Corporal Keepers, Cpl Everson, PFC Alston, PFC Girardo, PFC Cahill, PFC India, and Pvt Longwood. The Germans, right to left: platoon commander (a Lieutenant), a Sergeant with an MP-40, another SMG, and three riflemen (the MG in the house is already destroyed).
Starting positions, with Everson and two riflemen at bottom right, Keepers, Alston (SMG), and two riflemen on a 'left-hook' at bottom left, three Germans near the house, and the German Lt and two more troops entering at top left.
Germans near the house (two at wall, one at top right). The game has a mechanic called 'displacement,' so that when these guys are spotted by the Yanks a die will be rolled to determine where they really are, i.e., the current placement is only sort of a placeholder. I placed several German casualty figures on the board to represent casualties sustained during the fighting that's occurred so far.
The German Lt (center), flanked by a SMG gunner and a rifleman.
At bottom right corner, Cpl Everson flanked by Cahill and India.
Cpl Keepers, the squad leader (silver base), with Alston (sand colored base), Girardo, and Longwood.
The game is afoot! Right out the gate I rolled a 6 for 'firefight,' but no one has LOS to the enemy, so it's treated as a 'scurry,' where everyone gets to move without attracting reactive fire (plus there's no reactive fire on the first turn anyway). Keepers and Alston dart left, while Longwood and Girardo move up into the woods, getting a look at the German house.
Meanwhile, Cpl Everson, Cahill, and India move into the trees in the SE (bottom right) corner, also getting a look at the German house (top center).
I roll up their displacement, no big change. They were both behind the wall, now the rifleman is in a hole at far left and the German Sergeant is behind some bushes at far right.
Then things start to go to shit... The Kraut Sergeant darts across the road (no reaction fire because my three guys in the woods moved last turn) and sprays the woods: he doesn't hit anyone, but he pins Cpl Everson (yellow bead), and PFC India runs! Yes, that's why there are only two Americans in the woods...
Meanwhile, the German rifleman (far right) fires at Girardo (far left in woods), missing, then crouches down in the shellhole to hide (green bead for going prone out of LOS).
Cpl Everson (top right) is able to unpin himself, and fires at the German Sgt, driving him off, though, because he was so far across the board, his 12" flee doesn't cause him to leave the board, so he's suppressed (called 'hunker' in the rules) at top left. It's a big deal that my guy ran off board while the German NCO is still here, able to rally and get back in the fight...
On the left, Girardo (bottom left) dashes forward out of the woods and heaves a grenade straight into the shellhole the German rifleman is cowering in. But he's able to chuck it out, and hit explodes harmlessly (top right).
The Germans roll a 'scurry' (a 1), so the rifleman that just kicked the grenade falls back to another shellhole, while his Lt brings up help (top left).
The German Sgt (top left) recovers his suppression. There was a German rifleman on the little knoll next to the Sgt; he darts forward into the trees at top right
Then the damned Americans roll a 'scurry' (another 1). Cpl Everson (far right) rallies, while Cahill mounts the knoll at center, just opposite the German rifleman that moved into the woods at top left. I'm not getting any reactive fire in the game because only guys that didn't activate during their turn can fire ("guard fire"), but I keep rolling 1's ('scurry'), so everyone is activating...
Keepers and Alston move up on far left (bottom left), while Girardo and Longwood move up as well (bottom center right).
Then the Germans roll another scurry! This is certainly a lot more maneuver than fire, but hey, it's not the rules' fault, it's my terrible dice-rolling!
The German rifleman in the woods in the east sits tight, staring at Cahill, whilst the German Sgt is able to mov up and join him.
And the Germans on the left re-position slightly to get better angles of fire.
Finally my activation dice is something other than a '1'! Alston (bottom center left) opens up with his Tommy Gun and hits nothing, so Keepers fires at the same target and gets a knockdown (black bead). The knockdown will likely recover on his next activation if I can't get someone up there to touch him, which puts him out of the fight. Most of the time you can only activate a couple guys, so it's a tough call whether to activate a man that's been knocked down (to try to make him recover), or use a guy that's in good health.
The German Sgt moves up and sprays his MP-40 in Cahill's general direction, which is good enough to make him decide to head for the hills! That's twice the German Sgt has pulled off that little feat...
This is followed by the German Sgt's buddy moving up to Cahill's recently abandoned position and taking a shot at Cpl Everson, still in the woods. Everson goes down like a sack of potatoes... The Americans now have ZERO men on the right flank.
Longwood tosses a grenade at the German in the shellhole, and gets it close enough to score a knockdown. Then Cpl Keepers decides to charge forward into the woods and finish off the other German rifleman that had suffered a knockdown. As he's moving up the German Lt fires his pistol at Keepers, but misses. The German rifleman is kaput (top center, with Keepers standing over the body, German Lt just to his right; Longwood is at bottom left, and you can see the white puff from his grenade).
Thing are starting to look up, right? Negative...
This photo is looking from east to west (right to left). With the US right flank open, the German Sgt and his rifleman move west (rifleman at bottom center, Sgt just across road behind bushes in shadow from telephone pole). They both open up on Longwood and Girardo, trading fire with them to no effect (top center, with German Lt at top right).
Then the US rolls a '6,' for firefight. No one can move, but all US troops with LOS to the enemy will be able to fire. However, all enemy that survive in good order will be able to return fire. Cpl Keepers (center) opens up first, pinning the German Lt (far right, with yellow bead). Then Alston (far left) opens up and forces the German Lt to run!
Longwood (far left) and Girardo (to his right) both open up on the German Sgt (top right in the road), but miss. The German Sgt and his rifleman (far bottom right behind bushes) both return fire, but both miss.
The remaining German that was knocked down gets up (top left), and the German Sgt (far right) fires at Girardo (bottom center left behind bushes), making him run! The only good news is that Girardo was far enough 'inland' to not leave the board...
Then the US rolls another firefight, which sucks, because I needed a move to get Alston (off camera at bottom left) into LOS of the bad guys, and only Keepers (far left) and Longwood are in position to shoot (Girardo is cowering, remember?). Keepers fires at the German rifleman in the shellhole (at right), but misses, as does the German's return fire.
Then Longwood (far left center) fires at the German Sgt again, and misses again (third time). The German Sgt (on road) and his rifleman (bottom right) have done this twice before and missed both times, but this time their return fire puts Longwood down...
As I previously stated, a lot of times you can only activate two guys. Well, the Germans had an SMG gunner in the house that hadn't acted in awhile, but now he decided to join the party. He moved up (top right) next to the rifleman that just recovered from the knockdown (in the shellhole) and fired at Cpl Keepers, putting him out of the fight!
Then PFC Alston rushed up to Keepers (far left) and sprayed, causing the German rifleman (bottom right in shellhole) to run. Girardo is the only other able-bodied American still on the table, but he's suppressed ('hunker). I activate him and roll to rally, and he runs off. You've got to be kidding me...
Then some strangeness occurred that I wasn't sure how to handle with the rules. The German SMG gunner at top center opened up and got a hit on Alston (far left), achieving a knock down. Then the German Sgt moved up (bottom right) and fired at Alston (the only American left); he achieved another knock down and got a 'flee' result. Well, if he's knocked down, he can't rightly flee, and I'm not sure what happens is a guy with a knockdown gets another knock down. I probably should have played him as out of the fight as well, but instead I rolled on him; he got up, and so I had him grab Cpl Keepers and high-tail it out of there.
So, the attack failed... 1st Platoon fell back under harassing fire, while the HQ Company's mortars and machine guns pounded the house. Forty-five minutes later 3rd Platoon mounted up and took the hill, which was occupied only by two wounded Germans left behind to cover the withdrawal of their comrades.
The boys didn't do so well. Three perfectly healthy men ran for their lives, while Keepers, Everson, and Longwood went down. I played it that Keepers was dragged off by Alston, and that Everson managed to drag himself off, but Longwood was wounded and captured by the Germans. I rolled on the 'out of action' table: Cpl Keepers was lightly wounded, out for 8 days. However, for Cpl Everson the war is over; he was hit bad enough to be evacuated back to the States. PFC Alston was recommended for another Bronze Star for saving Keepers' ass!
The Germans suffered one KIA (I didn't roll, I just count downed bad guys as KIA), and their Lieutenant that run was caught and executed (that is from a roll on a table in the rules).
I was pretty happy with the rules, though not perfectly happy. The big problem I have is with the 'morale' system, and it's not really a problem with the rules, just a problem with the small scale of the game and table I'm using. In the rules there's a decent chance your guy will get scared and run 12" in fear. Well, my table is only 24 inches by 24 inches, so not a lot of leeway. Additionally, I feel like there should be more of a lead up to running, rather than just running away the first time a guy is shot at. I favor a more incremental approach, i.e., hit the deck-pin-suppress-fall back, with a small but possible chance to progress through them very quickly.
Hope you liked it, I did. What you saw in this write-up, with the lead-in explanation of the surrounding events is my intent for a campaign with these rules. As I don't have much time, I want to play short, sharp fights with a handful of guys per side, maybe a vehicle on one of them, but representing much larger fights. I'm not 'bath-tubbing' them, I'm simply on playing the final 50 yards of the assault, where a handful of men face off in close combat. I'm a little concerned that it may become repetitive, but I'm hoping that I can have a suitable campaign background where I get familiar with and attached to the characters (as I've done with All Americans and In Country) so that it doesn't matter. That brings up the other feature of the campaign: I'm not going to follow one squad through the campaign, I'm going to follow a whole rifle company. I'm not going to follow every single soldier, only the (as the Lardies call them) "Big Men," i.e., the leadership. So we'd be following a British rifle company, with the named characters being: 1 Company Commander, 1 Sergeant Major, 3-4 Lieutenants, 3-4 Platoon Sergeants, and 9-12 Corporals (squad leaders). One or two of them will lead each fight, with a number of 'unnamed' rifleman (Lance Corporals and Privates). So, as an example, the above fight could have had a Platoon Leader (leading from the front), a Squad Leader, and five 'unnamed' privates, and the next fight could have the Company Commander, a Squad Leader, and six 'unnamed' privates. Again, the idea being that a company assault is taking place, but we're picking up the action in the last 50 yards, after all the supporting fires and large-scale maneuvering has already occurred. I'd really like to call it "At the Sharp End," but the Lardies already used it! I suppose I'll go with, "The Last Fifty Yards."
Whaddaya think?
V/R,
Jack
I'm back, albeit in a limited capacity. Three weeks into this, wife and baby are doing well, but we're all tired and there's not much time for wargaming. Having said that, I've been on the lookout for something to do small, quick games, and I may have found an answer in the new skirmish rules "Five Men in Normandy." I've had them for a couple weeks now, and last night I resolved to wake up early (whilst the wife and three kids were hopefully still sleeping) and sneak upstairs to get in a game or three, which is exactly what I did.
I played the rules twice as written, then tweaked a couple things: one to speed the game up a bit, and another to make the morale system act a little more to my liking. The first two games were okay, and the third not only went great (a sound trouncing of the Germans!), but felt right. So, what was I doing?
I resurrected my "All Americans" campaign; not a full-blown deal, but something I already had lying around, ready to go, in order to allow me to playtest the rules. After the three playtest games today I've decided I'd like to playtest three more games. Today was nothing but pure infantry vs. infantry, and for my next three I'd like to go US armor vs. German infantry, German armor vs US infantry, and US armor vs German armor. These are skirmish rules, so I'm not looking for massive, armor slugfests, I'm just taking about one vehicle against none or one vehicle. I hope to get to that next weekend. So, let's get back to the story.
Following the fight in Sicily, the 499th PIR readied itself again for combat, and on 14 Sept 1943 it jumped near Paestum in Italy, in support of the floundering invasion beaches at Salerno. The regiment had a great drop, and was able to quickly form up and move into the line. What followed was much boredom, preparing for German counterattacks that didn't materialize. After much digging in, marching, counter-marching, and digging in again, the invasion beaches were secure enough for the 499th to begin its move on Naples. The regiment moved out on foot, encountering very limited resistance on its way to Naples, which it entered on 1 Oct 1943. Several days later the regiment began pushing further inland, which is where this batrep picks up.
It's 4 October 1943 and the regiment has been on the move for a couple days. They found themselves near the town of Villa Literno, searching for river crossing over the nearby river of the same name, when they ran into German forces in strength. German infantry and anti-tank weapons occupied nearby (fictional) Hill 113. 1st Battalion drew up plans to clear the hill, with Able and Baker companies in the assault, HQ Company (with its machine guns and mortars) in support, and Charlie Company in reserve. Able was on the right, with Baker tacking the hill head-on and Able working its right flank, where the German position was anchored on a bombed out house.
The assault kicked off with a massive artillery barrage provided by nearby British 25-pounders, and the attack kicked off with 1st Platoon in the assault, 2nd Platoon in support, and 3rd Platoon in reserve. 3rd Platoon layed about in a defile, reading letters, smoking cigarettes, and eating C-rations, while 2nd Platoon poured fire into the house from dug-in positions. 1st Platoon left its jump-off positions at 0615, right on schedule, in a platoon wedge formation, with 1st Squad on the left, 2nd Squad leading in the center, and 3rd Squad on the right. About 200 yards from the objective the platoon began receiving heavy fire from a machine gun in the enemy-held house, and everyone went to ground. Lt Shepherd, SSgt Ford, and the squad leaders immediately set about kicking the troopers' asses into getting back into the fight, and squad fire and maneuver was begun.
2nd and 3rd Squads, as well as 2nd Platoon and the company machine guns and mortars, laid down fire on the house as 1st Squad bolted forward. They hit the ground and began firing as 3rd Squad made its bound, then 2nd, as the platoon slowly worked its way forward under heavy fire. Along the way, one of the 60mm mortars scored a perfect hit, silencing the enemy machine gun, though a handful of enemy riflemen remained.
The squad rushed continued, drawing the platoon ever closer to the objective. Both enemy troops and paratroopers continued to fall as the fighting neared its climax; one more bound and the objective would be theirs! As luck would have it, 2nd Squad, led by Corporal Keepers, found itself in the final assault position, and with a bellow of "Follow me!" Keepers led several members of his squad to their feet and at the enemy position. What he didn't know was that the German platoon commander had noticed his faltering left flank and was leading a small group of men to aid their comrades in the house.
Overview of the field. As normal, I will be playing this in 10mm (all Pendraken), and the board is 2' x 2'. The objective house is at center top, surrounded by craters from the arty barrage, and 2nd Squad will be entering from the bottom baseline.
The opposing forces: top, from right to left, Corporal Keepers, Cpl Everson, PFC Alston, PFC Girardo, PFC Cahill, PFC India, and Pvt Longwood. The Germans, right to left: platoon commander (a Lieutenant), a Sergeant with an MP-40, another SMG, and three riflemen (the MG in the house is already destroyed).
Starting positions, with Everson and two riflemen at bottom right, Keepers, Alston (SMG), and two riflemen on a 'left-hook' at bottom left, three Germans near the house, and the German Lt and two more troops entering at top left.
Germans near the house (two at wall, one at top right). The game has a mechanic called 'displacement,' so that when these guys are spotted by the Yanks a die will be rolled to determine where they really are, i.e., the current placement is only sort of a placeholder. I placed several German casualty figures on the board to represent casualties sustained during the fighting that's occurred so far.
The German Lt (center), flanked by a SMG gunner and a rifleman.
At bottom right corner, Cpl Everson flanked by Cahill and India.
Cpl Keepers, the squad leader (silver base), with Alston (sand colored base), Girardo, and Longwood.
The game is afoot! Right out the gate I rolled a 6 for 'firefight,' but no one has LOS to the enemy, so it's treated as a 'scurry,' where everyone gets to move without attracting reactive fire (plus there's no reactive fire on the first turn anyway). Keepers and Alston dart left, while Longwood and Girardo move up into the woods, getting a look at the German house.
Meanwhile, Cpl Everson, Cahill, and India move into the trees in the SE (bottom right) corner, also getting a look at the German house (top center).
I roll up their displacement, no big change. They were both behind the wall, now the rifleman is in a hole at far left and the German Sergeant is behind some bushes at far right.
Then things start to go to shit... The Kraut Sergeant darts across the road (no reaction fire because my three guys in the woods moved last turn) and sprays the woods: he doesn't hit anyone, but he pins Cpl Everson (yellow bead), and PFC India runs! Yes, that's why there are only two Americans in the woods...
Meanwhile, the German rifleman (far right) fires at Girardo (far left in woods), missing, then crouches down in the shellhole to hide (green bead for going prone out of LOS).
Cpl Everson (top right) is able to unpin himself, and fires at the German Sgt, driving him off, though, because he was so far across the board, his 12" flee doesn't cause him to leave the board, so he's suppressed (called 'hunker' in the rules) at top left. It's a big deal that my guy ran off board while the German NCO is still here, able to rally and get back in the fight...
On the left, Girardo (bottom left) dashes forward out of the woods and heaves a grenade straight into the shellhole the German rifleman is cowering in. But he's able to chuck it out, and hit explodes harmlessly (top right).
The Germans roll a 'scurry' (a 1), so the rifleman that just kicked the grenade falls back to another shellhole, while his Lt brings up help (top left).
The German Sgt (top left) recovers his suppression. There was a German rifleman on the little knoll next to the Sgt; he darts forward into the trees at top right
Then the damned Americans roll a 'scurry' (another 1). Cpl Everson (far right) rallies, while Cahill mounts the knoll at center, just opposite the German rifleman that moved into the woods at top left. I'm not getting any reactive fire in the game because only guys that didn't activate during their turn can fire ("guard fire"), but I keep rolling 1's ('scurry'), so everyone is activating...
Keepers and Alston move up on far left (bottom left), while Girardo and Longwood move up as well (bottom center right).
Then the Germans roll another scurry! This is certainly a lot more maneuver than fire, but hey, it's not the rules' fault, it's my terrible dice-rolling!
The German rifleman in the woods in the east sits tight, staring at Cahill, whilst the German Sgt is able to mov up and join him.
And the Germans on the left re-position slightly to get better angles of fire.
Finally my activation dice is something other than a '1'! Alston (bottom center left) opens up with his Tommy Gun and hits nothing, so Keepers fires at the same target and gets a knockdown (black bead). The knockdown will likely recover on his next activation if I can't get someone up there to touch him, which puts him out of the fight. Most of the time you can only activate a couple guys, so it's a tough call whether to activate a man that's been knocked down (to try to make him recover), or use a guy that's in good health.
The German Sgt moves up and sprays his MP-40 in Cahill's general direction, which is good enough to make him decide to head for the hills! That's twice the German Sgt has pulled off that little feat...
This is followed by the German Sgt's buddy moving up to Cahill's recently abandoned position and taking a shot at Cpl Everson, still in the woods. Everson goes down like a sack of potatoes... The Americans now have ZERO men on the right flank.
Longwood tosses a grenade at the German in the shellhole, and gets it close enough to score a knockdown. Then Cpl Keepers decides to charge forward into the woods and finish off the other German rifleman that had suffered a knockdown. As he's moving up the German Lt fires his pistol at Keepers, but misses. The German rifleman is kaput (top center, with Keepers standing over the body, German Lt just to his right; Longwood is at bottom left, and you can see the white puff from his grenade).
Thing are starting to look up, right? Negative...
This photo is looking from east to west (right to left). With the US right flank open, the German Sgt and his rifleman move west (rifleman at bottom center, Sgt just across road behind bushes in shadow from telephone pole). They both open up on Longwood and Girardo, trading fire with them to no effect (top center, with German Lt at top right).
Then the US rolls a '6,' for firefight. No one can move, but all US troops with LOS to the enemy will be able to fire. However, all enemy that survive in good order will be able to return fire. Cpl Keepers (center) opens up first, pinning the German Lt (far right, with yellow bead). Then Alston (far left) opens up and forces the German Lt to run!
Longwood (far left) and Girardo (to his right) both open up on the German Sgt (top right in the road), but miss. The German Sgt and his rifleman (far bottom right behind bushes) both return fire, but both miss.
The remaining German that was knocked down gets up (top left), and the German Sgt (far right) fires at Girardo (bottom center left behind bushes), making him run! The only good news is that Girardo was far enough 'inland' to not leave the board...
Then the US rolls another firefight, which sucks, because I needed a move to get Alston (off camera at bottom left) into LOS of the bad guys, and only Keepers (far left) and Longwood are in position to shoot (Girardo is cowering, remember?). Keepers fires at the German rifleman in the shellhole (at right), but misses, as does the German's return fire.
Then Longwood (far left center) fires at the German Sgt again, and misses again (third time). The German Sgt (on road) and his rifleman (bottom right) have done this twice before and missed both times, but this time their return fire puts Longwood down...
As I previously stated, a lot of times you can only activate two guys. Well, the Germans had an SMG gunner in the house that hadn't acted in awhile, but now he decided to join the party. He moved up (top right) next to the rifleman that just recovered from the knockdown (in the shellhole) and fired at Cpl Keepers, putting him out of the fight!
Then PFC Alston rushed up to Keepers (far left) and sprayed, causing the German rifleman (bottom right in shellhole) to run. Girardo is the only other able-bodied American still on the table, but he's suppressed ('hunker). I activate him and roll to rally, and he runs off. You've got to be kidding me...
Then some strangeness occurred that I wasn't sure how to handle with the rules. The German SMG gunner at top center opened up and got a hit on Alston (far left), achieving a knock down. Then the German Sgt moved up (bottom right) and fired at Alston (the only American left); he achieved another knock down and got a 'flee' result. Well, if he's knocked down, he can't rightly flee, and I'm not sure what happens is a guy with a knockdown gets another knock down. I probably should have played him as out of the fight as well, but instead I rolled on him; he got up, and so I had him grab Cpl Keepers and high-tail it out of there.
So, the attack failed... 1st Platoon fell back under harassing fire, while the HQ Company's mortars and machine guns pounded the house. Forty-five minutes later 3rd Platoon mounted up and took the hill, which was occupied only by two wounded Germans left behind to cover the withdrawal of their comrades.
The boys didn't do so well. Three perfectly healthy men ran for their lives, while Keepers, Everson, and Longwood went down. I played it that Keepers was dragged off by Alston, and that Everson managed to drag himself off, but Longwood was wounded and captured by the Germans. I rolled on the 'out of action' table: Cpl Keepers was lightly wounded, out for 8 days. However, for Cpl Everson the war is over; he was hit bad enough to be evacuated back to the States. PFC Alston was recommended for another Bronze Star for saving Keepers' ass!
The Germans suffered one KIA (I didn't roll, I just count downed bad guys as KIA), and their Lieutenant that run was caught and executed (that is from a roll on a table in the rules).
I was pretty happy with the rules, though not perfectly happy. The big problem I have is with the 'morale' system, and it's not really a problem with the rules, just a problem with the small scale of the game and table I'm using. In the rules there's a decent chance your guy will get scared and run 12" in fear. Well, my table is only 24 inches by 24 inches, so not a lot of leeway. Additionally, I feel like there should be more of a lead up to running, rather than just running away the first time a guy is shot at. I favor a more incremental approach, i.e., hit the deck-pin-suppress-fall back, with a small but possible chance to progress through them very quickly.
Hope you liked it, I did. What you saw in this write-up, with the lead-in explanation of the surrounding events is my intent for a campaign with these rules. As I don't have much time, I want to play short, sharp fights with a handful of guys per side, maybe a vehicle on one of them, but representing much larger fights. I'm not 'bath-tubbing' them, I'm simply on playing the final 50 yards of the assault, where a handful of men face off in close combat. I'm a little concerned that it may become repetitive, but I'm hoping that I can have a suitable campaign background where I get familiar with and attached to the characters (as I've done with All Americans and In Country) so that it doesn't matter. That brings up the other feature of the campaign: I'm not going to follow one squad through the campaign, I'm going to follow a whole rifle company. I'm not going to follow every single soldier, only the (as the Lardies call them) "Big Men," i.e., the leadership. So we'd be following a British rifle company, with the named characters being: 1 Company Commander, 1 Sergeant Major, 3-4 Lieutenants, 3-4 Platoon Sergeants, and 9-12 Corporals (squad leaders). One or two of them will lead each fight, with a number of 'unnamed' rifleman (Lance Corporals and Privates). So, as an example, the above fight could have had a Platoon Leader (leading from the front), a Squad Leader, and five 'unnamed' privates, and the next fight could have the Company Commander, a Squad Leader, and six 'unnamed' privates. Again, the idea being that a company assault is taking place, but we're picking up the action in the last 50 yards, after all the supporting fires and large-scale maneuvering has already occurred. I'd really like to call it "At the Sharp End," but the Lardies already used it! I suppose I'll go with, "The Last Fifty Yards."
Whaddaya think?
V/R,
Jack
Subscribe to:
Posts (Atom)
15mm Platoon-Level Test Game #4
All, The Platoon Sergeant, Staff Sergeant Saunders, gathered the squad leaders to brief them, running the mission since Lt Hanley was still ...
-
All, I've been a fan of Martin's blog (https://tgamesweplay.blogspot.com/p/downloads.html), particularly his WWII fights on small t...
-
All, 1430 Local Time 10 November 1942 Near Port Lyautey, French Morocco Normally this would have been a job for his XO, or even one of the b...
-
All, It's now 0700 on 18 April 1943, eight days since the battalion turned back a German armored counterattack. Everyone can...