All,
It's now 1820 on 2 April 1943, and there's an enemy panzer on the loose! Okay, not so much on the loose, but an panzer that needs getting got! What's happened is the squad got the crap kicked out of it taking a machine gun position at the southwest end of the ridge, and then their platoon leader, Lt Pelluer, lead the rest of the platoon up to clear the rest of the ridge. But once they got up there they ran into an enemy tank, which chewed the platoon up pretty well. Lt Pelluer ordered the remaining dogfaces to dig in while he fell back to the rear to find a bazooka team. On his way back to the front he stops and grabs the remaining guys from the squad to help out.
There are two things the good Lieutenant doesn't yet realize: the tank belongs to Leutnant Stransky, the one that got away from Staff Sergeant Smith's tank platoon in fight number four. Lt Stransky's tank was already damaged, low on fuel, and nearly out of ammo. Now it's out of fuel and ammo, and Lt Stransky has dismounted to find help and gas. So far he's rounded up a few stragglers from the ridge to help protect his tank while he searches for fuel, but now he sees more Americans moving up the ridge.

The opposing forces, with doughboys on the left and Afrika Korps on the right.
I played the first few skirmishes with Five Men in Normandy, but now I've returned to my favorite, Five Men at Kursk, and the games were a blast (got four in this past weekend). I'm playing in 15mm with Battlefront/Flames of War troops, Warzone hills, Wargamer's Terrain roads and rivers, and Crescent Root buildings.

The dogfaces, led by 2nd Lieutenant Pelluer (top right). Across the bottom are the 'regular' members of the squad that are left: PFC Graham, PVT McGovern, and CPL Saxon. At top left is the bazooka team: gunner, CPL Roberts, and assistant, PVT Maas. The guy at top center right is that bastard PVT Baldinger, the guy who ran in the face of the enemy (fight number one). He was scooped up and thrown in the 'brig,' which, in real terms for a unit at the front lines, meant that he was summarily court-martialed, fined three months' pay (couldn't be busted, he's already an E-1), and assigned to work details at/around the Battalion Command Post. But the squad is so beat up, and the Lieutenant needed help taking out the tank, so he grabbed Baldinger and brought him with. Lucky they don't strap a satchel charge to his ass and HE is the anti-tank weapon! ;)

The German force, consisting of Lt Stransky (top right, with pistol), a machine gunner (bottom left, he'll be winging the MG-42), and two riflemen, all strays/stragglers from the machine gun nest on the ridge taken out by the platoon.
The map, now with troops. The Americans have just double-timed onto the board, looking to move up and knock out that panzer! The Germans have, as usual, not many troops, but they seem to always get lucky with their placement. The German MG just happens to be on the 2nd floor of the building (top left), while there is a rifleman in cover at center, and another in cover at right, with Lt Stransky right behind him.
The Americans, from left: PVT Baldinger (predictably bringing up the rear), PFC Graham, CPL Saxon, PVT Maas (bazooka assistant), PVT McGovern, CPL Roberts (bazooka gunner), and Lieutenant Pelluer (with his trusty .45 automatic).
The German MG, looking out to the west (left), while the Americans approach from the south (bottom).
Looking east to west at the top half of the board, you have the German Leutnant and rifleman at bottom left, a rifleman at center left, and the MG and tank at top right. The Yanks are just off camera to top left. Time to fight!
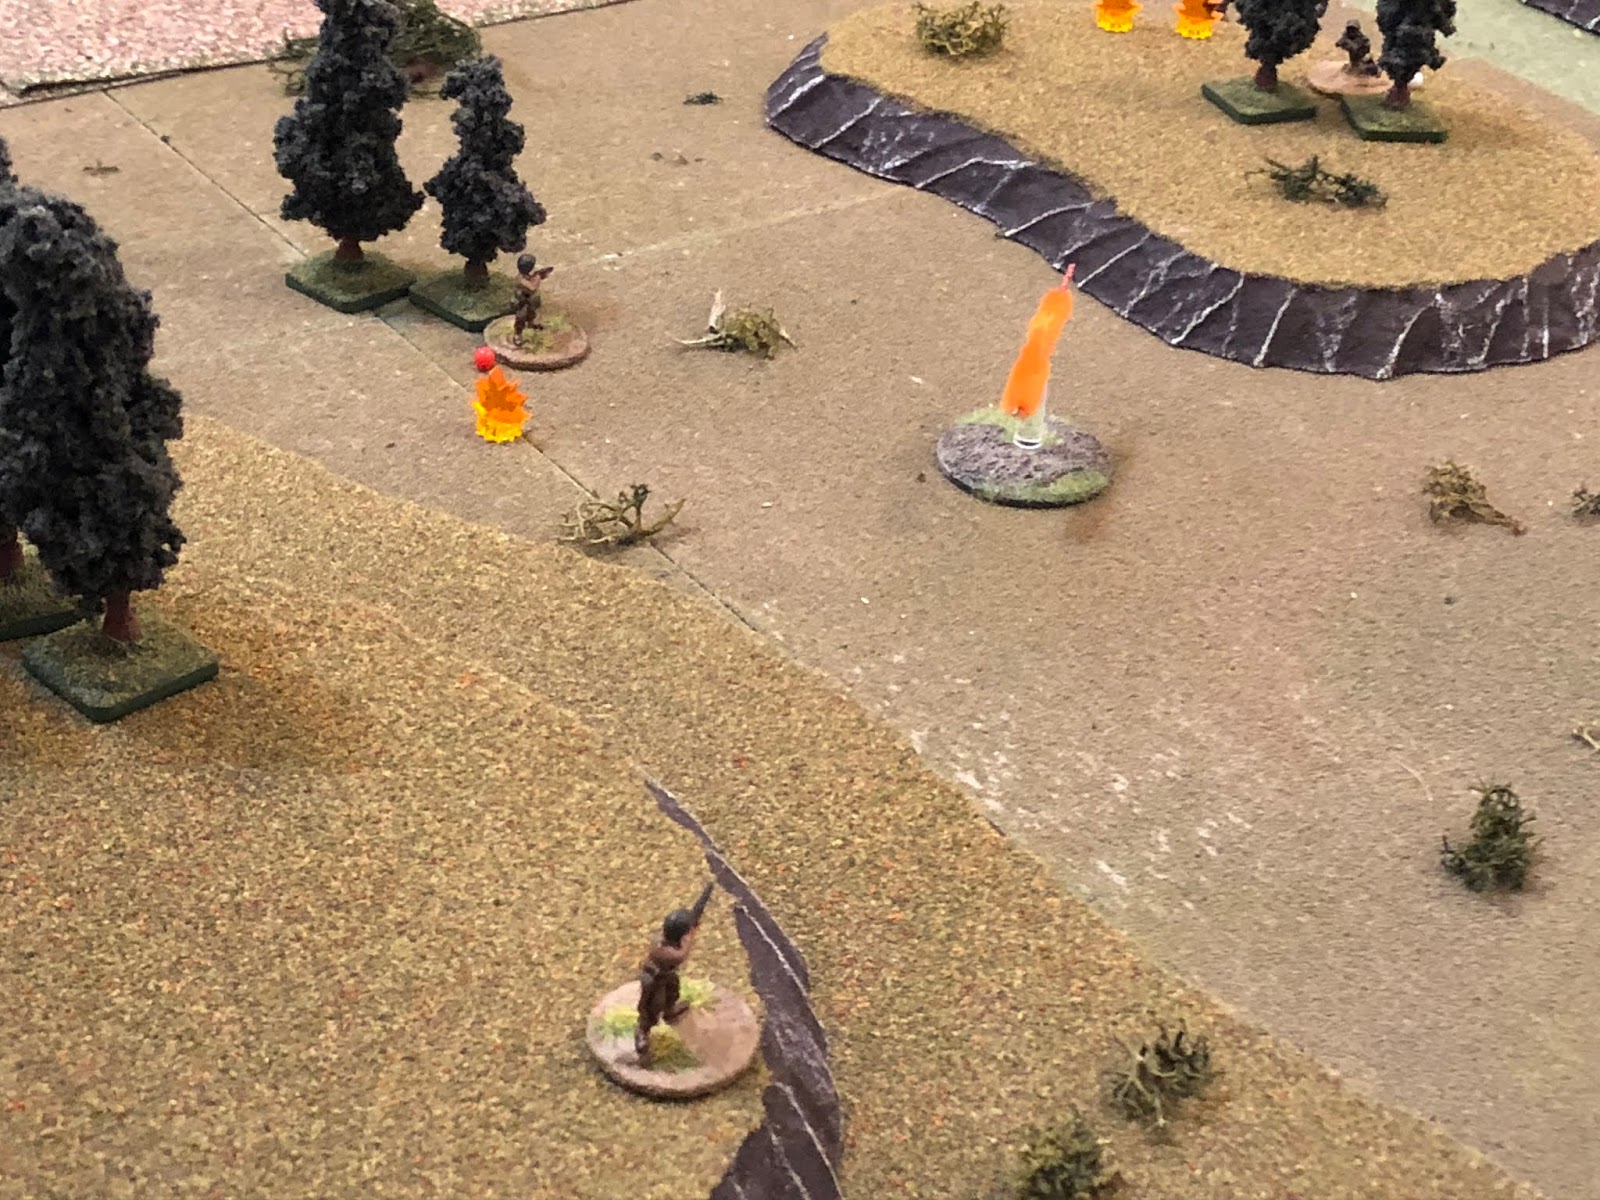
As always, the Germans got the drop on the Yanks: the rifleman on the knoll, with Lt Stransky right behind him, spots the GIs double-timing down the ridge and opens fire
And right off the bat, McGovern goes down!
Further up, the other German rifleman aims and fires, knocking down Lt Pelluer!
The German machine gunner is stirred by the racket his comrades are ginning up. He takes a quick puff on his cigarette and steps over to look: "Scheisse, Amerikaners!!!" He leans back over, grabs his MG-42, stuffs it into the window frame, and opens fire...
Baldinger is knocked down (white bead at bottom right, the other white bead is Lt Pelluer), while CPL Saxon (left most of the Americans) spins and returns fire, suppressing the enemy gunner (top left). The world is crashing down on the Americans, caught in a crossfire, but CPL Roberts does the first thing that comes to mind...
He launches a bazooka round a the knoll!
The rocket enters the trees and detonates, knocking Lt Stransky and his rifleman down!
Maas moves up to check on the Lieutenant...
But enemy fire drives him right back down, suppressed (red bead).
Saxon (bottom center), having already suppressed the enemy machine gunner (top left) with his rifle fire, reloads and keeps firing, letting out a horrible rebel yell. And by horrible, I mean that he'd heard his grandpappy do it many times, and he was doing his best, but despite being a bona fide war hero, he's still scared and he's only 17, so his voice is uneven and cracking...
Nevertheless, the gunfire and incessant moaning like a banshee/goat is enough to force the German back, out of the building!
Saxon then dashes up (top right), under fire, to check on the Lieutenant, and he's okay, back in the fight, while Graham (bottom left) moves back to check on Baldinger.The Mafioso is dead. Despite their dislike for the young man, the GIs are still all a bit shocked...
Which is enough of a break to allow the remaining German rifleman to dash back to help Lt Stransky and his comrade (top right, from bottom left, with Americans off camera to bottom right), both knocked down by the bazooka round)! In the north, the German machine gunner manages to rally himself 'up' to pinned.
CPL Saxon (bottom center, next to the Lieutenant and CPL Roberts, the bazooka man) spots the fleeing German rifleman and snaps off a few rounds from his Garand...
He doesn't hit the German, but he does convince him to dive down behind the knoll, suppressed (red bead).
And with things suddenly quiet, CPL Saxon (center) and CPL Roberts (center left) move up, closing the distance on the tank.
While Graham moves up to rally the assistant gunner, who quickly moves to join his team mate.
On the right, the German rifleman manages to rally himself...
As does the enemy machine gunner.
CPL Saxon can't see anything, but he keeps blasting away at the where the German rifleman disappeared...
Before dashing forward (center, from left) to investigate, as Graham (bottom center left, with bazooka team at far left) looks on.
But the German machine gunner (bottom left, with the other Germans at top left) spots CPL Saxon (center right) and rips off a long burst...
CPL Saxon dives for cover, suppressed!
Graham can't see the enemy MG (off camera to far left), so he (bottom right, with CPL Saxon at far left) firing on the enemy knoll (top left), laying down cover fire...
For the Lieutenant and bazooka team to push up (left, with Graham at bottom right and CPL Saxon at center top right).
Behind the knoll (CPL Saxon is visible at top center), the German rifleman crawls over to check Lt Stransky. "Sir, wake up. Sir, wake up! Sir" -SMACK- "wake up!" "I'm awake you fool, and don't ever slap me again!" The Leutnant is back in the fight.
In the north, the enemy gunner moves into the first floor of the building, setting off a ferocious firefight at point blank range!
The bazooka team is double-timing towards the building when Maas (the assistant) see the door open; he immediately raises his M-1 Carbine and begins blasting away...
Rounds thud into the heavy, wooden door as the German rips off a long burst from the MG-42, but he's "assault firing" it (firing from the hip) and rounds are spewing everywhere except where he wants them.
CPL Roberts hits the deck, suppressed...
But Maas keeps popping with his carbine, and the Lieutenant joins this duel to the death with his pistol!
The German machine gunner continues hosing down the local area, filling the air with hot lead but hitting nothing...
While the Yanks stand cheek to cheek, blazing away! They send countless rounds into the wooden door and the thick, stone walls, but the German remains just as unfazed as they are. Truly both sides are on death ground!
The German MG continues to spit, but then suffers a malfunction!
Lt Pelluer (right) continues firing his .45 as CPL Roberts and PVT Maas dash forward...
On the run, Maas rips a fragmentation grenade off his webbing, pulls the pin with his teeth, and slings it at the house. Somehow the grenade bounces in front of the door and into the room!
The young German soldier is too preoccupied with fixing the jammed MG-42 to notice the grenade that has joined him in the room. The building rocks with the concussion from the grenade, putting the enemy machine gunner out of the fight.
Back on the right, Graham keeps firing on the knoll.
He doesn't hit anything, but he keeps firing as he moves up (center, from bottom left). Seeing Graham coming at him is enough to rally CPL Saxon red bead) back into the fight.
The explosion in the building draws the attention of the rifleman at the knoll (bottom center, with the other rifleman knocked down at bottom left, the German Leutnant just off camera to bottom center left, CPL Saxon at far left, and Lt Pelluer at top left), who spots the American bazooka team (top center) running across the street. He raises his rifle and fires, but apparently the two GIs of the bazooka team are truly leading charmed lives! The German's rounds sail by harmlessly.
As Lt Stransky moves up to check on the other rifleman.
But CPL Saxon spots the German officer and begins firing his M-1...
With rounds zipping by his head, Lt Stransky shows a little crazy himself. He stands tall, levels his Luger, and begins returning fire on CPL Saxon!
The rounds pin the young American (yellow bead), while Graham (bottom center) opens fire...
Lt Stransky drops to the ground, pinned, but leans over and checks the rifleman, and he's back in the fight.CPL Saxon (yellow bead at bottom left) raises up and fires, as Graham readies a grenade (blue bead at bottom right).
CPL Saxon (far left) keeps laying it down as Graham dashes ahead (blue bead at center)...
And lays the frag up there next to Lt Stransky!
Lt Pelluer (bottom left) spots the enemy officer (top center, with CPL Saxon at center and Graham at center top right) and opens fire with his pistol. And just as the German officer is reaching down to flick the American grenade away...
He gets knocked down by Lt Pelluer's pistol fire (white bead!)!!!
Which is immediately followed by the grenade detonating, killing the nearest rifleman and suppressing the other!
LT Pelluer then moves up and rallies CPL Saxon (far right, from center...
As the bazooka team creeps up to the wall and reloads.
LT Pelluer and CPL Saxon (bottom left, with Graham at far right) continue pumping rounds at the knoll.
Keeping the Germans suppressed...
And allowing PFC Graham to sprint up and capture Lt Stransky and his remaining rifleman. Back on the left...
It's game over as the bazooka team takes the top off of Lt Stransky's panzer!!!
The doughboys quickly consolidate their positions, send back word for reinforcements to be brought up, and check their casualties. PVT Baldinger is, indeed, dead, the squad's first KIA, but McGovern turns out to be okay, he was just knocked out. CPL Saxon again performed admirably, as did PFC Graham, who seemed to snap out of whatever it was that happened to him during the fight to take out the German MG position. PVT Maas was meritoriously promoted to PFC and awarded the Bronze Star with V for charging the enemy machine gun in the building and taking it out.
And with that, the horrible fighting of 2 April 1943 is over for SGT Cherry's squad. But there's still more infantry and tank fights to come before the campaign in Tunisia is wrapped up!
V/R,
Jack


Great report- really getting into these section sized skirmishes.
ReplyDeleteCheers,
Pete.
Glad to hear it, Pete, they’re a lot of fun, pretty quick, and very personalized, so really into the storytelling. You stop thinking about what you want to do (at least sometimes) and start thinking about what THAT guy would do.
DeleteV/R,
Jack
Another excellent report, thanks for sharing.
ReplyDeleteMy pleasure, John!
DeleteV/R,
Jack