All,
Following the Brits' successful escape from the German encirclement, they immediately go on the counterattack, looking to catch the Germans dispersed and off balance. Lt Page organizes his men, gathers up what armor is available, and launches his men at the enemy forces.
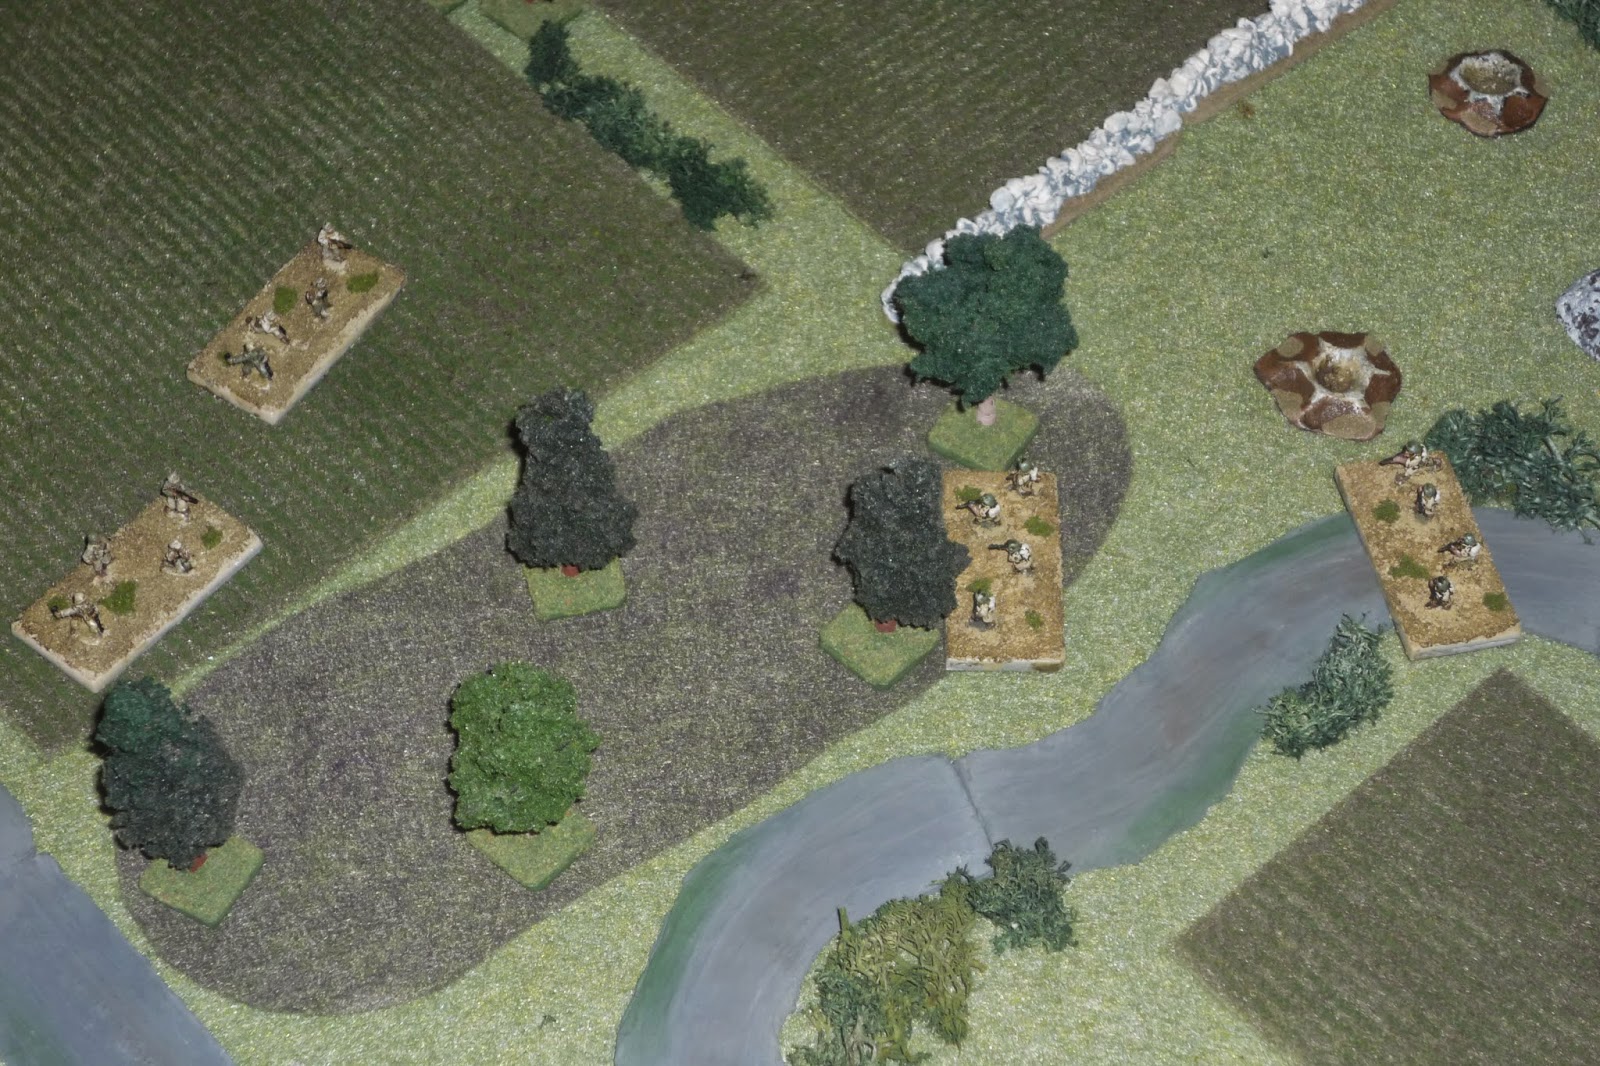
Overview, north is up and the German baseline, bottom is south and Brit baseline, though the Brit forces will be split, with one force under attack by the enemy, while the relief force makes its way to rescue them.
The Brits, with 7 rifle squads, a CO stand, an MG, and a Sherman tank (75mm).
The German force, with five rifle squads, a CO stand, and a mortar. The Germans do not have an anti-tank weapon: only the PaK-38 is available as its 1943, so no Panzerfausts, and I don't have any Panzerschrecks for my Afrika Korps troops (though I suppose I could have borrowed one from my late-war Germans, now that I think about it). The Germans only hope to defeat the British Sherman is to close assault it with infantry. The Germans went with a more mobile force, opting to defeat the British (win the game) by destroying the Brit hold outs before the Brit relief force can get there, then fall back, conserving their force. It wouldn't quite work out that way though...
Starting positions: in the top left (NW) corner are the Brit hold-outs and the German force, while the Brit relief force enters from the bottom right.
Three Brit rifle squads and their MG on the hill, with the Germans to the north and east. There is 1 rifle squad and the mortar at the top, two more rifle squads and their CO behind the wall faced up to the Brits, and two squads keeping an eye to the south (where they expect the Brit relief force to come from).
The Brit relief force: Lt Page, four rifle squads, and a Sherman. They'll be busting brush to get to their mates on the hill.
The Brits start the game LCpl Dawson and Cpl Everson's 4th and 5th Squads (of the relief force) moving up (bottom right, with Germans at top left). The Brit plan (at least so far) is to advance the relief force with their activations and leave the hold-outs to fend for themselves via reaction (snap and guard) fire.
The Germans roll a normal activation, but then disaster strikes! A random event ("distraction") is rolled, and so the German mortar crew, in its haste to displace, does not have ammo ready and is unable to act this turn. This is crucial, as the mortar was key to pounding the Brit hilltop hold-outs so the German infantry could get in close and eliminate the Brits.
So the plan changes, and the German 4th and 5th Squads (top left), led by LCpl Droll and Cpl Egan, move up to counter the Brit relief force (far right). They both sprint, but neither make it to the cover of the treeline...
Then the Brit Sherman is escorted forward by Cpl Everson's squad, with Lt Page and LCpl Dawson's squad in trace.
The Germans get their 80mm mortar (top right) going, and it causes Cpl Bates' 2nd Squad (far left, with red bead) to fall back, while Cpl Colgen's 3rd Squad (bottom center) fires on LCpl Crews' 3rd Squad (center, with white bead) and gets a knockdown!
At first glance, the Brits get just what they needed, a 'scurry,' which will allow them move everyone without drawing reaction fire. But they also roll a random event ("Ouch!"), and so a stray round sets off some spare ammunition, giving Cpl Allen's 1st Squad (above the squad with the white bead) a knockdown too!
The Brits on the hill try to rally/recover, and 2nd and 3rd Squads do, but 1st Squad is still in knockdown.
The entire relief force moves up (across the entire bottom).
The Germans react: their 4th Squad loops around (bottom center), splitting the difference between the Brits on the hill and the Sherman, while their 3rd Squad (center top, sitting astride the hedge) moves up and their 5th Squad (top right) backs up into cover, though this was probably the wrong move as it isolated them from the main body...
LCpl Arretz leads the German 1st Squad out of the house in the north and up the hill, trying to get into close combat with the Brit 1st Squad, but the Vickers opens up and knocks them down!
And it's time to go for the tank, so LCpl Droll leads the German 4th Squad in a charge to close with the Sherman, but the coax chatters and the German squad gets a knockdown also! Sgt Nelson then orders his driver to pivot and advance, and the Sherman rolls over the suppressed German squad, then backs up, and runs over them again. Then backs up, and runs over them one more time.
While Cpl Foster leads the Brit 6th Squad (far right) up to the wall to fire at the German 5th Squad, to no effect.
Back on the hilltop, the German mortar gets going again (probably should have done that last turn, instead of rushing their 1st Squad up there, but the Vickers really stood a small chance of stopping them. But did...). In any case, the Brit MG is forced to flee and hunker (top left with red bead). Meanwhile, the German CO, Captain Penzig, rushes up to his 1st Squad (top right) and recovers them. The German 2nd Squad (bottom right, under LCpl Benz), fires on the Brit 2nd Squad (center with yellow bead) and gets a 'flinch.'
Sgt Nelson sets his gunner to work, and the Sherman's main gun roars, and the German 3rd Squad is eliminated (top center, on the hedge), and the German 2nd Squad (top, with yellow bead) gets a flinch. The Brit 1st Squad (off camera at top left) rallies.
But the German mortar keeps pumping 80mm rounds out, and LCpl Crews' 3rd Squad is eliminated, and 1st Squad is forced to flee (bottom left). Captain Penzig leads his 1st Squad to the top of the hill, where they fire down on the Brit 2nd Squad (white bead at bottom left), getting a knockdown. The 1st and 2nd Squads, and the MG are in bad shape with two hunkers and a knockdown.
This is a key shift, as just a second ago the Germans on the hill were in a bad morale state and their troops covering the Brit relief force is being scattered and pummeled, while the Brits on the hill were doggedly holding on, with the relief force not far away. Quickly the tables seemed to have turned, at least on the hill.
Sgt Nelson's Sherman blasts the German 1st Squad, causing them to flee (top right), while the German CO goes to his 2nd Squad (far right on road with yellow bead). Lt Page, the Brit CO (top center) leaves the cover of the tank and sprints to go save his 1st and 2nd Squads and the MG (by rallying them before they can be easily destroyed).
LCpl Dawson moves his men forward (bottom right), taking a shot at the German 2nd Squad (top left), missing.
Then the Germans get screwed by rolling a scurry; they can move everyone, but can't fire and can't move into close combat (to finish off Brit hill troops hunkering/knocked down)...
The German 1st Squad rallied itself (top center), while Captain Penzig rallied his 2nd Squad and led them off the road and atop the hill, while Cpl Egan had his 5th Squad (bottom right) fall back.
At this point the Germans have no way to win this: they failed in their one chance to close assault the tank, and the scurry destroyed their ability to regain the initiative by putting the Brit hilltop troops out of the fight. Now the Germans are caught in an awkward middle ground, and may not be able to even escape (that Sherman is pretty fast compared to troops on foot).
The Brits react with Lt Page moving up to 1st and 2nd Squads (top left), then LCpl Dawson's 4th Squad escorting Sgt Nelson's tank forward.
5th, 6th, and 7th Squads darted forward as well, chasing down Cpl Egan's German 5th Squad and pinning it to the wall.
Sgt Nelson's 75mm gun roars again, and Captain Penzig and his 2nd Squad surrender to the Brits.
The same occurs on the right, where Cpl Egan's 5th Squad surrenders. The German mortar team and 1st Squad were able to flee the battlefield, escaping the British.
A soaring success for the Brits, with the hold-outs 1-3 Squads, Vickers MG) holding out long enough for the relief force to punish the Germans and rescue them. The Germans suffered atrociously, while the Brits lost but a single rifle squad. Once again, as I type this, I realize it may not look like a close3 game (because of the lopsided casualties), but I can tell you it was very tense, with four key events going against the Germans:
1) the random event that kept the mortar from raining destruction on the hilltop (you could see how effective it was in suppressing squads when it was in action).
2) The Vickers MG rolling 1 dice in reaction fire, stopping the charging German squad cold in its tracks, saving the Brit 1st Squad (which was in a knockdown status and would have been eliminated upon contact).
3) The Sherman firing its MG, rolling 1 dice in reaction fire, stopping another charging German squad cold in its tracks, more than likely saving the Sherman (close combat would have seen opposing D6 rolls, with the Germans getting a +2 for initiating combat).
4) The Germans rolling a 'scurry' when they had the Brit 1st Squad and MG hunkered, and the 2nd Squad knocked down. This meant no firing and no moving into close combat, when any German unit moving into contact with the 2nd Squad would have won automatically, and any German unit moving into the 1st Squad or MG would have been +3 in its opposed die roll.
So, it was pretty close, despite how the end tally looks. A great game pretty quickly, leading to the final fight of the operation, a Brit prepared assault on the main German line. Stay tuned!
V/R,
Jack


Jack, it did come across as a pretty tense game that could have gone the other way. I am glad you put the summary at the end though, it realll did highlight how it could have gone badly for the Brits. Another great read, as always!
ReplyDelete