All,
In our last fight, Captain Penny's men took the German forward line, but before the position could be consolidated, the German commanding officer, Captain Penzig, swiftly organized and counterattack.
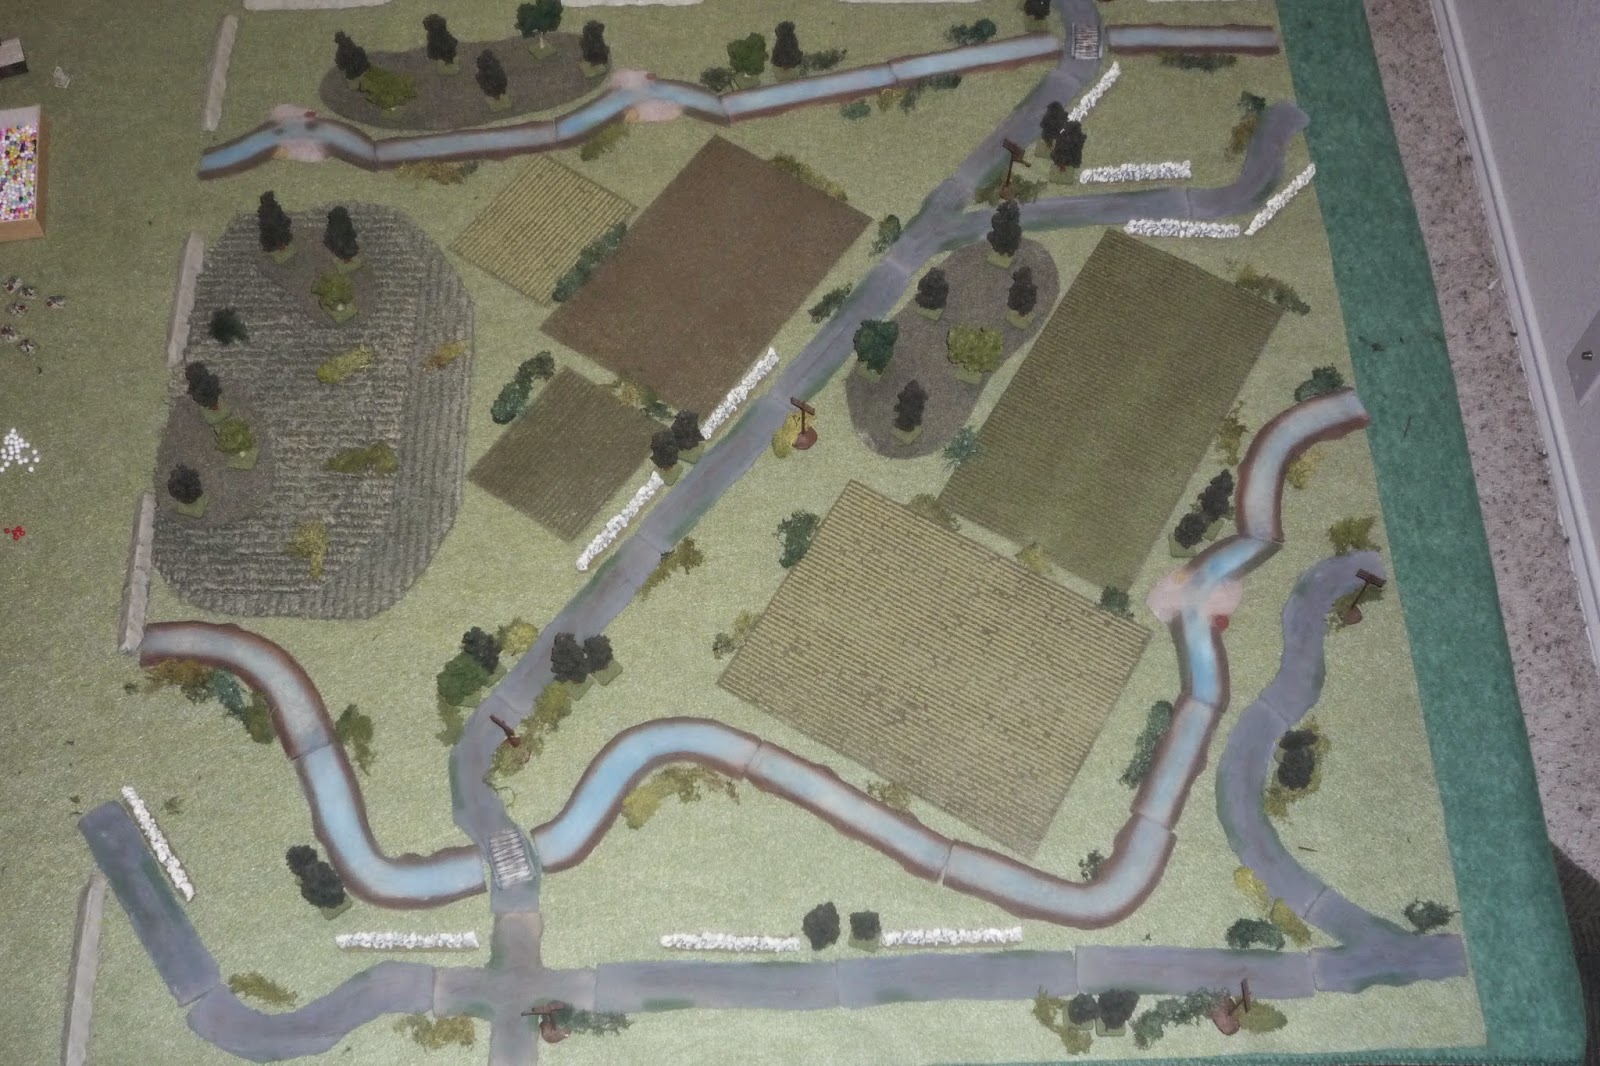
Overview, with 'up' being north and the German baseline, south being the Brit baseline.
The Brit force, consisting of their CO, Captain Penny, a PIAT team, and five rifle squads.
The German force: the CO, 7 rifle squads, an MG, and a Pz Mk IV (w/short 75mm). This force will be split into two elements, the 'holding force,' consisting of two rifle squads and the MG, and the 'relief force,' consisting of the CO, 5 rifle squads, and the Panzer.
Starting positions: the German have Cpl Albrecht and Cpl Borger's squads, and Sgt Jernigan's MG, on the hill (far left), while the Brits have (counterclockwise from bottom left) Sgt Abbott's squad, Sgt Belmont's, Cpl Cooper's (on hill next to Germans), Sgt Dupont's, and Sgt Enis' squads, with the CO behind Enis and Cpl Leon's PIAT team behind Sgt Dupont's squad. Then the Germans have Cpl Colgen, Sgt Dietrich's, and Cpl Egan's squads at top center left, looking to cross a ford, with the CO, Sgt Nuen's Panzer IV, and Sgt Falmstadt's and Sgt Gohrman's squads accompanying them coming up the road at top right center.
A closer look at the hill.
And the German baseline.
Right off the bat, the Brits roll the worst command possible, a 'scurry,' which will allow all their units to move (though not into 'brawling,' AKA, close combat). The problem is that the Brits don't need to move, they need to shoot to pin/suppress the Germans on the hill, THEN move to assault them. The other problem is that every German unit in that sees a Brit move will then also get to move (in reaction), then the Germans will get to have their own turn, so this will help the German Relief Force get here even sooner... Yay!!!
By the way, the Brit plan is to hurriedly eliminate the Germans on the hill, then turn to face the relief force, getting the PIAT in close to take out the Panzer. The scurry doesn't help us very much...
Might as well move in, so Sgt's Abbott and Belmont (bottom left) start their squads crossing the river, and everyone else moves in (the Germans can't react fire on a scurry). I did ponder having them sprint towards the relief force, but it didn't jive with the idea these guys are worn out and barely hanging on, plus they'd probably just get mowed down in the open on their way to meet their comrades. So they sit tight.
Cpl Colgen and Sgt Dietrich's squads are able to pass the ford, but Cpl Egan's boys are taking their sweet time. The force on the road was not in position to react, so they sit tight.
Then all hell breaks loose on the hill; Sgt Jernigan's MG-42 (left center) and Cpl Borger's squad (top left) open up, getting knock downs on Sgt Dupont and Sgt Enis' squads (white beads at white). So much for knocking the hill out early...
Then the Brits roll a firefight, which isn't terrible as everyone gets to fire, but no one gets to move, and the Germans I don't knock out get to return fire. Sgts Abbott and Belmont's squads, still in the river (bottom left) open up on Cpl Albrecht's 1st Squad and manage a knockdown (far left, with white bead). Meanwhile, the CO tries to recover Sgt Dupont's squad, but they remain at knockdown... Miraculously, the German MG and 2nd Squad on the hill, as well as Cpl Colgen and Sgt Dietrich's squads (at top right) fail to hit anything. But...
Then the Germans roll a damned scurry, allowing them to move all their guys, which is really handy for the relief force getting to their comrades on the hill... Cpl Albrecht tries to recover his squad (far left, with white bead), but remains knocked down, while Cpl Colgen (top center) and Sgt Dietrich and Cpl Egan's squads (top right) move up.
And so does the Panzer force (top center)...
Sgt Enis' squad (center left, next to commander stand at base of hill, with Germans at their 10, 12, 1, and 2 o'clock) manages to recover from its knock down, but Sgt Dupont's squad doesn't, and melts away, while Cpl Cooper's squad and Cpl Leon's PIAT team fall back across the road (bottom center) in preparation for the Panzer coming down the road (top right).
The Germans on the hill reorganize.
But the Brits figure it's go time: Sgt Abbott leads his squad into close combat, and wins! Cpl Albrecht's squad is out of the fight.
And then Sgt Belmont leads his squad past Abbott's and into close combat with Cpl Jernigan's MG-42. But they don't get there, as Jernigan's MG cuts them down (with Snap fire)...
Smelling blood in the water, Sgt Dietrich's German 4th Squad (far right) fires at Sgt Enis squad (bottom center, with Capt Penny next to him), getting a knockdown, so Cpl Colgen's German 3rd Squad swiftly closes the distance into close combat, eliminating the Brits. Captain Penny and his command group run screaming down the hill...
Sgt Abbott's squad, having just seen their mates in 2nd Squad mowed down by the MG-42, look for retribution, and get it! They fire and eliminate Cpl Jernigan's MG team.
Then they charge into close combat with Cpl Borger's German 2nd Squad (far left, with Cpl Colgen's German 3rd Squad at right), and defeat them!
But then the German 3rd and 4th Squads move up the hill and fire on Sgt Abbott's squad, and they are out of the fight too...
With all Brit forces on the hill eliminated, only the CO, Cpl Leon's PIAT team, and Cpl Cooper's 3rd Squad remain on the battlefield (far right). Cpl Cooper's boys turn their weapons on Sgt Falmstadt's men of the German 6th Squad (leading the tank down the road), and they are eliminated!
And this clears the way for Cpl Leon's PIAT team to move up and fire on Sgt Nuen's Panzer IV. The German tank is damaged, but it's enough to force the crew to bail out!
The Germans get a 'normal' roll, but also a random event, which causes the PIAT team (top center) to fall back to cover and hunker (red bead). Then Cpl Colgen (bottom right) and Sgt Dietrich's (far left, with Brit Cpl Cooper's squad in center with Capt Penny) move up and fire on Cooper's men, getting a knockdown (white bead)...
Capt Penny (center left) tries to recover Cooper's boys but fails, but they manage to right themselves. Similarly, Cpl Leon tries to rally his men from their 'hunkered' status, but only manages to move up to 'flinch.'
Then the Germans roll a 'scurry,' which allows them to encircle the Brits (the three stands at center).
Cpl Leon again tries to rally his PIAT team (far right top), but again rolls flinch, while Cpl Cooper and Cpl Leon's fire is ineffective. The Brit fire causes Cpl Colgen (top left, behind wall) and Sgt Dietrich's (bottom left) squad's to snap fire, and the PIAT team is out of the fight...
Then the Germans roll up a firefight, and four rifle squads fire to no effect, and then Cpl Cooper's squad fires on Sgt Dietrich's boys (bottom left), and get a knockdown! Maybe a door has opened?
I screwed up again; German 3rd and 4th Squads snap fired and shouldn't have been able to take part in the firefight roll, but what the hell...
Fighting for their lives, Captain Penny leads Cpl Cooper's squad southwest into contact with Sgt Dietrich's German 4th Squad, and the Germans are put out of the fight!
But the Germans are able to catch them; Cpl Colgen's squad (top left) moves up and fires, and gets a knockdown on Cpl Cooper's squad (white bead), while Cpl Egan's squad sprints ahead, trying to get into close combat, but falling short (far right).
Captain Penny decides the jig is up; "Come on lads, into the bag," as he stood and raised his hands...
Some serious ups and downs in that one. Bad command rolls early (too many scurries, 'down'), then Sgt Abbott's squad wins a close combat atop the hill (up), then Sgt Belmont's squad gets mowed down (down), then Abbott's squad gets the German MG and last squad on the hill (up), then gets eliminated (down), then the PIAT gets the Panzer (up), then the Germans get a scurry and surround us...
I may have lost, but it sure was a lot of fun. More to come.
V/R,
Jack


No comments:
Post a Comment