All,
We've come to the final fight of the operation. Let's review: the Brits started with a hasty attack supported with light armor, in which they did okay, forcing the enemy to fall back. This Germans immediately counterattacked, and the Brits again did okay, but lost their CO when he was cornered and forced to surrender. This was followed by a rapid attempt by the Germans to close the loop and encircle the Brits, but they ferociously fought there way out of the closing trap. The Brits immediately counterattacked, making good use of supporting armor to throw the Germans back to their last line of defense.
Lt Page spoke to his key leaders, letting them know armor support would be on hand, but that's because the German line was expected to be formidable, with recon parties reporting the Germans were well dug in.
At dawn Lt Page led his men across the line of departure, hot on the heels of the pre-assault stonk. It was mere seconds before the chatter of machine guns interrupted the early morning calm...
Overview, once again with the German defenders starting on blinds; rifle squads and dummies are white, two support weapons and dummies are black, I'll place their CO where it makes the most sense once the enemy troops are placed on the table. Once again north is up, with the German baseline at top and Brit at bottom.
The Brit assault force, with a CO, a Vickers MG, a 3" mortar, an M4 Sherman, and 9 rifle squads.
The German force: a CO, an MG42, a PaK-38 ATG, and 5 rifle squads.
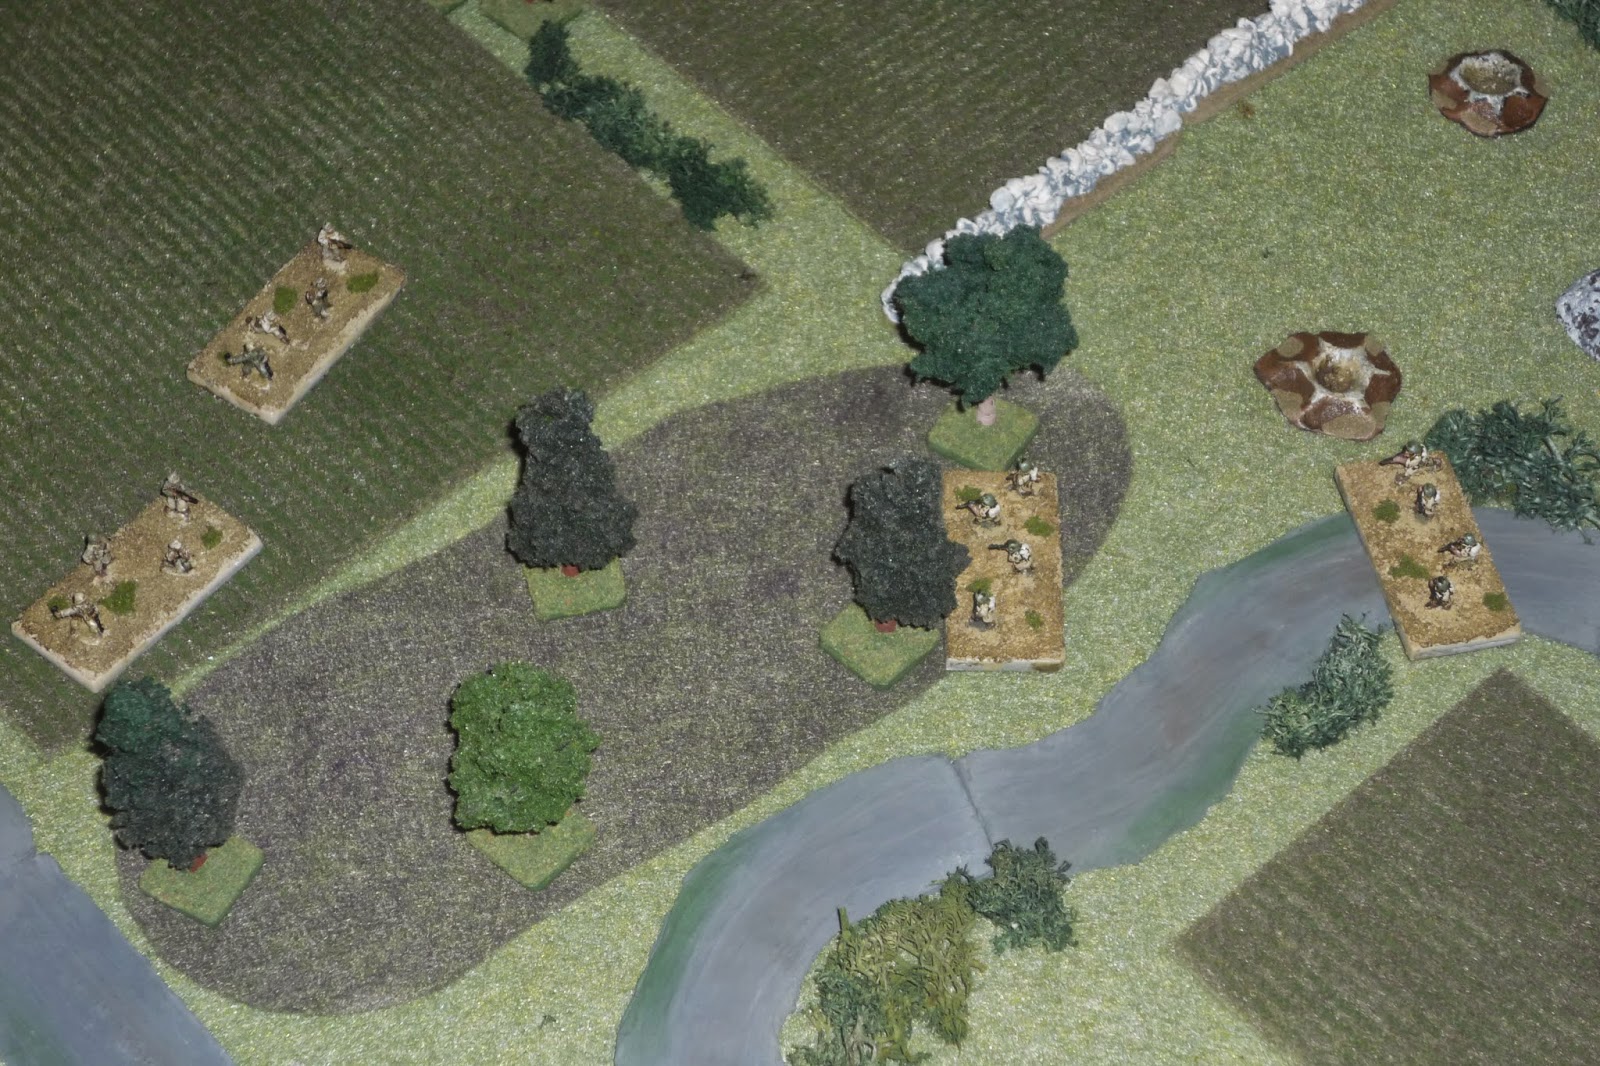
The Brit assault forces, at the moment they crossed the Line of Departure.
The defenders are placed: a rifle squad in the far left bunker; the MG42, the CO, and a rifle squad in the center bunker; a rifle squad on the road behind the wall between the center and far right bunker; a rifle squad in the far right bunker with a rifle squad at the wall in front of them; and the PaK-38 in the house at top right.
German positions on the left.
And the right.
The ATG in the northeast (tip right) corner.
I resolved to play this game correctly (regarding activations), with each side getting one activation per three units on the table (not including the CO, who gets a free move each turn.
Let's get it on!
The attack gets off to an auspicious start; LCpl Dawson's 4th Squad (center left, behind wall) moved up and the German 1st Squad (top left) snap fired on them, forcing them to flee. Then Cpl Everson's 5th Squad (center, with casualty figure on it) move up, and the German 2nd Squad (center bunker) snap fires, putting them out of the fight! Sgt Nelson moves his Sherman up, the coax MG rattling, getting a pin on the German MG42 (center bunker), while Cpl Foster's 6th Squad follows them.
Due to the loss of Cpl Everson's squad the Brits are already down to 3 activations per turn...
The German CO, Lt Prinzen (Capt Penzig was captured in the last fight) rallies the MG (top left) and the MG42 opens up on 6th Squad (bottom right), pinning them while LCpl Ersatz led the German 5th Squad (top right) forward.
Lt Page rallies 6th Squad (far right, behind Sherman, with German squad just above them, and 4th Squad below them with the red bead), while the Sherman fires on the MG in the center bunker, forcing them to fall back (to the left of the bridge). The Brit MG (just to left of 4th Squad) and LCPl Crews' 3rd Squad (bottom left) move up, but the German 1st Squad (far left bunker) snap fired, getting a knock down on 3rd Squad!
The German CO ran from the center bunker back to the wall, trying to rally the German MG42 hiding there, but they ran again (far left, behind building)!
LCpl Benz' German 2nd Squad in the center bunker (far left) fired on the Brit 6th Squad (bottom right), forcing them to flee, which clears the way for the German 5th Squad (top right) to close assault the British Sherman!
And that's exactly what happened. LCpl Ersatz advanced his squad into close combat with the Sherman tank, and there was nothing anyone could do as the Sherman was facing the wrong way to snap fire, and the two Brit rifle squads (4th and 6th) at bottom left were both hunkered (and 4th was facing the wrong way).
Lt Page and his headquarters section rush into the fight, but to no avail. LCpl Ersatz' riflemen swarm the tank, opening hatches and dropping hand grenades in, while using their machine pistols to gun down the British commander...
The Brits roll a scurry, so 4th and 6th Squads try to rally and are successful.
On the far left, the 3rd Squad recovers (bottom center), while the MG, 1st, and 2nd Squads moved up (bottom left, opposite the German 1st Squad at top right).
On the Brit right, the 3" mortar, 7th, 8th, and 9th Squads move up and turn left to encircle the German 5th Squad (at the knocked out Sherman, with 6th Squad at bottom left and 4th Squad just off camera at bottom left).
Regarding the mortar, I hadn't done anything with it as it's not really useful against all the Germans in the bunkers, plus the ATG has yet to be spotted. But I am kicking myself in the ass because I could have used the mortar against the German 5th Squad, which was in the open the turn before it charged the Sherman...
However, LCpl Ersatz feels the pressure and falls his men back (from the Sherman to top center).
The German CO continues to try to catch up to the cowering MG42, in order to rally them and get them back into the fight.
Then the Brit MG (bottom left, with 1st and 2nd Squads just ahead of them and 3rd Squad to their immediate right) find itself in trouble; caught in the crossfire between the two German bunkers, LCpl Jay's machine gun team is out of the fight...
Having just watched their buddies in the MG get gunned down, Pvt Alston (yes Pvt Alston is now leading 1st Squad) leads his men forward (far left) and fires on the German 1st Squad, forcing them to flee!
While Cpl Bates' 2nd Squad (bottom left) and LCpl Crews' 3rd Squad (bottom center) rush on the German center bunker and fire, getting a pin.
The the Germans rolled a scurry, and while the MG42 finally rallied, their 1st Squad which had fallen back from the bunker at bottom right, failed its roll and retreated all the way back to the MG42 and their CO.
On the Brit right, the German 3rd and 5th Squads (center) move up into a flanking position to challenge the Brit 7th, 8th, and 9th Squads (bottom right).
And the Brits react, with their 1st Squad (far left) moving up to the rail line, while 2nd and 3rd Squads move in closer on the German center bunker (center of picture), and 4th, 6th, 7th, 8th, and 9th Squads start to straighten the line on the right.
The Germans have a squad totally un-involved in the bunker at top right. It's been a conundrum; you don't really want to leave the bunker, and you have only a couple activations per turn anyway, but you also don't want them to be only spectators...
The leaderless Brits figure it's time to get stuck in, and it starts with LCpl Alston's 1st Squad moving up and firing on the German 1st Squad (under Pvt Aprohe), forcing them to hunker. This presents an interesting situation as the German 1st Squad is extremely vulnerable, and no one is in position to protect them (the CO can't fire, and the CO is blocking the MG's line of fire).
Pvt Alston screams, "Let's go lads, follow me!" and charges into close combat.
But a @#$% draw is rolled (the Germans through in their CO to help), so because the German squad is in cover, the Brits must fall back (bottom right)... @#$% it!!!! I hate this game...
Undeterred, the Brit and German 2nd Squads exchange fire to no effect, and then Cpl Bates leads 2nd Squad into a brawl, and the Germans are evicted from their bunker!
And then the Brits got a break: the Brit 3" mortar finally gets into action, and begins dropping rounds on the German MG42 (far left), and the barrage is enough to cause the MG42 and the German 1st Squad to break and flee, barely hanging on to the edge of the map. Lt Prinzen follows them.
But then the Germans roll a firefight, and the MG and 1st Squad rally!
Then the ATG (top right) decides to make its presence felt; the gun commander, Cpl Leib, yells "fire!" and a 50mm shell hurls at the Brit 3rd Squad (bottom left), but doesn't affect anyone.
On the far right, the German 3rd and 5th Squads get into a firefight with the Brit 7th, 8th, and 9th Squads, at very close quarters. The Brit 7th Squad gets a 'flinch' (yellow bead), while the 9th Squads gets a 'knock down' (white bead). The Brit return fire is ineffective...
Pvt Alston leads 1st Squad forward to fire on the Germans at the board edge, and simultaneously mortar rounds begin falling on the German position, causing the MG42 to flee off the map.
Back on the right, Sgt Ingersoll's 9th Squad recovers from knock down.
German roll firefight, and the PaK (top right) fires on 3rd Squad, forcing it to flee (from center of the picture to the bottom left).
While the German 1st Squad fires on the Brit 1st Squad, with the Brits gaining the upper hand with a knockdown.
On the far right, the German 3rd and 5th Squads shoot it out with the Brit 7th, 8th, and 9th Squads again. The Brit 9th Squad is forced to flee, but both German squads receive knock downs, essentially sealing their fate.
Pvt Alston leads 1st Squad into close combat with the German 1st Squad and their CO.
And the Germans were eliminated!
Back on the right, the Brits charge in, eliminating the German 3rd and 5th Squads in a pushover (due to both enemy squads being knocked down).
The German 4th Squad (top right), watching their comrades get butchered by these crazed Tommies, throw down their weapons and raise their hands before the Brits have a chance to close the distance, while the sole remaining German unit, the PaK-38 anti-tank gun crew, flees off the map.
So, how was it for you? I had a great time, playing five battles in two days (it took about as much time, if not a little more, to type all these batreps up). I am perfectly happy with the rules, with the only adjustment I need to make being to add more scenarios, which I'll work on and solicit help with.
I think it's pretty cool to be able to get in a five-game Operation so quick. I believe I'm going to transition my French Foreign Legion campaign to these rules.
If you got this far, thanks for sticking with me ;)
V/R,
Jack