The German force:
Battalion Commander (2)
Rifle Company Commander (2)
3 x Rifle Platoons (15)
1 x Mortar Platoon (3 x 8.0cm tubes) (4)
1 x Armored Car Platoon (4 x Sdkfz 234) (8)
1 x Panzerjaeger Platoon (4 x Marder III) (8)
BR=39
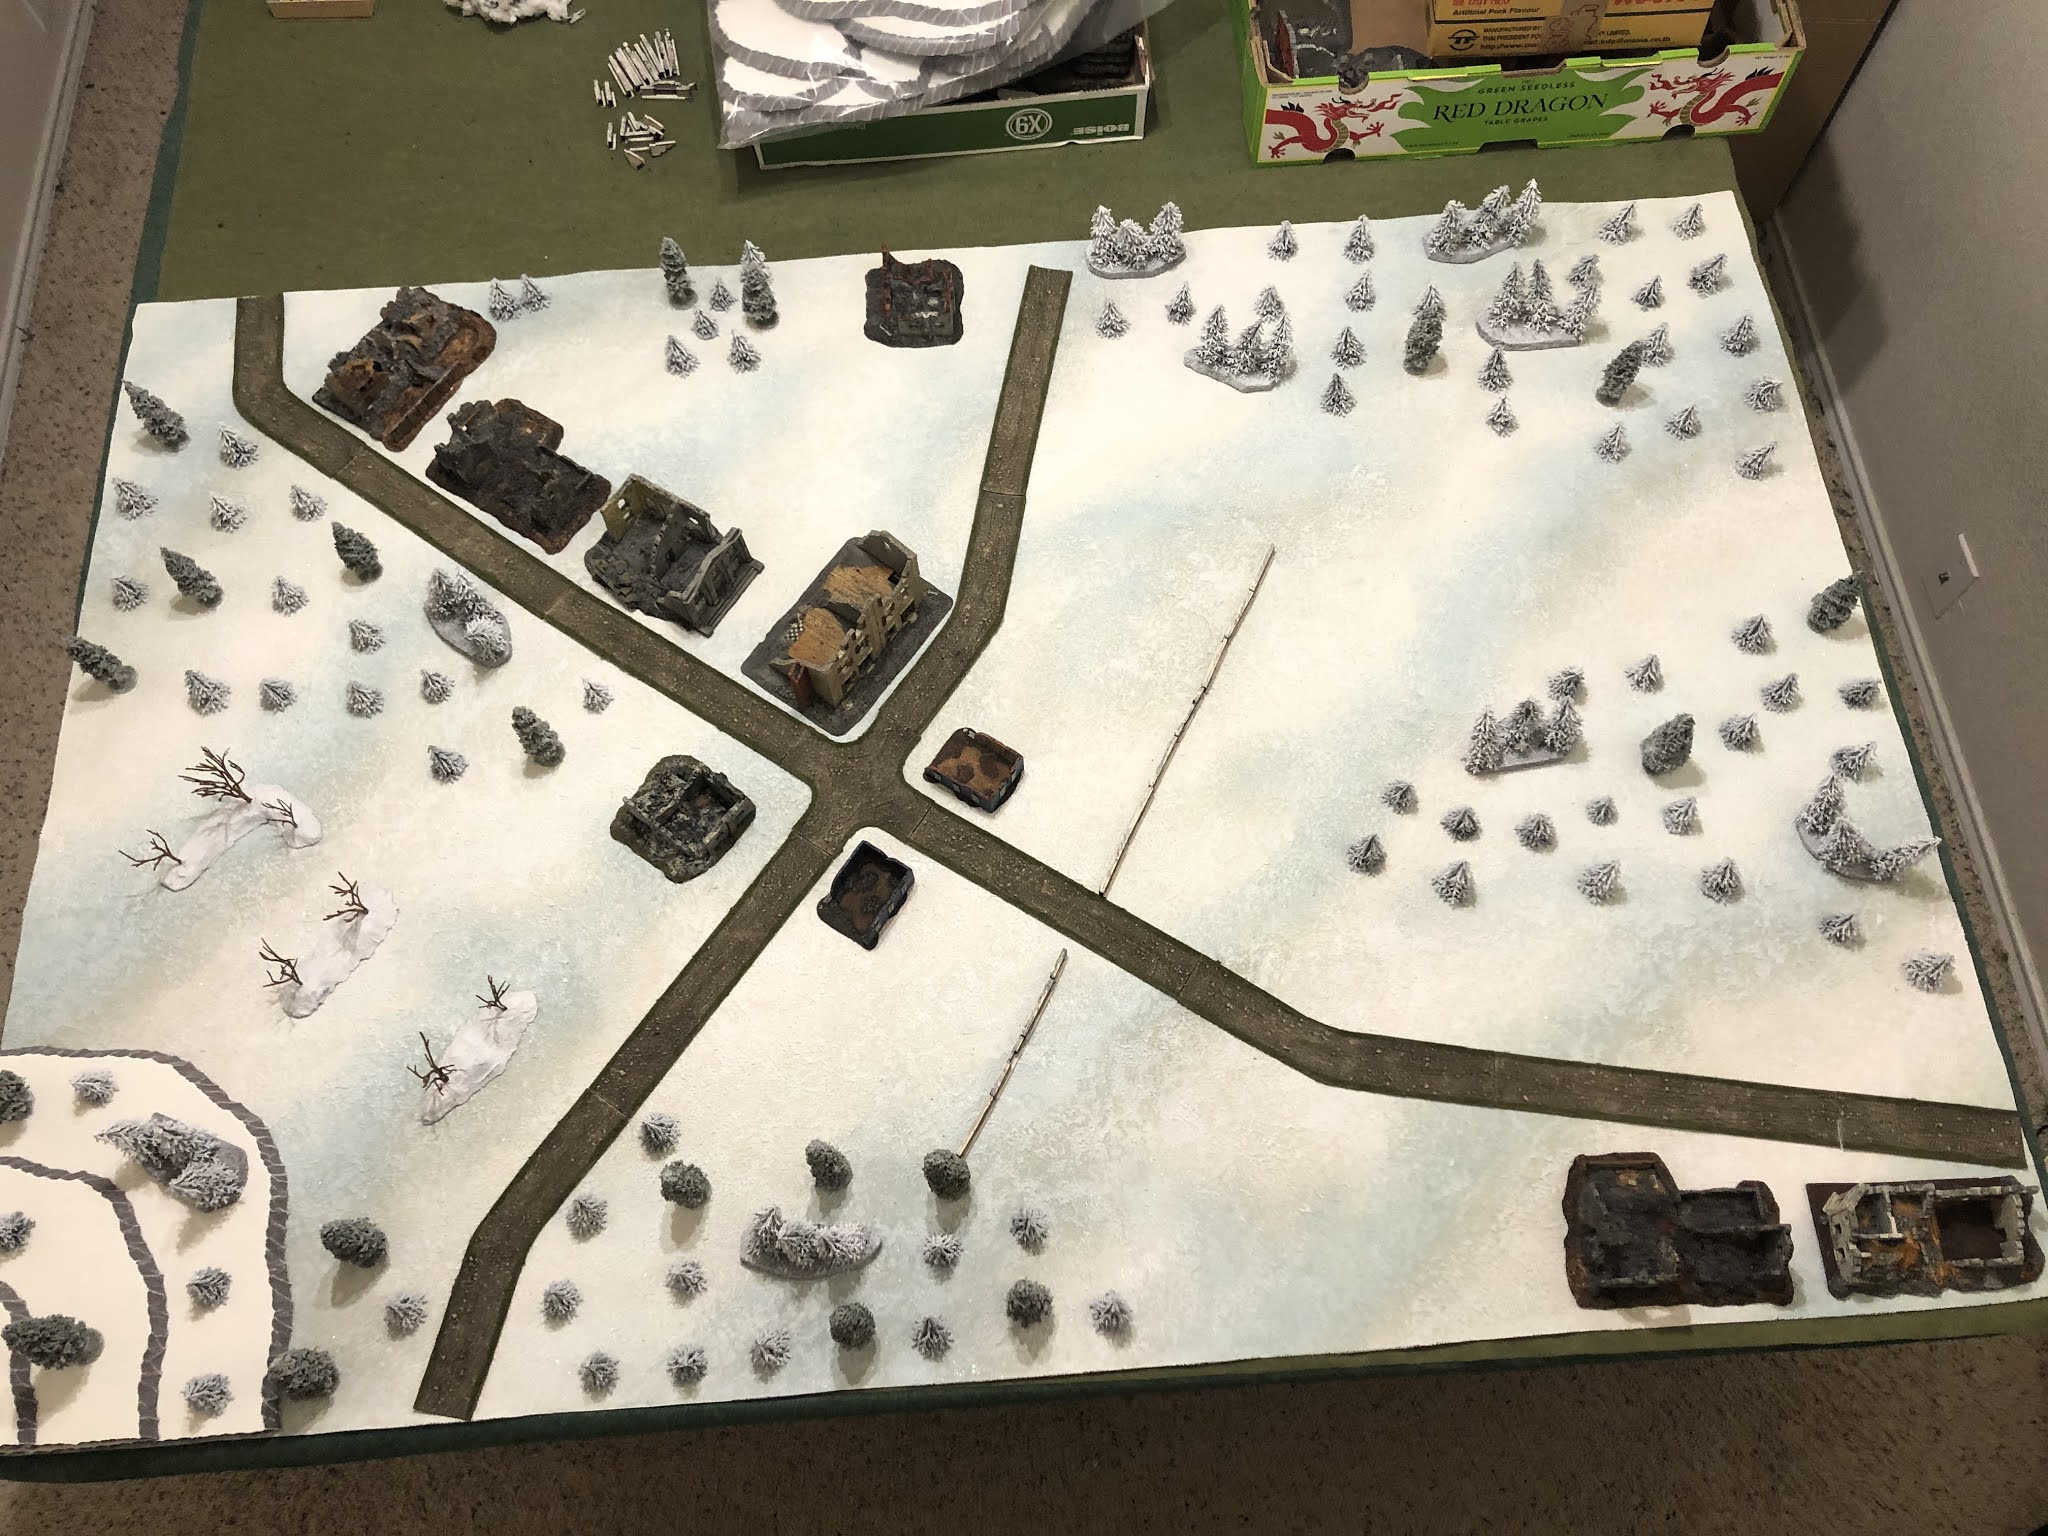
Overview, now with troops. The Americans are starting with only a single rifle platoon on the board (crossroads), manning outposts. HQ has gotten word of something afoot from the Germans and has dispatched reinforcements, which start off table but enter on Turn 1 anywhere on the left baseline. The Germans are starting with all forces on the table, spread across the east (right) end of the table.
The US presence in Losheim: 1st Platoon, with rifle squads at top left, center, and bottom right. Their bazooka team is in the building at center, while the command team is just below them.
The rest of the US force, commanded by Lieutenant-Colonel Denver, waiting to come on the table.
The German deployment on their baseline.
On the German left is their 1st Platoon (in buildings), the Armored Car Platoon (on road), their Mortar Platoon (just below the road), and their Rifle Company Commander (bottom right).
2nd Platoon is in the woods in the center of their line (bottom left), then the Marder Platoon, the battalion commander, Major Wurst, and their 3rd Platoon.
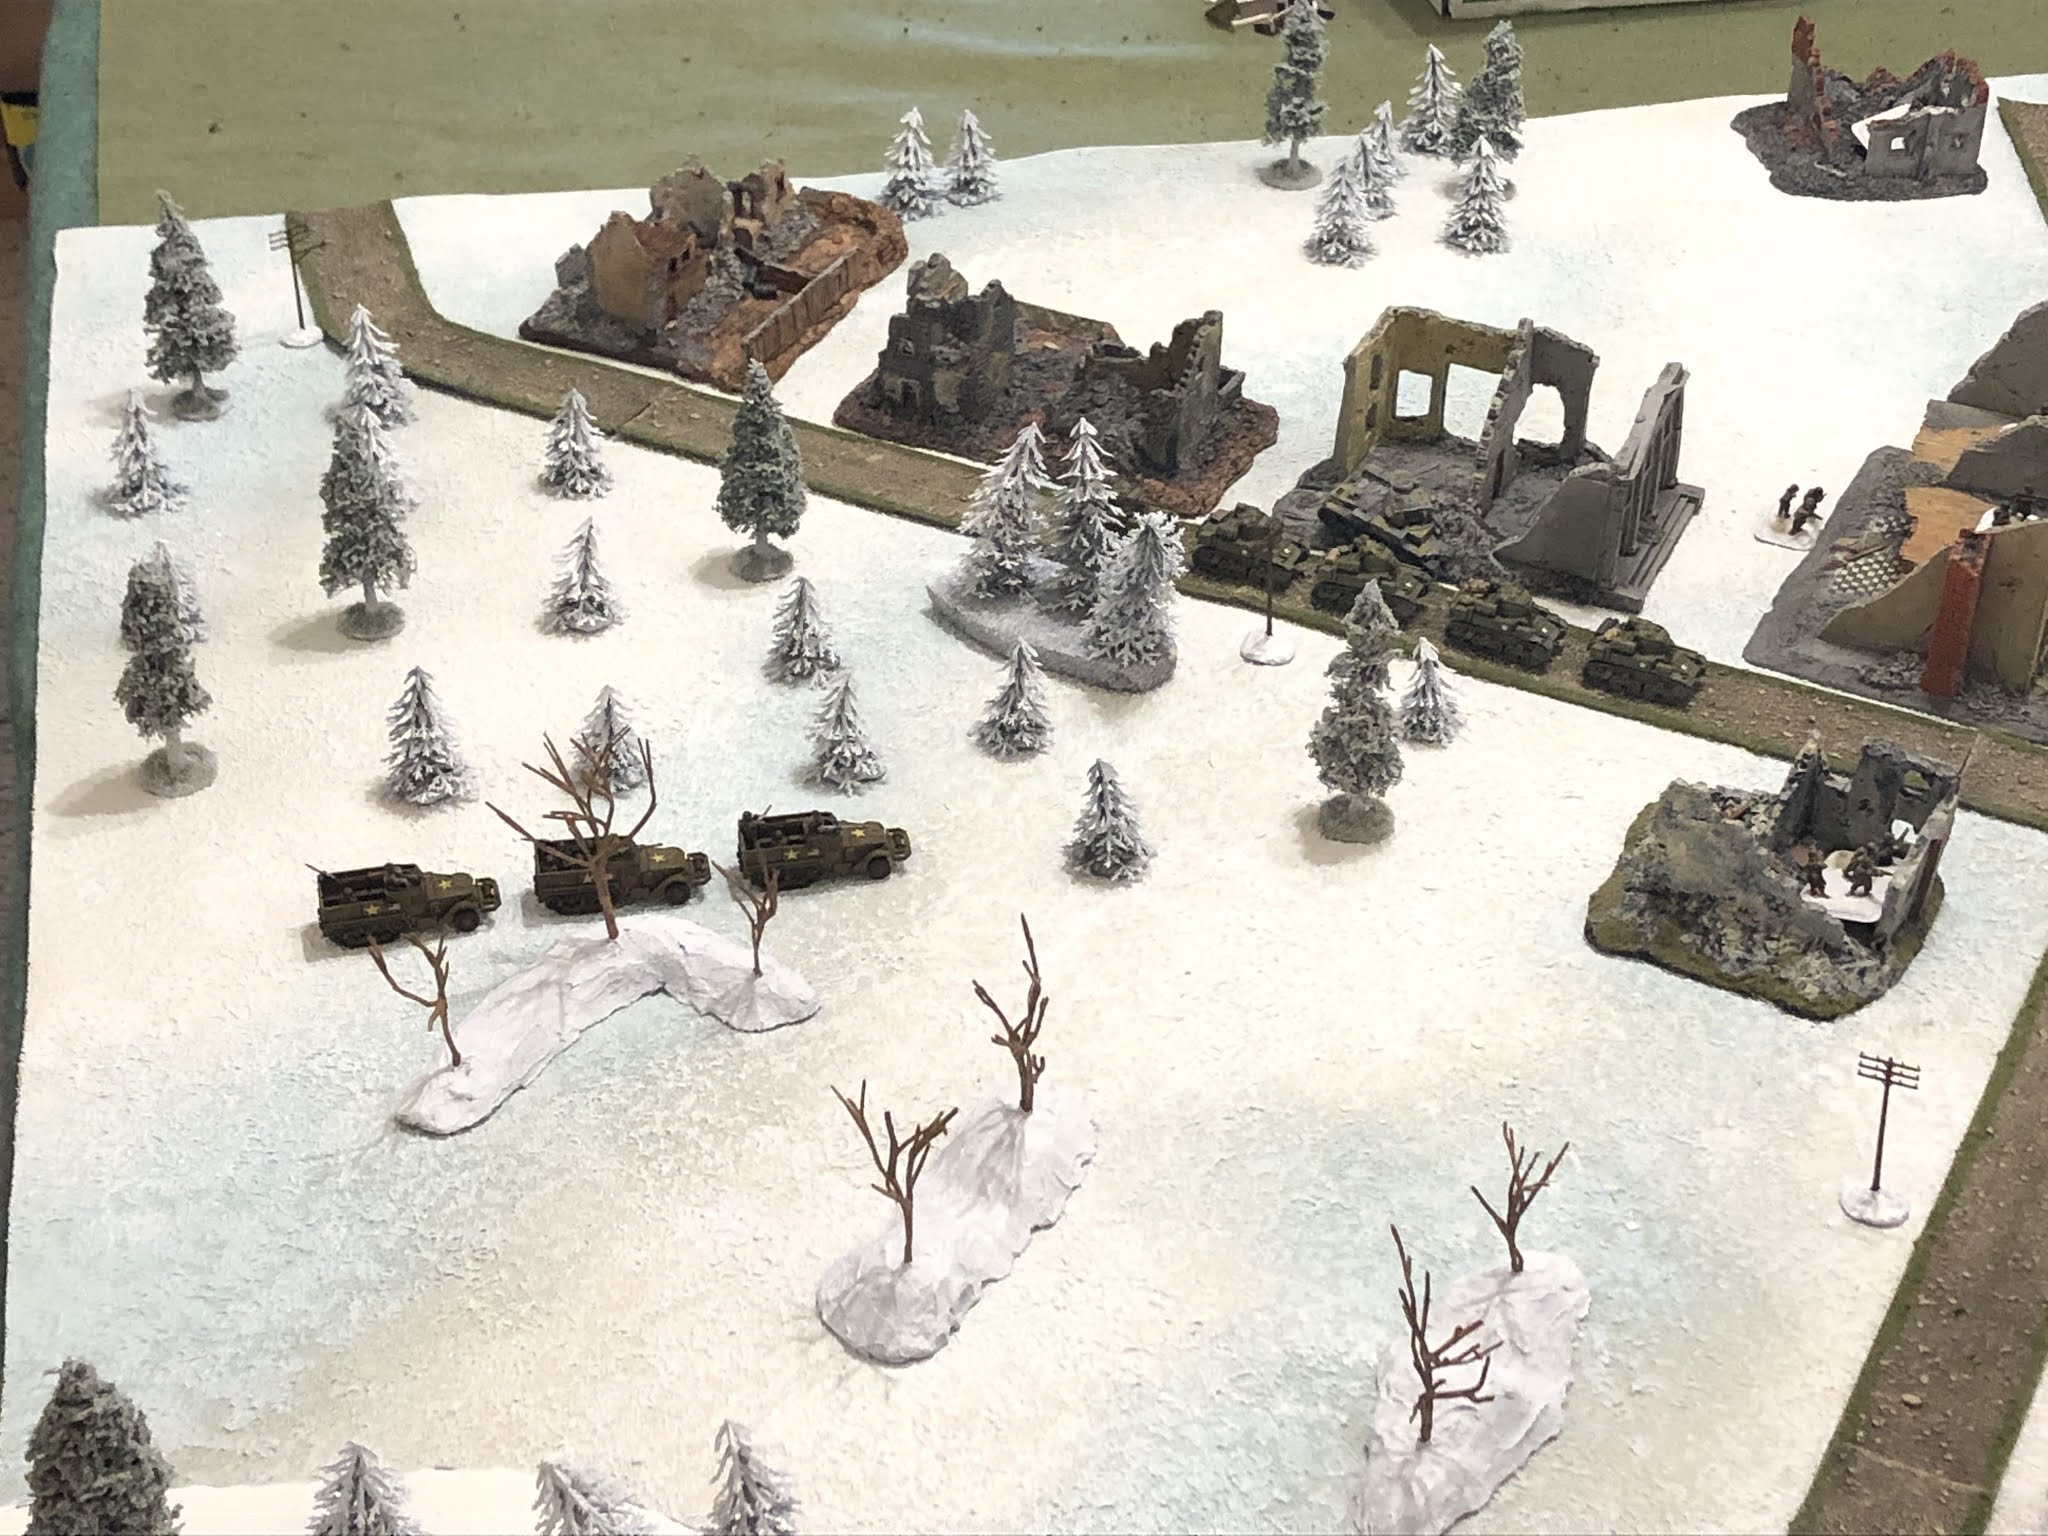
The fight kicks off! Col Denver pushes his Light Tank Platoon straight up the road into Losheim (right), while the halftracks of 2nd Platoon following in trace, albeit going cross-country (center left).
The GIs of 1st Platoon (far left and center bottom) spot the Germans advancing in teh center (top center) and open fire, to no effect.
Colonel Denver and the Rifle Company Commander move up the road into Losheim (left top), as the Self-Propelled Gun (SPG) Platoon moves up on the US right, rather craftily (bottom right).
The German right surges forward, and the Marders begin hammering away at the town.
As the German Armored Car Platoon pushes forward (bottom center)...
Where they (bottom right) spot the US Light Tank Platoon (top left) and engage with their 20mm autocannons, damaging the lead tank.
But the US Stuarts maneuver within the town (bottom left) and return fire, as one of 1st Platoon's squads moves forward, crossing the road (center bottom).
The lead Sdkfz 234 is knocked out by 37mm armor piercing rounds!
Like the US light tanks, the German armored cars fan out and return fire, but it's ineffective.
As is the fire of the Marder Platoon (bottom right).
The German infantry platoons on the right push forward, firing as they go (2nd Platoon at bottom left and 3rd Platoon at bottom right)...
And the GIs of 1st Platoon return the favor.
The German 1st Platoon moves out onto the road, following the Armored Car Platoon (top right), but managing to draw some fire from US troops on the far left (bottom left).
The US SPG Platoon (top right) has been spotted and the German Mortar Platoon (bottom left) immediately goes to work...
But the rounds are a bit off target.
The German Armored Car Platoon continues firing on the US Light Tank Platoon...
As do the Marders (far right, with the Stuarts at top left)...
And though several crews are shaken up by the incoming fire, still only one tank has been hit and damaged.
The plucky little Stuarts rally and return fire...
Knocking out a second armored car and suppressing the remaining two!
The German 1st Platoon veers left, off the road (bottom center left), heading for the cover of the woods, a move that would seal the Americans in Losheim's fate, as their 2nd Platoon dashes to the wall (center right) and lays down fire.
The US 1st Platoon (center bottom) returns fire...
But the German Mortar Platoon (bottom right) targets them (top left), as the German 3rd Platoon surges forward (top center).
The Marders move up to the wall, where they of them begin slamming 75mm HE rounds into the US 1st Platoon's main position (top left)...
Knocking out a rifle squad (casualty figures at top center), pinning the command team (yellow bead at center), and driving the bazooka team back (red bead at bottom left)!
Colonel Denver moves up to rally his flagging troops (left center)...
But the good Colonel catches a stray round and goes down (casualty figures on the road at top right), which causes one of the Stuarts to fall back (bottom left, from top right)!!!
Nevertheless, the US Light Tank Platoon continues to put up a dogged defense, with Stuarts on the right (bottom center left) continuing to engage the German Armored Car Platoon (top right)...
The damaged Stuart in the center firing its machine guns (bottom left) at the German 2nd Platoon (top right) at the wall...
And one of the Stuarts pushes left, through the incoming German mortar rounds (far left), where it halts and begins firing 37mm HE rounds into the woods containing the German 3rd Platoon (top center right)...
Knocking one of the German squads out!
But heavy German fire has caused the US rifle squad on the far left flank to fall back (top center, from the building at top right), nonetheless...
As the US squad on the right moves up, into the shelter of a bombed out house (bottom left) and begins firing on the German 2nd Platoon (top right).
Meanwhile, on the German left, their Rifle Company Commander dashes forward under fire to rally the two suppressed (and one is immobilized) armored cars.
Which immediately resume firing on th US Stuarts (top center left).
Another Stuart is damaged (far left), as the halftracks carrying the US 2nd Platoon drive right up into the middle of the fracas!
As the German 2nd Platoon hops the wall and moves up in the center.
And the 3rd Platoon moves up on the right (top center).
The Marders move up and fire on the Stuart holding down the US left flank (top right)...
Blasting it straight to hell!
The German mortars (bottom right) sight in on the crossroads...
Harassing the US 2nd Platon, still mounted in its halftracks, and knocking out the squad from 1st Platoon that was in the nearby building!
The German 2nd Platoon keeps up the pressure on the US center, moving up to the road..
And loosing a rocket from its panzershreck, though it missed...
While the German 3rd Platoon moved up on the right (center top, on road, with 2nd Platoon just visible at bottom center left)...
And guns down the cowering US squad on their left flank.
The German Armored Car Platoon (bottom right) continues shooting it out with the remains of the US Stuart Platoon (top left).
And then the boy makes the fatal mistake; rather than move his SPG Platoon forward (just off camera to far left) to get in the fight...
He pushes the lightly armored, open-topped guns into the woods, where they move up and engage the infantry of the German 1st Platoon at point-blank range. To make matters worse, they only manage to suppress one rifle squad...
While back at the crossroads, the US 2nd Platoon is suppressed by German mortar rounds, still mounted in their halftracks.
With German infantry nearby, the American infantry dismount on the crossroads.
But the German mortars continue to pound them, knocking out a squad and causing casualties in another!
Th US 1st Platoon is no longer an effective fighting force, with all three rifle squads knocked out and its platoon commander (far left, between two buildings) and bazooka team (in building at center top) suppressed, though the Stuart that had retreated when Colonel Denver was killed (bottom left) finally rallies. The US Rifle Company Commander, now the acting Battalion Commander, moves up and rallies the Stuarts on the US right flank (right).
Which immediately get back in the fight (bottom left), firing ont he German armored cars (top right).
But then the hammer falls...
The German Rifle Company Commander rallies his 1st Platoon, then sends them into the woods, where the paratroopers bust out their panzerfausts and go to work on the lightly armored M7 Priests...
The American armored crewmen manage to knock out a rifle squad and a panzerschreck team, but all three US vehicles are knocked out!!!
Following the game I discussed proper tactical usage of his SPGs, and armor in general, with the boy, though he apparently didn't grasp it as he made much the same mistake in the next fight, though without the results being quite so disastrous. Having said that, his deployment area wasn't well suited to the proper employment of tanks.
Which is enough to cause the remaining US forces to fall back to avoid being wiped out! The German have pushed the Yanks out of Losheim!
A fun fight, and a nice start (for the Germans, at least) to the campaign. The boys had fun, and my mashup of 5Core Company Command and Bolt Action wasn't bad, but it still took 2 1/2 hours, much too long for my little apprentices... I'm going to give a try to something I'm calling "5Core Battalion Commander."
The US 14th Cavalry Group has fallen back two spaces (top center), leaving the German 8th Regiment, 3rd FJ Division the sole occupiers of Losheim (right top, wth KG Peiper behind them). The next fight is, by special request, the US 110th Regiment, 28th Infantry Division versus the 77th Regiment, 26th Volksgrenadier Division in Hosingen (right center, where the little explosion is).


Jack, the thing that I like about this most is that it is hugely inspirational to those of us with smaller game spaces, to see just how much good gaming can fall from our own domestic tables.
ReplyDeleteAfter reading this, I went straight to my lead mountain and started painting 15mm German infantry. A post can’t claim to do better than that!
Norm,
DeleteWow, thank you for the kind words! I'm glad to have such an effect, and I look forward to seeing your 15mm troops.
And thanks for posting here, I was starting to wonder if the comments section wasn't broke ;)
V/R,
Jack
Jack great battle and happy to see your apprentices in action!
DeleteCant wait to see the Bloody Bucket in action next! Go 28th! Give em hell, Associators!
Thanks man, and don't get your hopes up for the GIs...
DeleteV/R,
Jack
I'm not - their job is literally to buy time for everyone else...
DeleteIndeed, but things aren't even going as well as they did in real life, as bad as that was!
DeleteV/R,
Jack
PS 5CCC Battalion Commander? I was intrigued with a mashup of 5CCC and BA and now I'm REALLY intrigued!
ReplyDeleteHow'd you integrate BA and 5CCC?
"5BoltGroup" is nothing more than using:
DeleteBolt Action's activation system
5Core's shooting, casualties, morale, and rallying
Battlegroup's battle rating and force morale chits/rules
"5Core Battalion Commander" is nothing more than playing 5Core Company Command except each normal game stand is a platoon using between 2 and 4 stands on the table.
V/R,
Jack
Sounds good, thanks.
Delete