All,
It's 1215 on 2 April 1943, and the US tank platoon is heading into action. About an hour ago their platoon leader, Lt Barker, headed into the Tunisian town of Al-Egheila, where a German panzer was spotted. The Lieutenant hasn't been heard from and so SSG Smith, the Platoon Sergeant, has assumed command of the platoon and has taken the remaining tanks, commanded by SGT Ross, SGT Snow, and CPL Grunhard, around to the north end of the Arab village. However, along the way, SGT Snow's tank dropped out of the column with mechanical difficulties, so three American Shermans are moving east, into the village, as a German platoon of three Panzer 4s are moving south into the village, setting us up for our second game of "What a Tanker!"
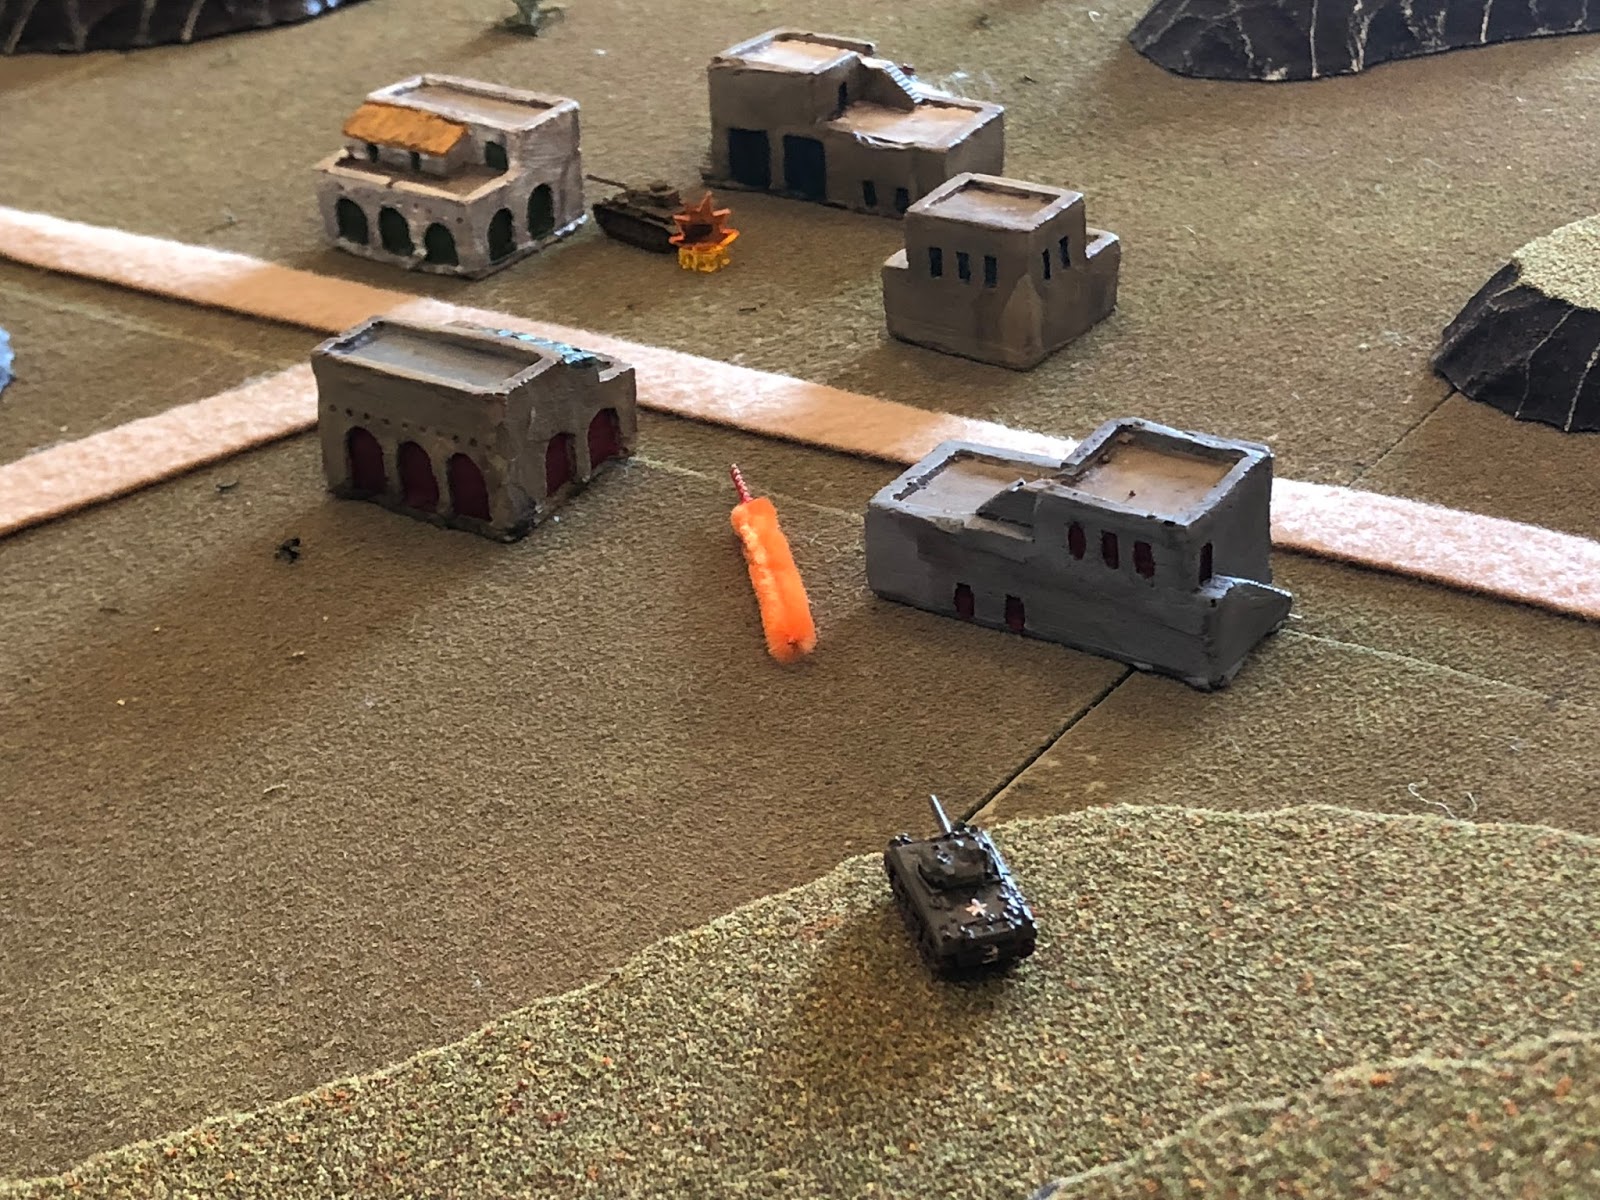
The board, north is up, showing the northern end of Al-Egheila (the previous fight happened off camera to bottom). It's basically the same setup: scattered buildings, hills/knolls/escarpments, a bit of brush, but now we've stepped up from 1v1 to 3v3 tanks.
The US column, heading east on the hardball, SSG Smith in the lead, followed by SGT Ross and CPL Grunhard.
The German Platoon, with Lt Stransky in the lead, followed by Sgt Steiner and Cpl Stichle, who re-joined his platoon after knocking out Lt Barker in the last fight.
For you "What a Tanker!' fans, I should point out that we are not using the cards, of which Cpl Stichle would have had one for his kill in the last fight.
Cpl Grunhard (bottom left) looks on as SSG Smith turns off road and tries to move up the hill but runs into difficulties with some soft sand (top center) and SGT Ross moves up (top right) then suddenly halts: "Contact!!!"
SGT Ross (bottom left) has spotted the German platoon (top right) and he decides to immediately open the fight. His tank halts: "Target, enemy panzers in the open, 300 yards, armor piercing, hit the center tank, fire!" A 75mm round screeches across the desert towards Sgt Steiner's tank...
SGT Ross's (center left, with SSG Smith's tank left of him) round misses, kicking up sand and debris (top right), as CPL Grunhard's tank (bottom left) moves up, spots the enemy, and fires.
The round skips harmlessly off Sgt Steiner's panzer, but it does cause his driver to back up, right into Cpl Stichle's panzer, shaking up the crews of each (-1 Command Dice each)!!!
Lt Stransky's panzer dashes into the center (left), while Sgt Steiner (center right) and Cpl Stichle's panzer both cut right, towards the American tanks (off camera to top center).
Sgt Steiner's panzer (bottom center) is able to acquire and line up a shot on SGT Ross's Sherman (top center, with CPL Grunhard's tank behind him), but the round misses.
Lt Stransky (top center right) continues to push into the center), Cpl Stichle (center right), looking to get his second kill in the last hour, hops up in front of Sgt Steiner's panzer.
Where he lines up a shot on CPL Grunhard's Sherman (top center) and fires, but the 75mm round skips away harmlessly. Sgt Steiner's shot is now blocked by his overeager Corporal (that's not true, he was still lined up for a shot, but didn't have a 4 or 6 to shoot with)...
So the German Sergeant pushes his vehicle up into cover (center right) behind a knoll.
SSG Smith gets his Sherman up the embankment (far left) as SGT Ross is feeling the pressure and backs his tank up (left) and CPL Grunhard's tank dashes right (far right).
Sgt Steiner moves his tank up (center bottom), spotting SSG Smith's Sherman atop the hill (top center). The Pz Mk IV fires its long 75mm...
The round ricochets off the front armor of SSG Smith's tank, but they are forced to fall back (bottom left, with SGT Ross's tank to their right).
Lt Stransky (bottom left, with Sgt Steiner at center and Cpl Stichle off camera to bottom right) knew the Americans had a tank on the road (top center left), but as he creeps his tank forward to engage, he's surprised to find the road vacant.
SGT Ross has his driver creep forward (center left, with SSG Smith at bottom left), where he spots Sgt Steiner's panzer (top center, just left of the building; Lt Stransky's panzer is at top right).
Sgt Steiner (center top, with Lt Stransky at far left) sees SGT Ross's tank (top center) and slams his hatch shut, ducking down into his tank, just as Cpl Stichle's panzer pulls up (bottom center) and fires, missing SGT Ross's tank.
SSG Smith pushes his Sherman back up the hill (bottom left) where they quickly acquire Sgt Steiner's panzer (center). They lurch to a halt and fire...
The round tosses up dirt and debris (top center) missing. SSG Smith's crew slams another round into the chamber and fires again, but misses again!!!
With SSG Smith and SGT Ross (top left) in a fight with Sgt Steiner and Cpl Stichle (top center and top right), CPL Grunhard, once confident about his stab to the right (bottom center), now feels a bit left out to dry. He pslowly pushes his tank forward on the right, not sure whether to keep moving east (right) or climb up the hill and get in the fight.
Unaware of CPL Grunhard's tank (top left), Lt Stransky pushes his panzer up in the center (center bottom) and takes a shot at SGT Ross's Sherman (top center, with SSG Smith just right of him, atop the hill). The German round hits the Sherman, but doesn't penetrate, just shakes the crew up a bit.
"Dammit! Smith (far left), you're gonna have to take that panzer on the left, I've got one moving up in the middle!" And with that, SGT Ross directed his driver forward, up to the road (center bottom), where they acquired Lt Stransky's tank (top right), lined up the shot, and suffered a malfunction! "Misfire!!!"
Hearing SGT Ross (top left) call out the enemy tank in the center and the misfire, Cpl Grunhard now understood he needed to do something, and do something quick. He ordered his driver to gun it, and the Sherman shot east (far right, rounding the knoll) as fast as it could, flanking the Germans (Lt Stransky at the crossroads at center, Sgt Steiner behind the building at center top, and Cpl Stichle at top right).
Back in the northwest, SSG Smith's crew (far left, with SGT Ross at bottom center) reload, aim, and fire,, missing Sgt Steiner's panzer (top center, with Lt Stransky's tank at far right) for a third straight time!
Sgt Steiner's crew (bottom center) returns fire, skipping another round off the SSG Smith's front armor, shaking the crew up a bit more.
With Sgt Steiner's panzer (center, Lt Stransky's at left) shooting it out with SSG Smith's Sherman (top center right), Cpl Stichle creeps his tank forward (bottom right) and lines up a shot on SSG Smith's tank.
SSG Smith's crew (far left) is getting beat to hell, but SGT Ross's crew needs a minute to get their marbles back together, so rather than engage Lt Stransky's panzer (top right), he pushes them forward to cover (bottom right).
Doing that (top left) allows Lt Stransky to push right, line up a shot on SSG Smith's Sherman (top center, which is now facing all three German tanks by himself!), and fire. The German round slams into the American tank but does not penetrate, further shaking up the crew.
I'm not sure as I didn't write it down and didn't want to burden my gentle readers with every minute detail, but I think at this point SSG Smith's tank is down to two Command Dice.
The slugfest continues in the north as Cpl Grunhard maneuvers his Sherman (far right) up onto a hill in the enemy's rear.
Up on his hill, SSG Smith's crew is dazed, the cabin is filled with smoke, it's hot, smelly, they've got three enemy tanks taking shots at them, and they've fired three times at a nearby panzer and haven't hit it yet. SSG Smith is holding is crew together by their shorthairs, in the fight by the skin of his teeth. They somehow get the gun reloaded and they once again fire on Sgt Steiner's panzer...
KA-BOOM!!!! Despite all their problems, they just dusted a Panzer IV. Lt Stransky's vehicle is nearby (top left), but he can't see what happened, he only knows Sgt Steiner is no longer answering the radio.
SSG Smith then orders his tank forward (center, from bottom left, with the burning panzer at top center left and SGT Ross's Sherman at bottom center right).
In the southeast, CPL Grunhard is finally able to put his superior maneuvering into play: he pushes his Sherman into a rear aspect on Lt Stransky's panzer (top center) and fires, damaging the German's turret.
With Sgt Steiner's panzer out of action (center right, just visible above the building) and Lt Stransky's damaged (just below that same building), Cpl Stichle pushes his panzer around from the north (top center right), running smack into SSG Smith (left) and SGT Ross (bottom left).
Cpl Stichle continues pushing forward (far right), then pulls up for a shot on SSG Smith's (center top, with SGT Ross just beyond him) flank. The round hits and penetrates, damaging the American tank's turret.
SSG Smith reverses his tank out of the line of fire (far left, from smoke at center, with Cpl Stichle's panzer at top center and Sgt Steiner's panzer burning at far right).
Lt Stransky's crew (bottom left, between building, with Sgt Steiner's panzer burning at center and Cpl Stichle at far right) is shook up and his tank damaged, so it's all he can do to get reloaded and aimed in on SSG Smith's damaged Sherman (top center left, with SGT Ross at top left).
Okay, time to do something, SGT Ross says to himself. He charges his Sherman (bottom center, with SSG Smith's tank at left) straight at Cpl Stichle's panzer and fires at point blank range
SGT Ross's crew (bottom left) immediately reload and fire again, severely injuring two of Cpl Stichle's crew (top center).
Lt Stransky hears Cpl Stichle call over the wireless that his crew is abandoning their vehicle, so he pops smoke...
And leaves (top right, from center), with Cpl Grunhard (bottom center) unable to get a shot off before he made the cover of the hill.
That's a joke, I just let Lt Stransky's tank withdraw.

As we see Cpl Stichle and his crew abandon their panzer, chalking up a kill for SGT Ross and his crew.
With that, SSG Smith immediately moved he and SGT Ross's tanks forward to link up with CPL Grunhard's vehicle to consolidate their gains, but there they halted in order to regroup and try to repair SSG Smith's Sherman. They called in a contact report and sat tight, awaiting reinforcements.
Well, that was a lot of fun. First, because I won ;) and second, it's just more fun with more tanks on the table. It does take quite a bit to keep track of three tanks per side, six for the table, and I can't really see us going more than six on the table. I foresee a lot of 3 on 3 or 3 or 3 on 2, maybe even some 4 on 2 once the Germans get some bigger vehicles.
Regarding lethality, here are the stats:
Total shots - 16
Misses - 5
Bounces - 6, including one from the flank!
Penetrate but only damaged - 4, including one from the rear!
Straight out Kills - 1
Having said all that, about halfway through this fight I realized I was making the mistake of not penalizing vehicles that were hit but not buttoned up, though it really wasn't that big of a deal as it's only +1 dice and we're actually pretty good about having our tanks buttoned up by the time the shooting starts.
All in all a fun fight, with SSG Smith and SGT Ross both getting a kill. Also, for leading the fight and keeping his tank crew in the fight under extreme duress, he was awarded the Silver Star. More to come.
V/R,
Jack


Really enjoying this current campaign (and the previous posts too). I look forward to seeing it develop.
ReplyDeleteCheers,
Pete.
Thanks a bunch, Pete, I really appreciate it. I started off the "What a Tanker!" stuff in 6mm, but I may very well step up to 10mm since we're having such a good time.
DeleteV/R,
Jack
It is interesting comparing the WaT and the 5-core AARs. The latter seem pretty realistic, in that there is nothing in the write-ups which make me do a double-take or think "it couldn't have happened like that", whereas the former seems more cinematic, or even D&D-ish, in a way. At those ranges, I would have expected a lot more penetrating hits and a lot more bail-outs from the non-penetrating hits.
ReplyDeleteThanks for another great AAR.
John,
DeleteI dunno, I'd say the 5Core batreps have a bit of Hollywood in them, too, but I take your point.
In an earlier post I responded about all the non-penetrating shots, which I've learned to live with, but the one thing it's really missing, in my opinion, are bailouts. Tanks get six Command Dice, and as they get hit they lose Command Dice, and the rules say that if/when the crew loses all its Command Dice they bail out.
But we haven't had that happen yet. Even with all the non-penetrating hits, the lowest we've had a tank go was 2 Command Dice, and that only happens after getting pounded and pounded. If I recall the rules correctly, off the top of my head, you can't lose more than two Command Dice in a single hit, because three unsaved hits destroys the tank anyway. So a Bailout could only be caused by three or more hits to begin with.
So it's a bit different in that a crew will hang in there after having its bell rung two to four times, almost like a submarine crew waiting for the last depth charge.
I have already house-ruled that an extra penetration dice is rolled once the tanks get within 100 yards, I may house-rule that crews bail out when they lose 4 Command Dice, maybe even 3 (half the original). But I dunno; the essence of the rules is simplicity and fast pace. I'll have to play more games and give it a good think ;)
V/R,
Jack