The next phase of the battle sees the 82nd Airborne moving west along the coastal road towards Marsala, largely against inferior opposition, while the German frontline units pull back towards Messina at the northeast tip of the island. 1st Platoon is being brought back into the line to face off against flagging German and Italian opposition. Up next for the platoon: Card H, "Screen." Engineers will be off-board checking a substantial portion of road to determine if it can support an armored column, while 1st Platoon screens them from enemy action. The platoon is at full strength and will have battalion 81mm mortars, an M-3 Stuart, and Sgt Lapidus' MMG in support, covering Sgt Austen's engineers. Also, the Lt has put it off a couple fights already, but his college chum, 1Lt Nickelson, has been begging to accompany Shepherd on a mission, and this seems to be as good as any. (That's what I get for writing up the intro last night but playing this afternoon; I forgot about the 81s and about bringing the Lt's buddy...)
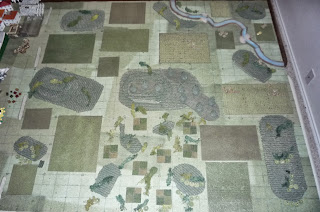 Over view of the table, US at bottom. A fairly open map (lotsa fields), with substantial hills at center left and center, rough ground at bottom center. You can see the Germans at top right.
 US left, with 1B up top, 1A down below, and the M-3 Stuart.
 US center, from left to right: bazooka team, Lt and RTO, 3B (top), and 3A (bottom).
 US right, top to bottom: MMG team, 2B, and 2A.
 Another shot of the US right, with Germans across from them. At top left is German 1AG, top center is 1HMG, center is FG, immediately to its right is 2AG, immediately above that (behind bushes) is 2HMG, above that is a Sdkfz 222 Armored Car and a Pz Mk III (long 50mm).
 German left: top left is 2AG, top right is FG, and bottom center is 2HMG.
 German right, from left: 1HMG and 1AG.
 Pz Mk III and Sdkfz 222.
 The entire German force. They are trying to break through to the US engineers (off-board on the US baseline). 1st Platoon will roll 1D6 at the end of each turn and must hold until a cumulative count of 20.
Turn 1:
 US left: Not much German action, so 1st Squad and the Stuart all moved up. You can see some Germans at top right, where the A/C moved quickly in this direction, and 1AG sprinted up the hill into the trees.
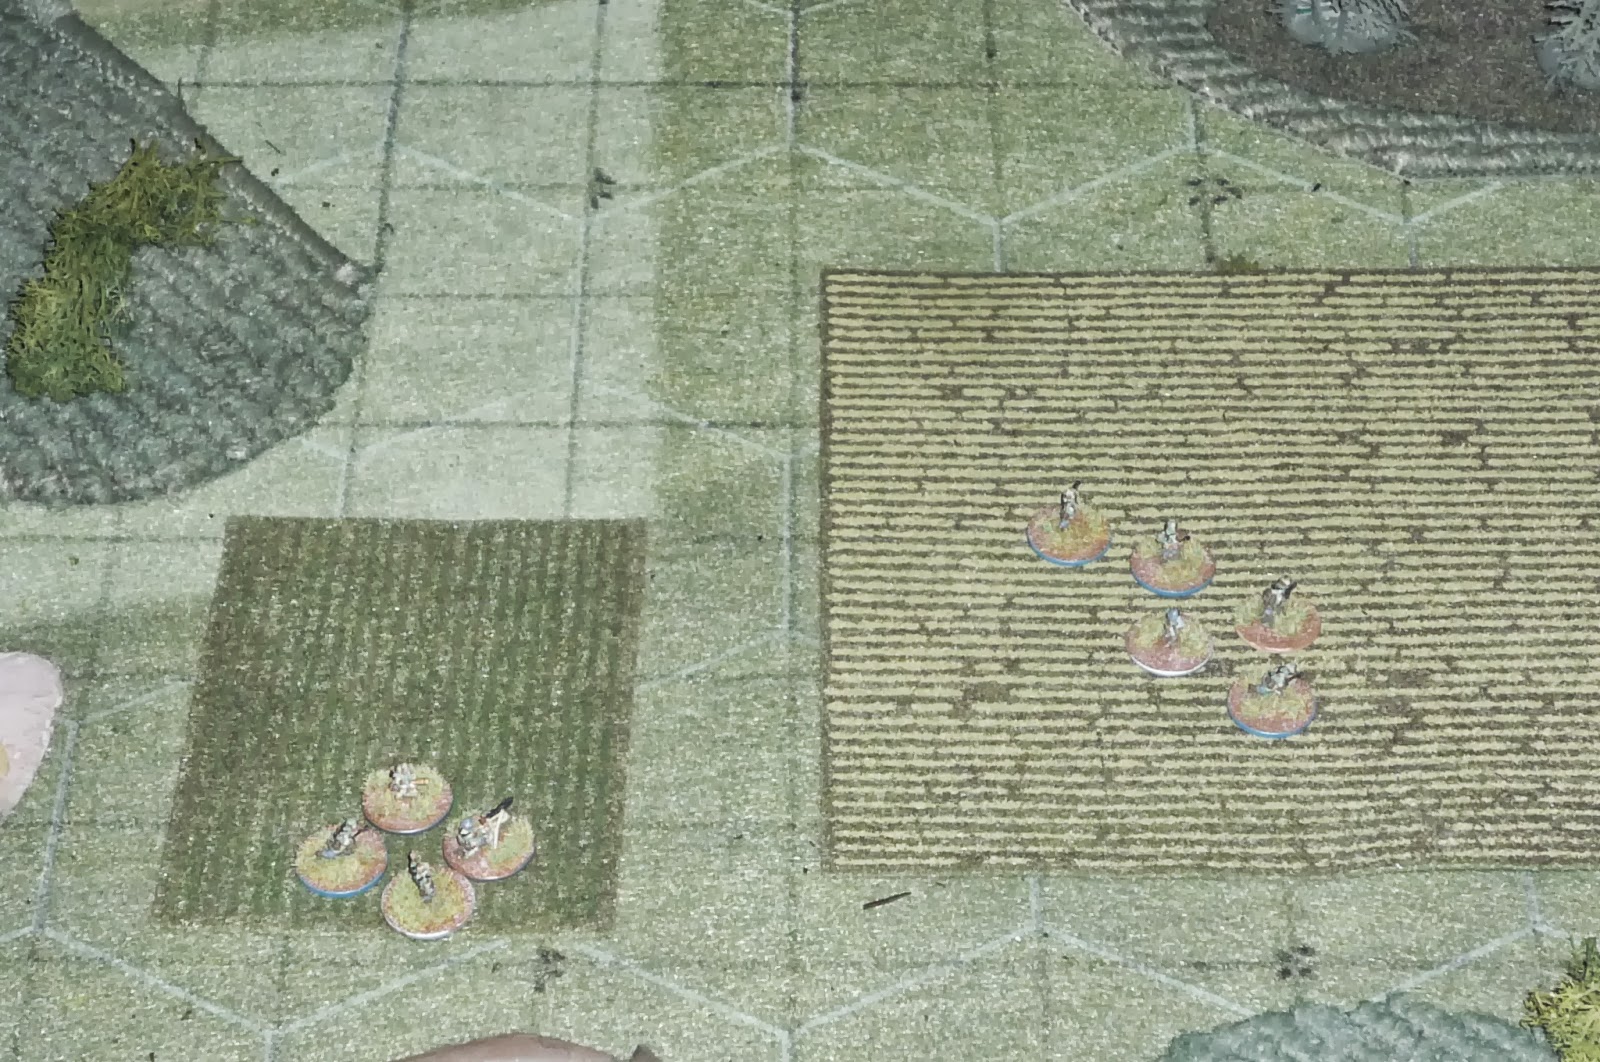
 Center: The MMG team fired at the German FG (center, in the field), getting a kill and 3shock. The 2 German HMGs started piling shock on 3B and the MMG team, and so the PC and Plt Sgt spent their activations rallying the men. 3A and the bazooka team moved up on the left, while 2B, who couldn't get a shot off around the MMG team and 2A on the right, moved up into the field at center. Surprisingly the German 2AG climbed the rise at far right, putting them face to face with the MMG and 2A, while the PzIII crossed the ford and moved forward.
 View of German left.
The engineer roll was a score of 1...
Turn 2:
 US Left: The Stuart went on OW, and shortly thereafter the German AC rounded the corner and got blown up. 1B (on left) and 1A both moved up, with 1A trading fire with 1AG atop the hill, and 1A coming out the worse for it with a man down.
 On the US right, the bazooka team joined 3A in the treeline, while the Germans concentrated their tank and HMG fire there, trying to protect their FG caught out in the field. You can see 3A and the bazooka team racking up some bodies and shock.
 On the far right, 2A and 1MMG combined to mow down the German 2AG, but in the field to left, the Germans got a couple hits and a couple shock on 2B (the Lt is there trying to rally them).
Engineer roll is 5, up to 6.
Turn 3:
 On left, Stuart and 1st Squad put a couple kills and some shock on 1AG.
 On the right, 2A and the MMG on far right are mostly ineffective, while Plt Sgt moves to 2B and the PC and his RTO sprint left to join 3A and the bazooka team. However, the Panzer and three MG42s all take the area under fire, and the Lt and his RTO both fall in a hail of bullets (top left)!!! The bazooka team bounces a rocket off the front glacis of the PzIII, damaging its sights.
 Lastly, 3B (just off camera at top right) gets a very lucky hit on 2HMG (bottom left) and puts the gun out of action. The red bead shows the Panzer's damaged sight.
Turn 4: Sgt Carlyle is pissed, and stands full upright amid the hail of incoming machine gun rounds, and calmly send a rocket straight into the PzIII, blowing the turret off. "That's for the Lieutenant..."
This broke the German Force Morale (I didn't relate it in the narrative, but the US paras had a real talent in this fight of knocking off German NCOs, taking big whacks at their Force Morale). Five Germans immediately surrendered, while the rest fell back off the table.
**Now, I broke the German force, but, as this was a screening mission with time still left on the clock, I figured it wasn't right to end the fight here, so I rolled up some German reinforcements and kept at it**
SSgt Ford quickly policed up the platoon, reorganizing and evacuating the wounded. He knew it was only a matter of time before more Germans showed up... And here they come.
 US left: again, 1B up top, 1A at bottom, and Stuart on right.
 US center, with bazooka team at left, 3A at top center, and 3B at bottom right. Plt Sgt is at bottom right as well.
 US right: MMG team at top, consolidated 2nd Squad at bottom.
 And our adversaries, coming in at top center right: A Sdkfz 222 Armored Car, a Sdkfz 251/9 L24 (short 75mm), two Sdkfz 251s, each carrying a rifle squad, and a PC in the kubelwagen.
Turn 4:
 US Left: The Sdkfz 251/9 and a halftrack 1 (HT1) with 1st Squad move right. 1A sprints ahead, while 1B and the Stuart sit tight. In the center, the bazooka team and 3A moved up.
 On the right, the MMG team opened up on the A/C, immobilizing it (though the crew stayed in the fight). The German HT2 moved up and disgorged the German 2nd Squad, while the German PC moved up in his kubelwagen. US 2nd Squad got a kill and a couple shock on 2FG.
 The center, with bazooka team and Plt Sgt at bottom center and 3A atop the hill in center. You can see the immobilized AC at top right, as well as the German HT2 and 2nd Squad.
Turn 5:
 US Left: The Stuart went on overwatch, and along came the German Sdkfz 251/9, which promptly got blown up. 1B sprinted up next to 1A, but this allowed the German HT1 to dismount its 1st Squad. The next card was alos German, and so 1FG scaled the hill and found 1A milling about in the open; 1FG promptly puts 1 kill and 2 shock on 1A, putting down Sgt Hume! 1A then failed its activation roll. 3A (top right) moves left and fires on 1AG catching them in the open. They lost two men before taking cover behind the destroyed AC (from the early part of the battle). The bazooka team is just below 3A on far right; Carlyle put a rocket into the side of HT1, destroying it.
 In the center, the German PC dismounts to rally his forces. 2FG (in the field next to PC) got a kill on the US MMG team, dropping them to 2 men. You can see the AC burning, because...
 The MMG (far right) opened up on the AC again, this time firing a whole belt into it before it caught fire. 2AG and 3B square off on each other at far left, both sides somehow firing ineffectually...
The German FM is now at 1, and the magical number of '20' has been broached, so the engineers are finished. Rather than simply 'call' the game, I decided to play it out as the two sides were locked in close combat.
Turn 6:
 On the left, the Stuart put 3 shock on 1FG, but it managed to activate and mowed the whole damned team down! 1B and the bazooka team (far right center) returned fire to no real effect. 3A (top right) and the Plt Sgt (bottom right) both engaged 1AG, getting only 1 kill. As good as the Plt Sgt is as a leader and in close combat, he sucks when shooting (3 dice at close range as I play him as having a Thompson)!!!
 2FG and the US MMG exchange fire, with 2FG losing another man, and the MMG team losing one also, dropping it to one man!
 2nd Squad (bottom right) opened a torrent of fire on 2AG (top right), killing three of them. The BAR gunner from 3B looked at his two comrades and decided to go for it! In the ensuing close combat, the German team was eliminated and the BAR man was also put down. This caused the German Force Morale to break. To be honest with you, I was really not happy with my decision to continue on with the game; I had two earlier decision points in which I could have ended the game; the moment the original German forces FM broke, and then when the engineer roll was finished. But I decided to press on, and it cost me heavy casualties, including my beloved Sgt Hume, the leader of 1st Squad. The mission was accomplished, the engineers found a route to support the tanks from 2nd Armored Division in the thrust towards Marsala, but it sure cost the platoon. C'est la guerre...
The Germans lost:
40 WIA/KIA
7 POW
1 Pz MkIII destroyed
2 Sdkfz 222s destroyed
1 Sdkfz 251/9 destroyed
1 Sdkfz 251/1 destroyed
Our Casualties:




Turn 1:


The engineer roll was a score of 1...
Turn 2:


Engineer roll is 5, up to 6.
Turn 3:


Turn 4: Sgt Carlyle is pissed, and stands full upright amid the hail of incoming machine gun rounds, and calmly send a rocket straight into the PzIII, blowing the turret off. "That's for the Lieutenant..."
This broke the German Force Morale (I didn't relate it in the narrative, but the US paras had a real talent in this fight of knocking off German NCOs, taking big whacks at their Force Morale). Five Germans immediately surrendered, while the rest fell back off the table.
**Now, I broke the German force, but, as this was a screening mission with time still left on the clock, I figured it wasn't right to end the fight here, so I rolled up some German reinforcements and kept at it**
SSgt Ford quickly policed up the platoon, reorganizing and evacuating the wounded. He knew it was only a matter of time before more Germans showed up... And here they come.


Turn 4:


Turn 5:


The German FM is now at 1, and the magical number of '20' has been broached, so the engineers are finished. Rather than simply 'call' the game, I decided to play it out as the two sides were locked in close combat.
Turn 6:


The Germans lost:
40 WIA/KIA
7 POW
1 Pz MkIII destroyed
2 Sdkfz 222s destroyed
1 Sdkfz 251/9 destroyed
1 Sdkfz 251/1 destroyed
Our Casualties:
2Lt Jack Shephard (PC) *Submitted for Bronze Star (3); Submitted for Bronze Star (5); shot in arm, Purple Heart (7);
Pvt Alcee (HQ Element) *Repl (3/4); WIA, evacuated, Purple Heart (7)
Sgt Desmond Hume (1st Squad SL) *Shot in foot, Purple Heart (1); Shot in bicep, Purple Heart (4); 1st Sgt of Wpns Co has a positive view (4/5); KIA (7)
Cpl Baker (1st Squad) *Shot in forearm, Purple Heart (1); Promoted to Cpl by Lt (6/7); KIA (7)
Pvt Dodge (1st Squad) *Repl (6/7); WIA, evacuated, Purple Heart (7)
Pvt Calhoun (1st Squad) *Repl (6/7); WIA, locally evacuated, return 26 July 43, Purple Heart (7);
Pvt Edge (1st Squad) *Repl (6/7); shot in jaw, Purple Heart (7);
PFC Farr (2nd Squad) *Repl (3/4); Shot in shoulder, Purple Heart (4); Shot in foot, Purple Heart (5); Promoted to PFC by Lt (6/7); WIA, evacuated, Purple Heart (7);
Pvt Johnson (2nd Squad) *Repl (3/4); Shot in thigh, Purple Heart (5); WIA, locally evacuated, return 26 July 43, Purple Heart (7);
PFC India (2nd Squad) *Shot in calf, Purple Heart (2); Transferred from 1st Squad (4/5); Promoted to PFC by Lt (6/7); shot in thigh, Purple Heart (7);
Pvt Jackson (2nd Squad) *Repl (6/7): shot in hand, Purple Heart (7);
Pvt Mickelson (3rd Squad) *Repl (6/7); WIA, evacuated (7);
Pvt Noonan (3rd Squad) *Repl (6/7); shot in neck, Purple Heart (7);
Cpl Charley Pace (3rd Squad) *Shot in torso, locally evacuated and treated, return 14 July 43, Purple Heart (2); shot in calf, locally evacuated, return 24 July 43, Purple Heart (7);
Pvt Oliver (3rd Squad) *Repl (6/7); WIA, evacuated, Purple Heart (7);
PFC Herby (3rd Squad) *Repl (2/3); shot in groin, locally evacuated and treated, return 14 July 43, Purple Heart (3); Promoted to PFC by Lt (6/7); KIA (7)
Cpl Frank Lapidus (Wpns Plt/MMG) *(2); (3); (5); (6); shot in shoulder, Purple Heart (7);
Pvt Apple (Wpns Plt/MMG) *(2); (3); (5); (6); WIA, evacuated, (7);
Pvt Ronson (Wpns Plt/MMG) *Repl (6/7); KIA (7)
To be honest, the platoon is a bit distraught; the last fight was pretty traumatic. First, the platoon was facing pretty overwhelming odds regarding two waves of German infantry backed by armor. Then seeing Lieutenant go down (though he's okay now). Then the death of their most popular squad leader. Some of the men are starting to wonder if Sgt Hurley is going to make it; he's clearly depressed again following the death of his good friend. The platoon is missing a full rifle squad, and everyone's worried; if the Krauts will put up that kind of a fight on just the road to Marsala, what the hell is waiting for them in Marsala? And everyone saw Captain Linus call a huddle with Lt Shepherd and SSgt Ford; no replacements, and the platoon will be moving up to its jump-off positions early in the morning...
V/R,
Jack
Sgt Desmond Hume (1st Squad SL) *Shot in foot, Purple Heart (1); Shot in bicep, Purple Heart (4); 1st Sgt of Wpns Co has a positive view (4/5); KIA (7)
Cpl Baker (1st Squad) *Shot in forearm, Purple Heart (1); Promoted to Cpl by Lt (6/7); KIA (7)
Pvt Dodge (1st Squad) *Repl (6/7); WIA, evacuated, Purple Heart (7)
Pvt Calhoun (1st Squad) *Repl (6/7); WIA, locally evacuated, return 26 July 43, Purple Heart (7);
Pvt Edge (1st Squad) *Repl (6/7); shot in jaw, Purple Heart (7);
PFC Farr (2nd Squad) *Repl (3/4); Shot in shoulder, Purple Heart (4); Shot in foot, Purple Heart (5); Promoted to PFC by Lt (6/7); WIA, evacuated, Purple Heart (7);
Pvt Johnson (2nd Squad) *Repl (3/4); Shot in thigh, Purple Heart (5); WIA, locally evacuated, return 26 July 43, Purple Heart (7);
PFC India (2nd Squad) *Shot in calf, Purple Heart (2); Transferred from 1st Squad (4/5); Promoted to PFC by Lt (6/7); shot in thigh, Purple Heart (7);
Pvt Jackson (2nd Squad) *Repl (6/7): shot in hand, Purple Heart (7);
Pvt Mickelson (3rd Squad) *Repl (6/7); WIA, evacuated (7);
Pvt Noonan (3rd Squad) *Repl (6/7); shot in neck, Purple Heart (7);
Cpl Charley Pace (3rd Squad) *Shot in torso, locally evacuated and treated, return 14 July 43, Purple Heart (2); shot in calf, locally evacuated, return 24 July 43, Purple Heart (7);
Pvt Oliver (3rd Squad) *Repl (6/7); WIA, evacuated, Purple Heart (7);
PFC Herby (3rd Squad) *Repl (2/3); shot in groin, locally evacuated and treated, return 14 July 43, Purple Heart (3); Promoted to PFC by Lt (6/7); KIA (7)
Cpl Frank Lapidus (Wpns Plt/MMG) *(2); (3); (5); (6); shot in shoulder, Purple Heart (7);
Pvt Apple (Wpns Plt/MMG) *(2); (3); (5); (6); WIA, evacuated, (7);
Pvt Ronson (Wpns Plt/MMG) *Repl (6/7); KIA (7)
To be honest, the platoon is a bit distraught; the last fight was pretty traumatic. First, the platoon was facing pretty overwhelming odds regarding two waves of German infantry backed by armor. Then seeing Lieutenant go down (though he's okay now). Then the death of their most popular squad leader. Some of the men are starting to wonder if Sgt Hurley is going to make it; he's clearly depressed again following the death of his good friend. The platoon is missing a full rifle squad, and everyone's worried; if the Krauts will put up that kind of a fight on just the road to Marsala, what the hell is waiting for them in Marsala? And everyone saw Captain Linus call a huddle with Lt Shepherd and SSgt Ford; no replacements, and the platoon will be moving up to its jump-off positions early in the morning...
V/R,
Jack


